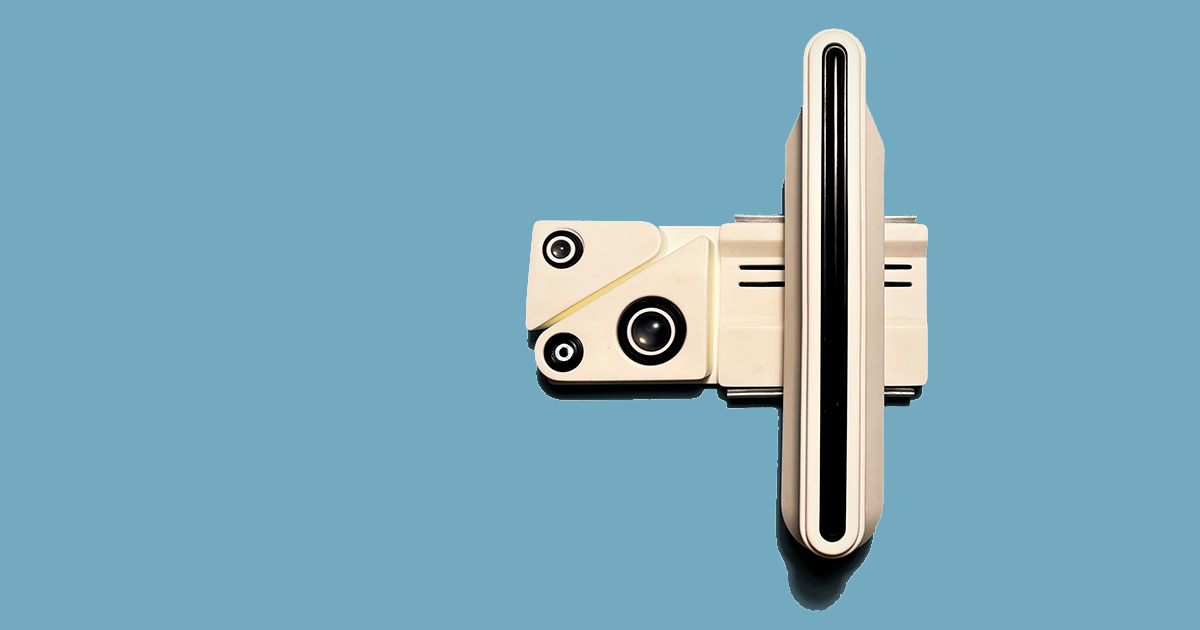
Welcome to the online instructions for the Blade Runner 2049 Yay Monsters Baseline Scanner Kit!
Things you’ll need:
- Twenty Six M2 x 10 mm Silver Socket Head (self tapping) Screws
- Two Sawtooth Picture Hangers
- Elmer’s White Glue, Clear Silicone Glue or Canopy Glue
- CA Glue (Superglue)
- Hot Glue and Gun
- Dawn Dish Soap
- White Primer Spray Paint
- Flat or Satin White Spray Paint
- Dark/Black Primer Spray Paint
- Flat Black Spray Paint
- Gloss Black Spray Paint
- Metallic Silver Spray Paint
- Soldering Iron and supplies
- 220 Grit Sandpaper
- SAE Drill Bits 1/16″, 1/8″ 13/64″
- 9 volt rechargeable battery
Instructions:
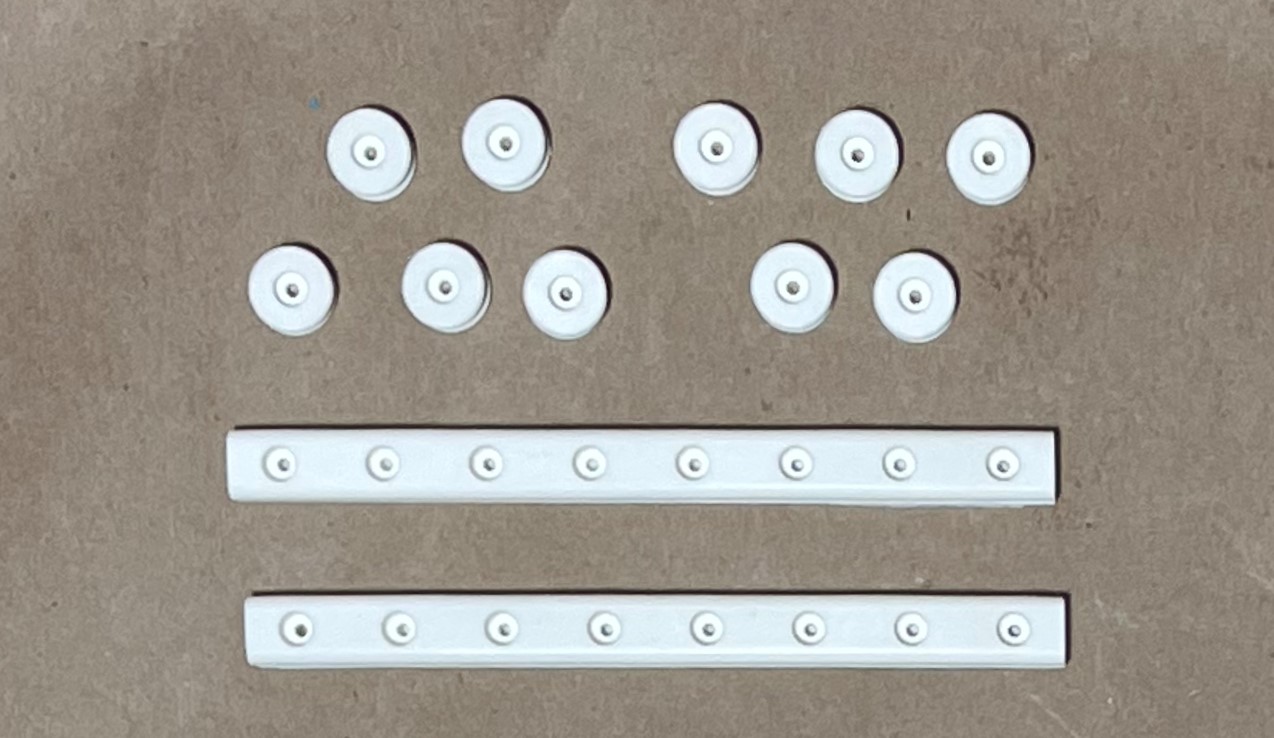
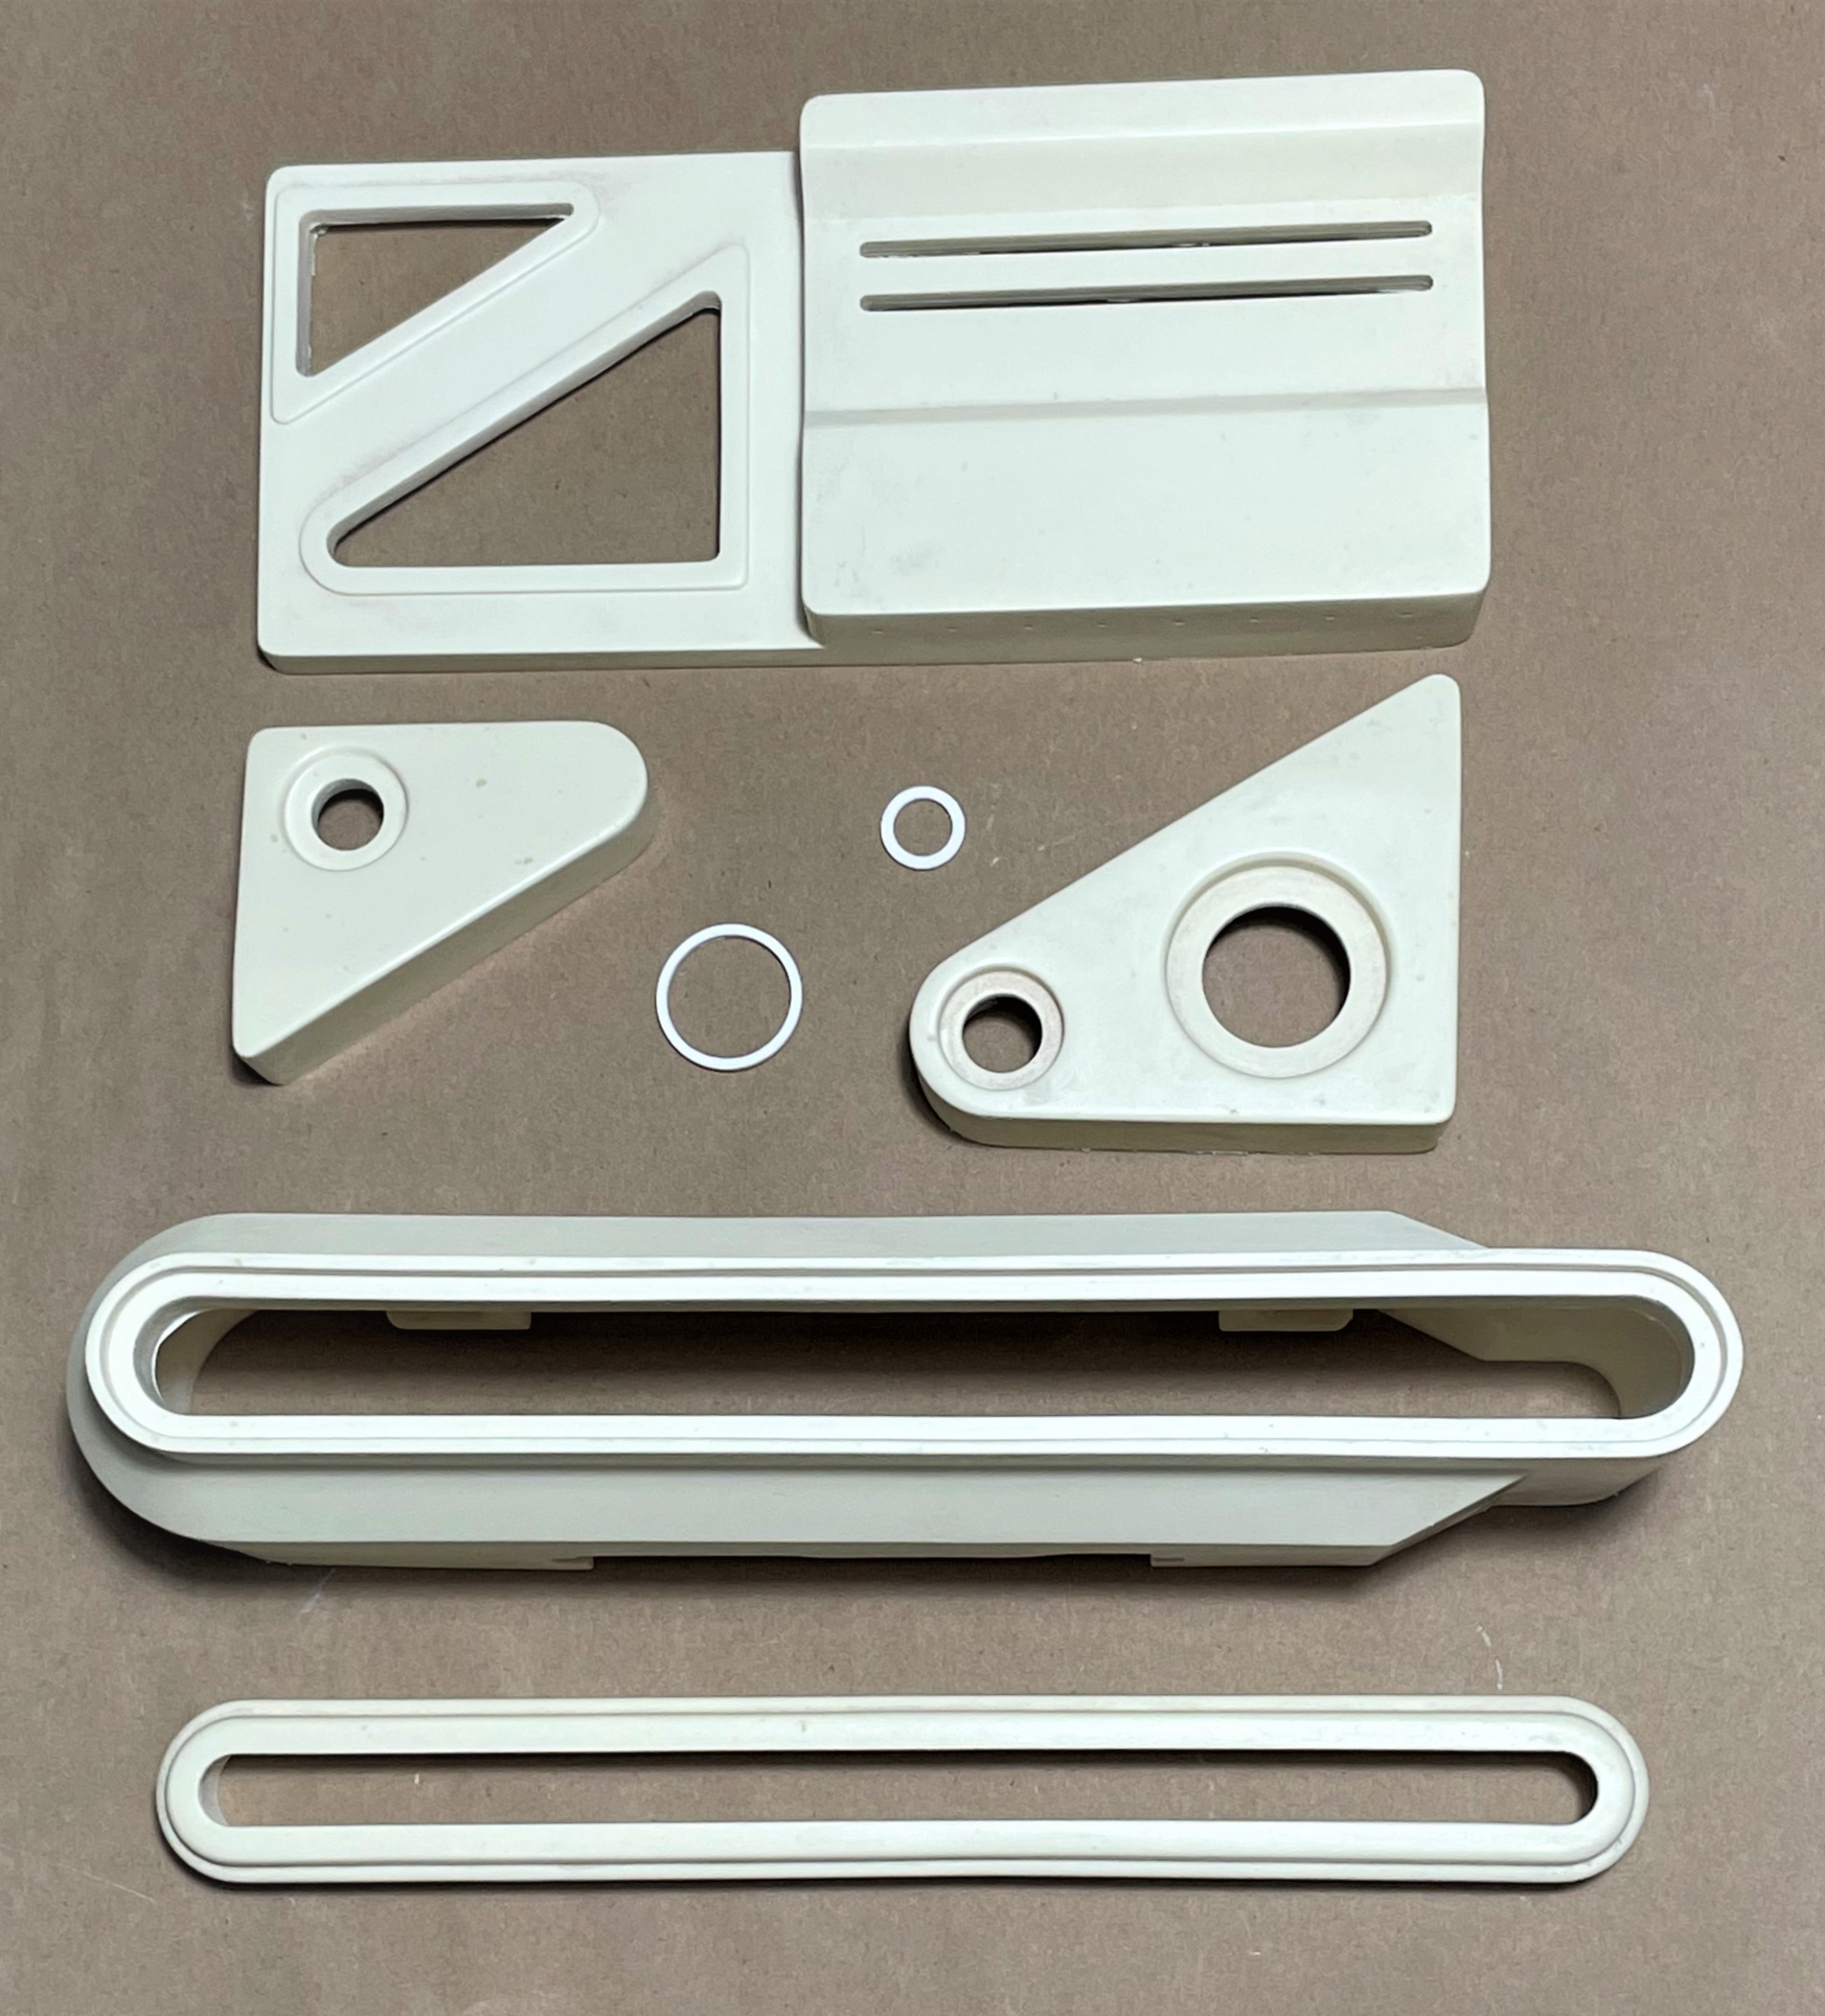
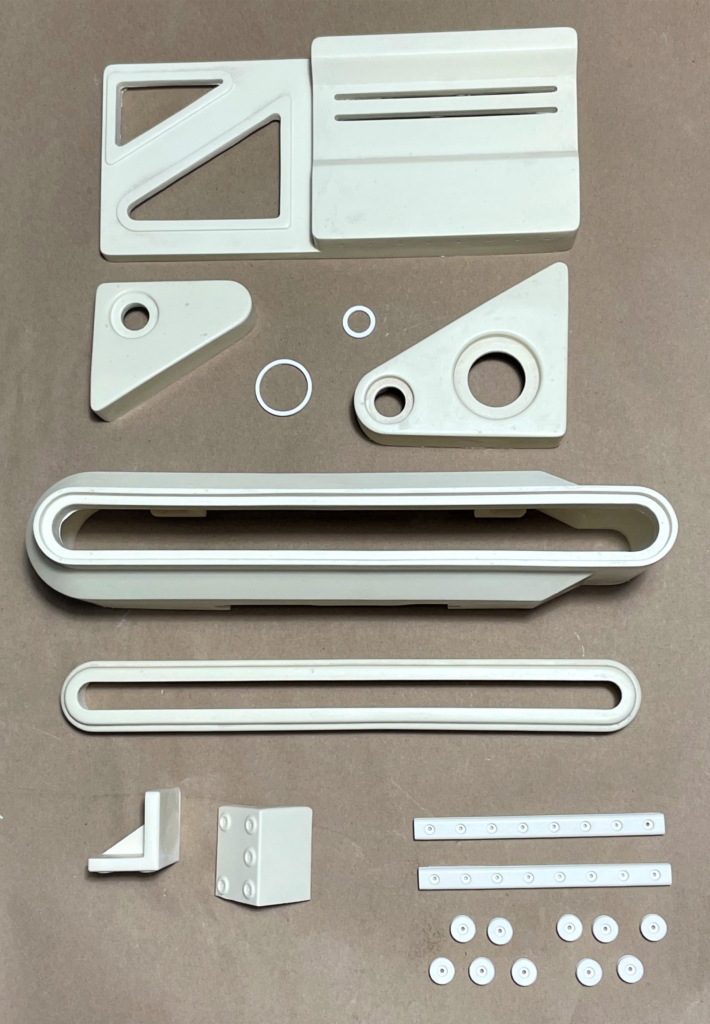
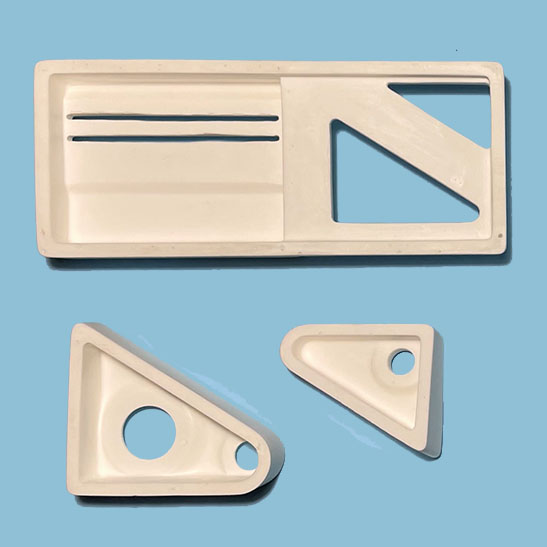
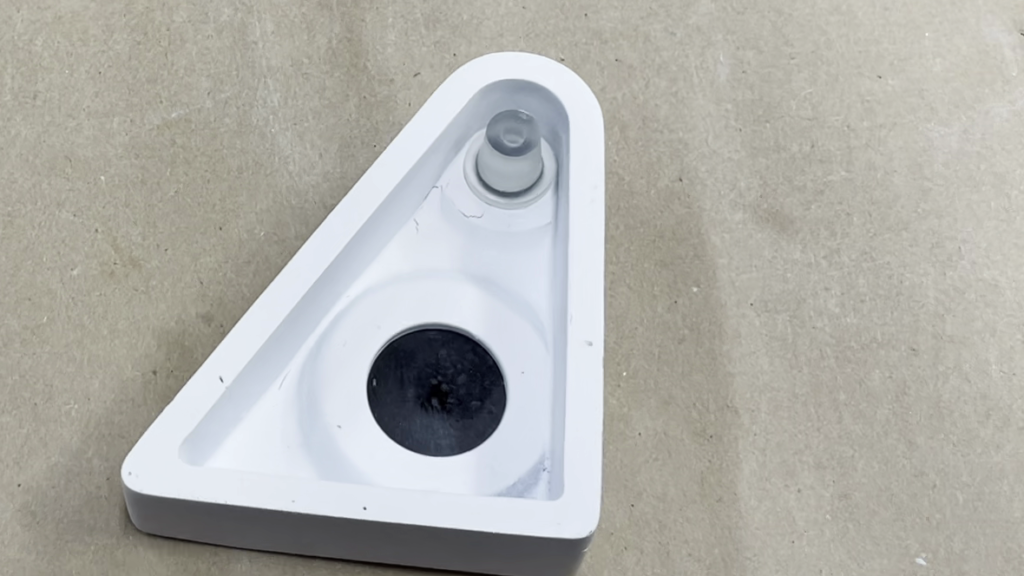
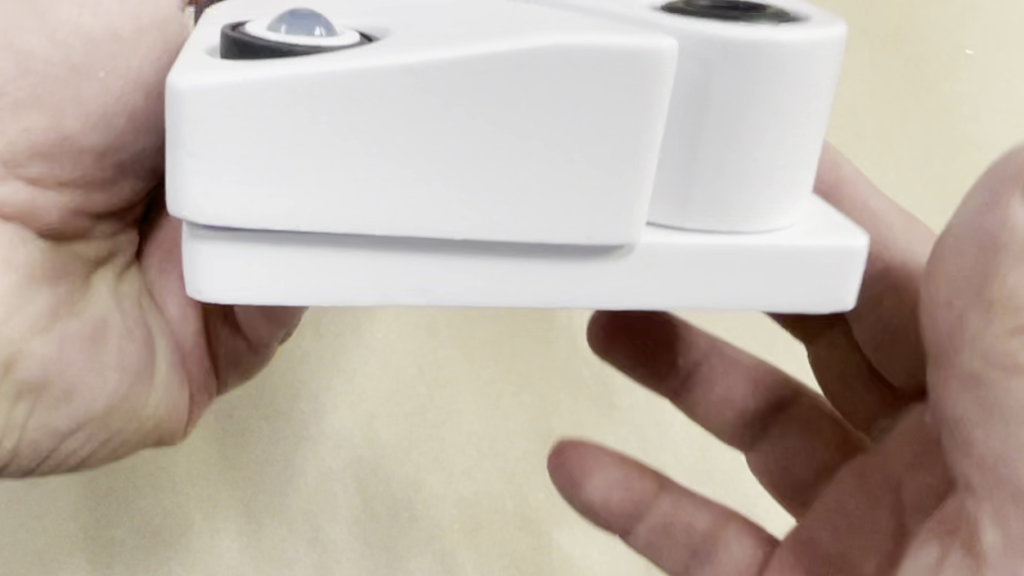
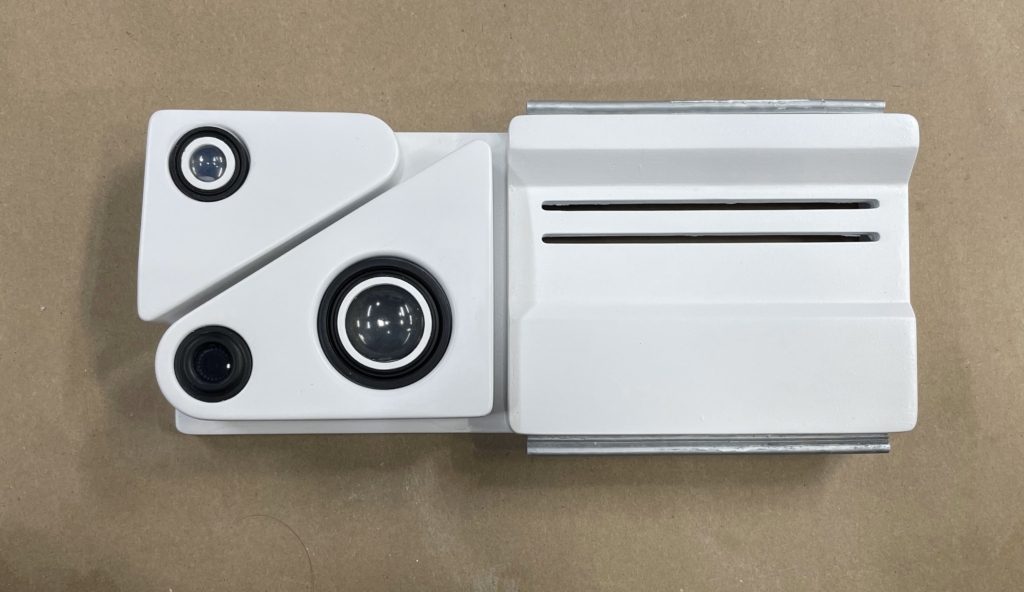
- Remove from packaging and familiarize yourself with the kit parts.
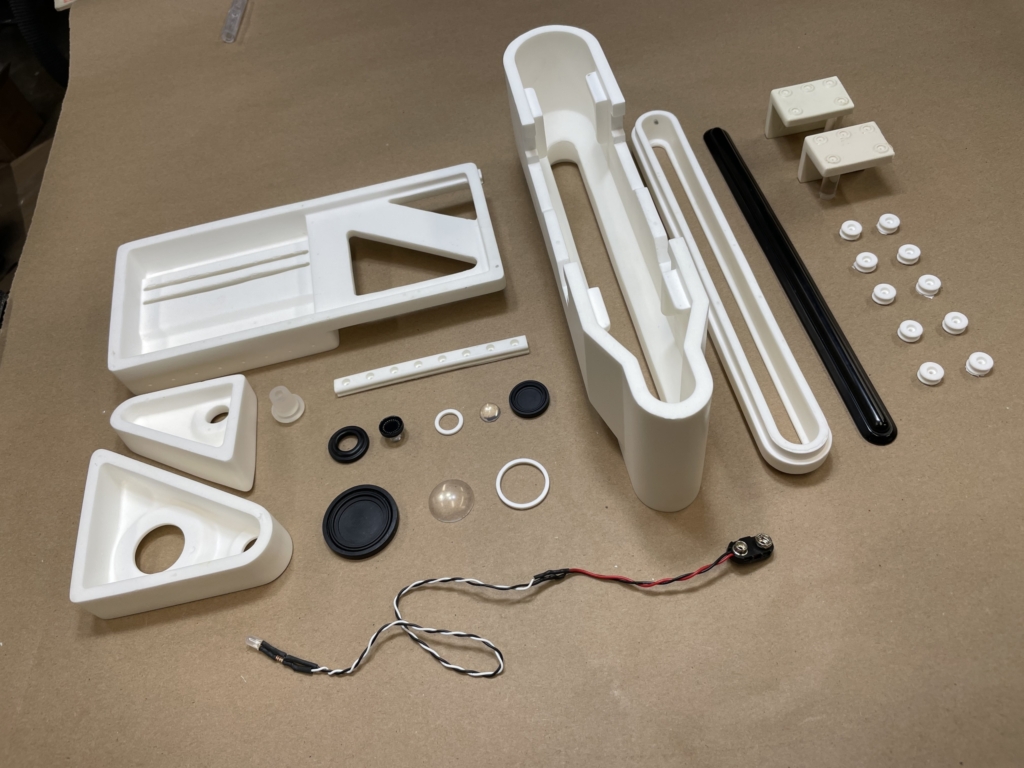
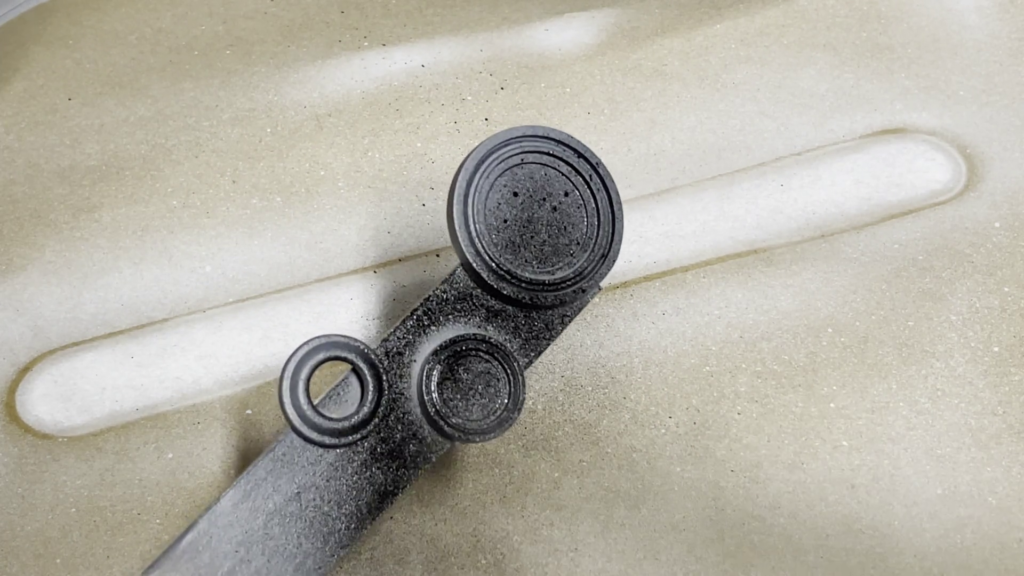
- Sand and clean any excess flashing. Dry fit assemblies
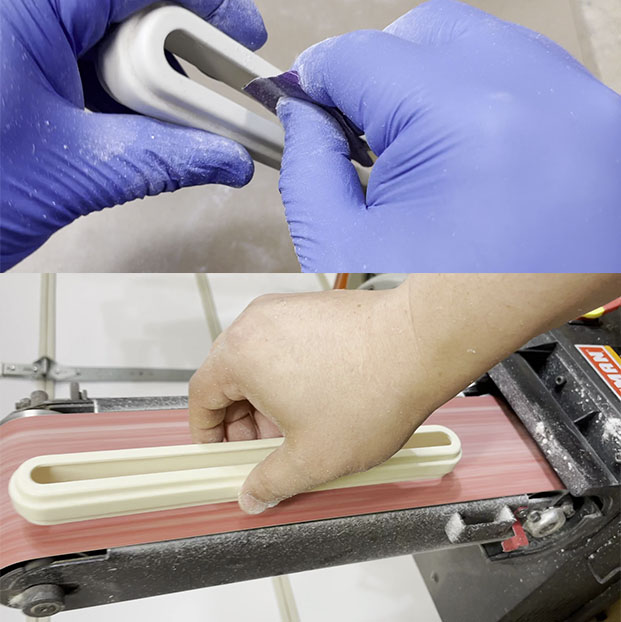
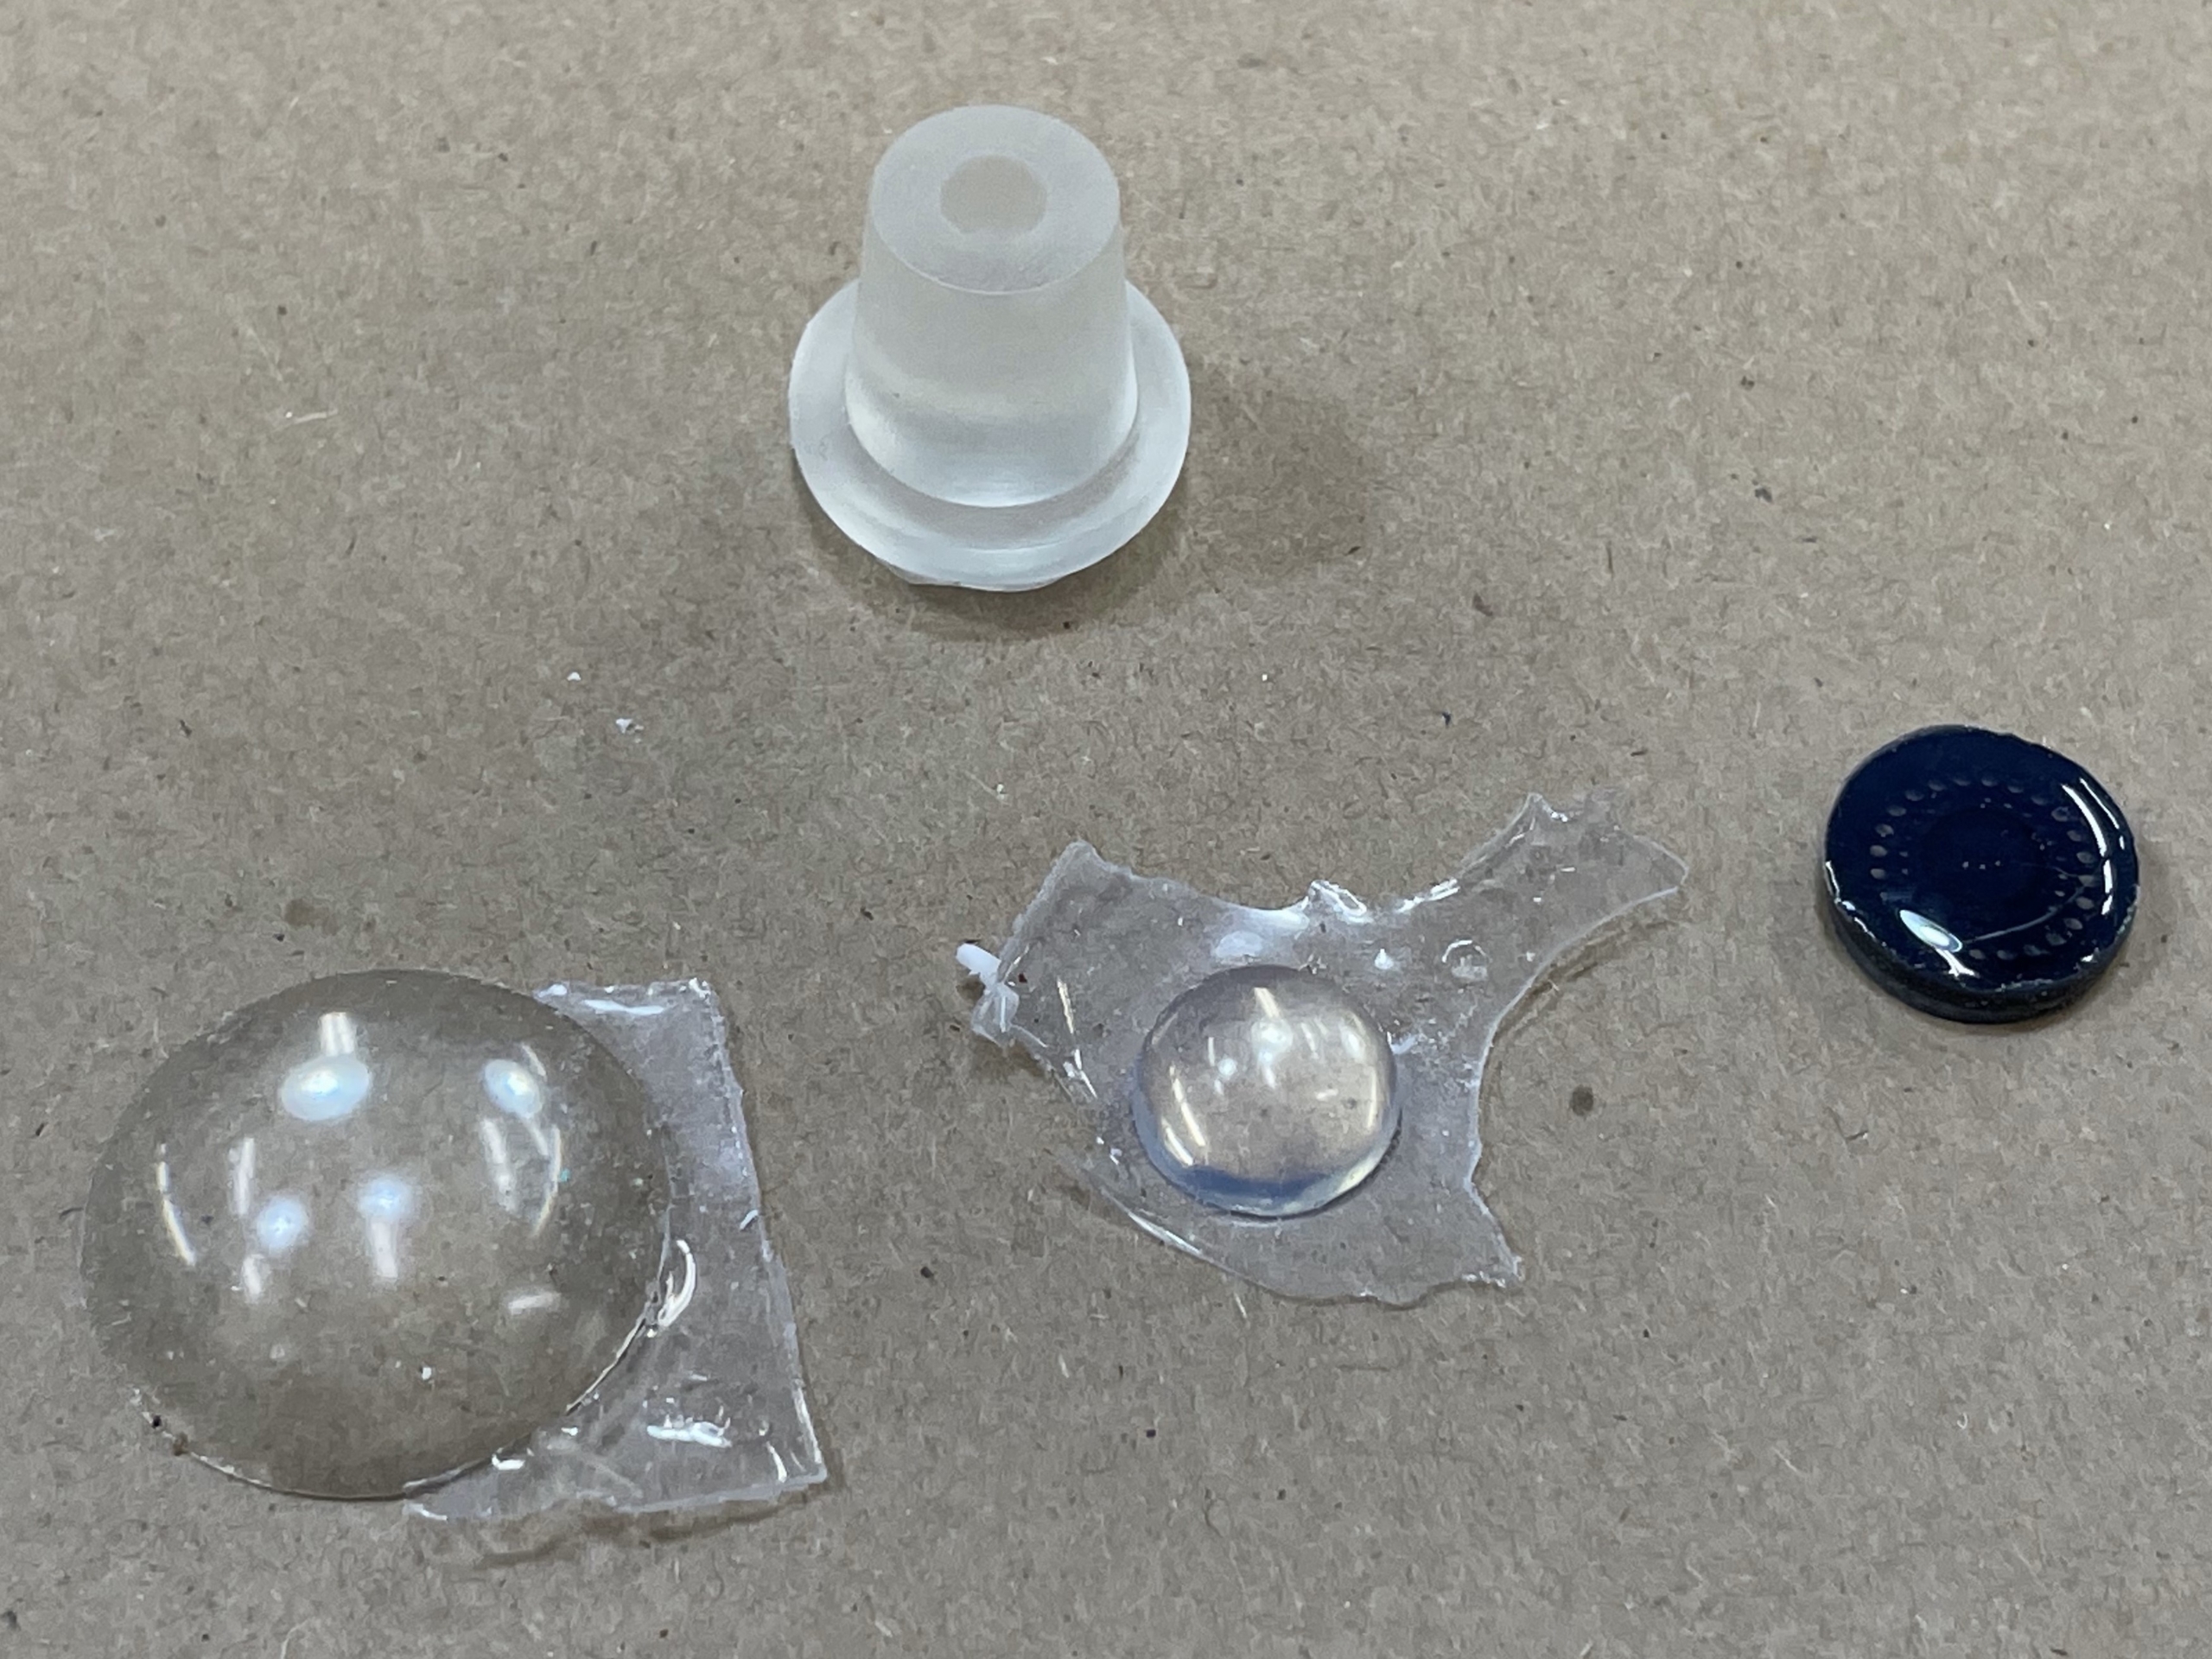
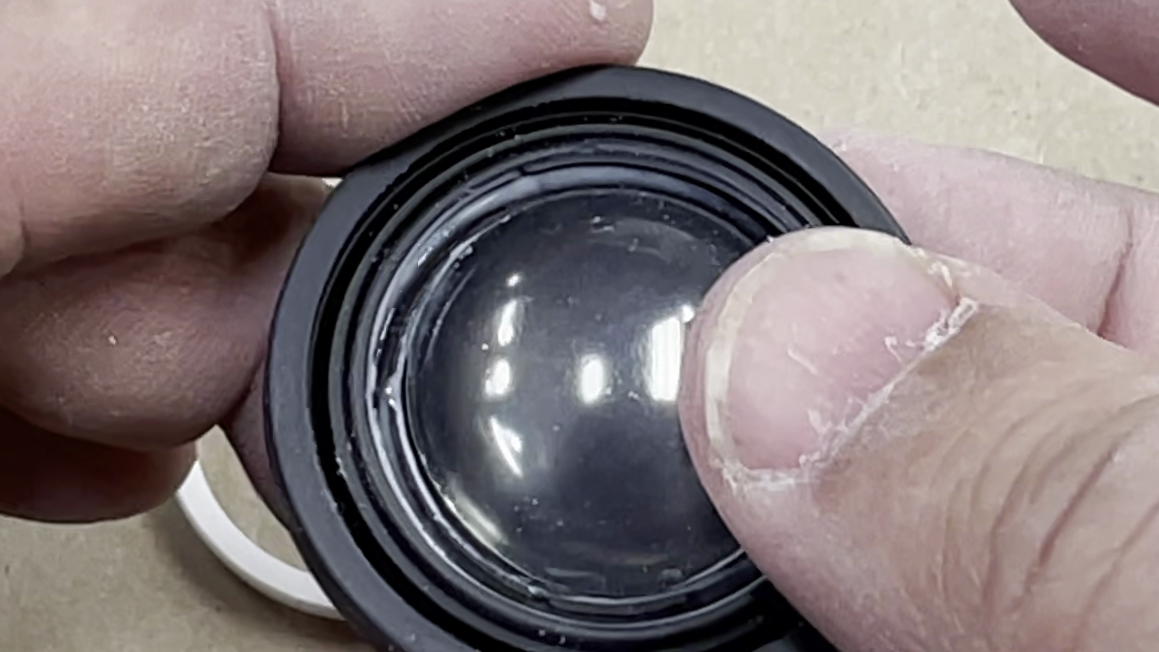
For the clear parts, they’ve been engineered to be optically clear. Use a fingernail to scratch the flashing on the outside. You can run sandpaper around the outside of them for fit but avoid scratching them as they are ‘lenses’.

Other than cosmetic clean up the only real fit work is sanding the two white rings. You want to sand the bottom interior of these to make sure the clear lenses fit easily beneath them.
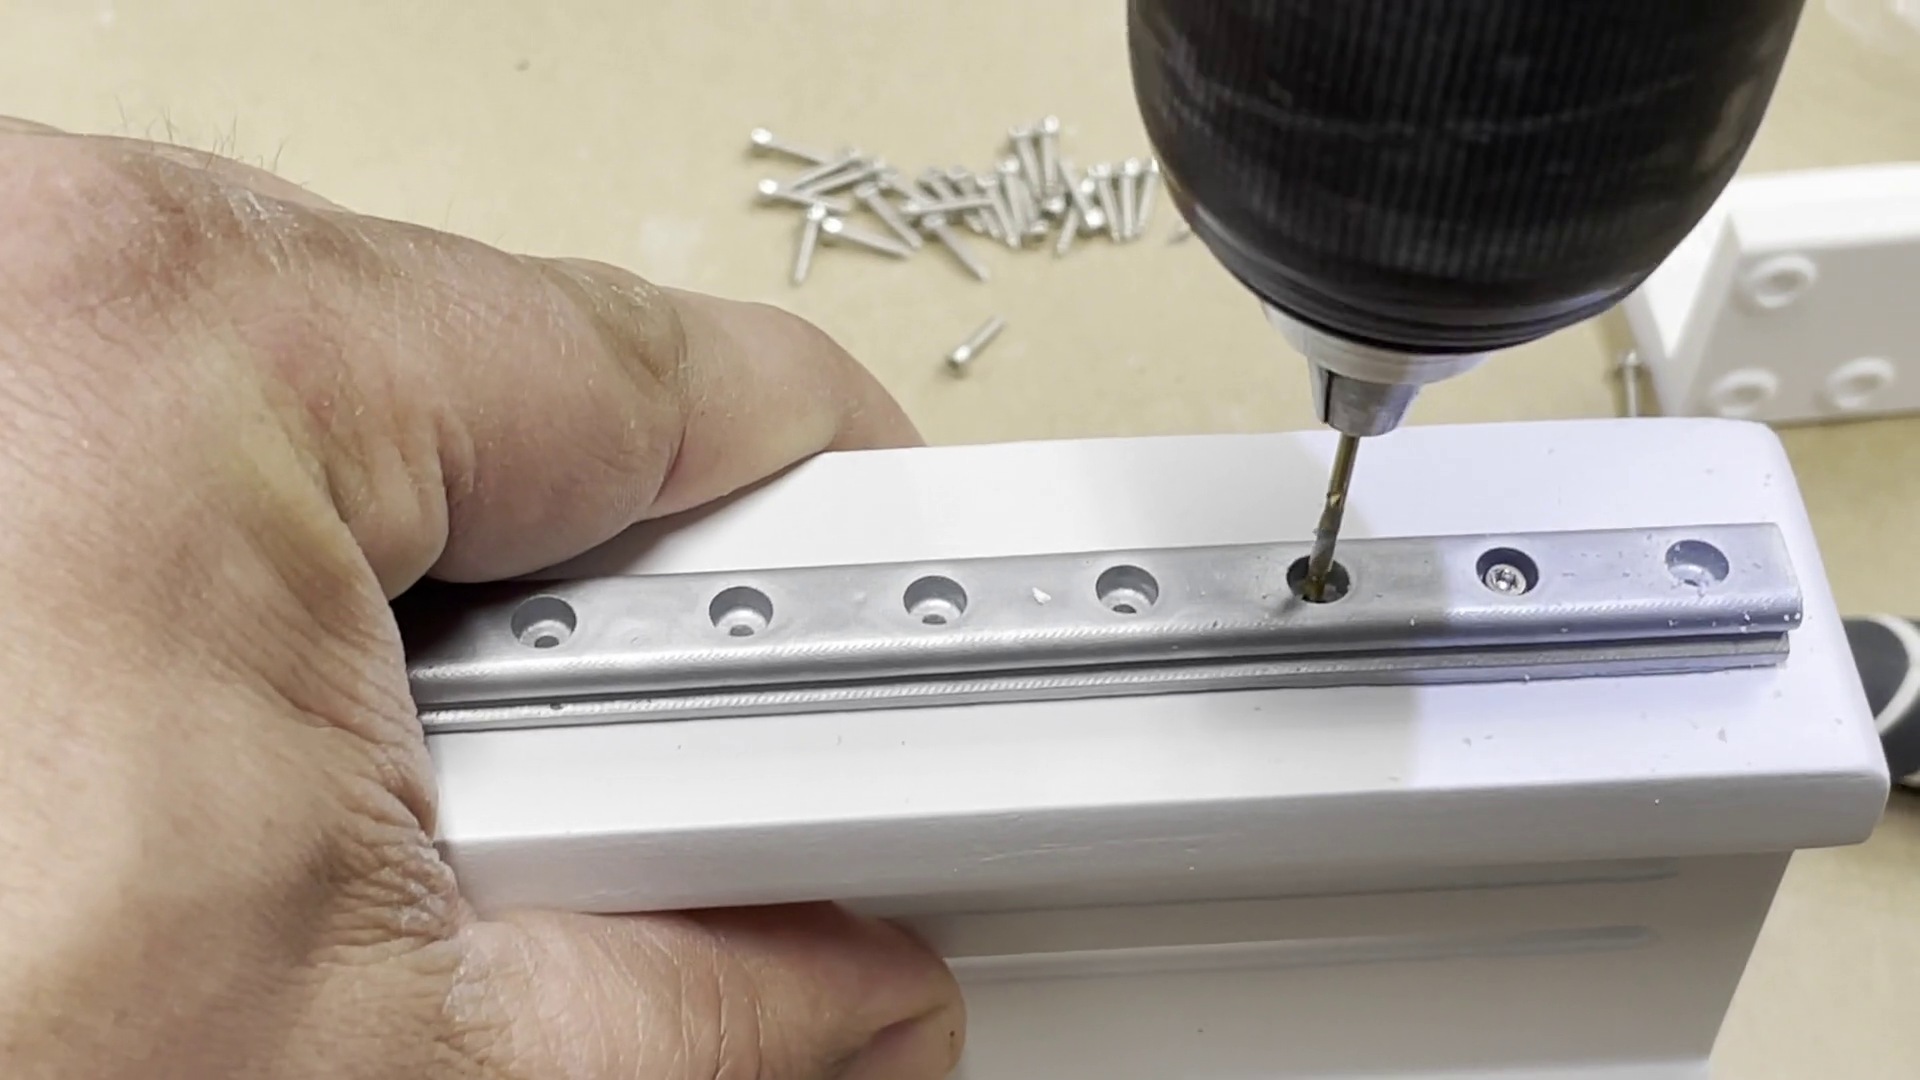
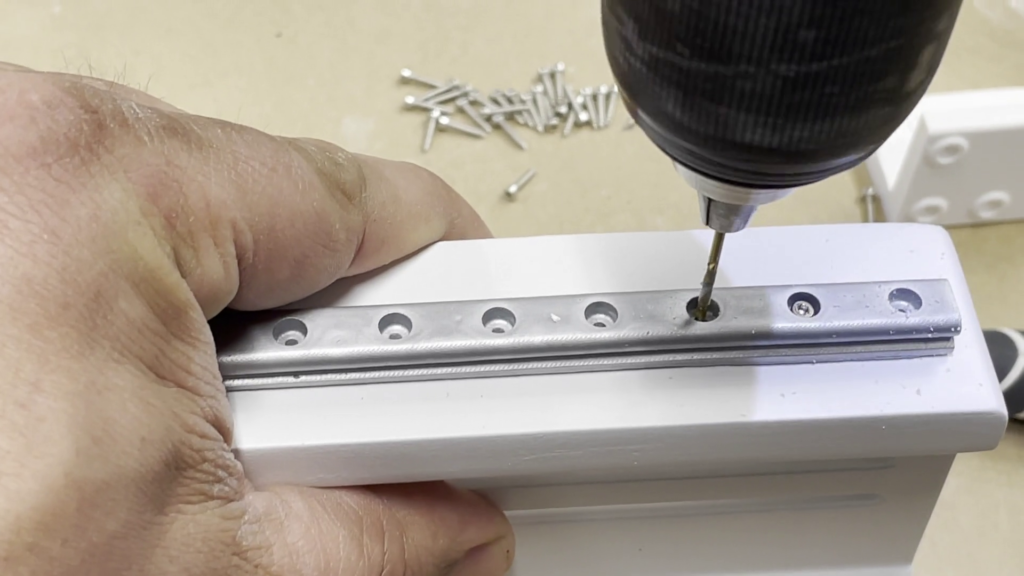
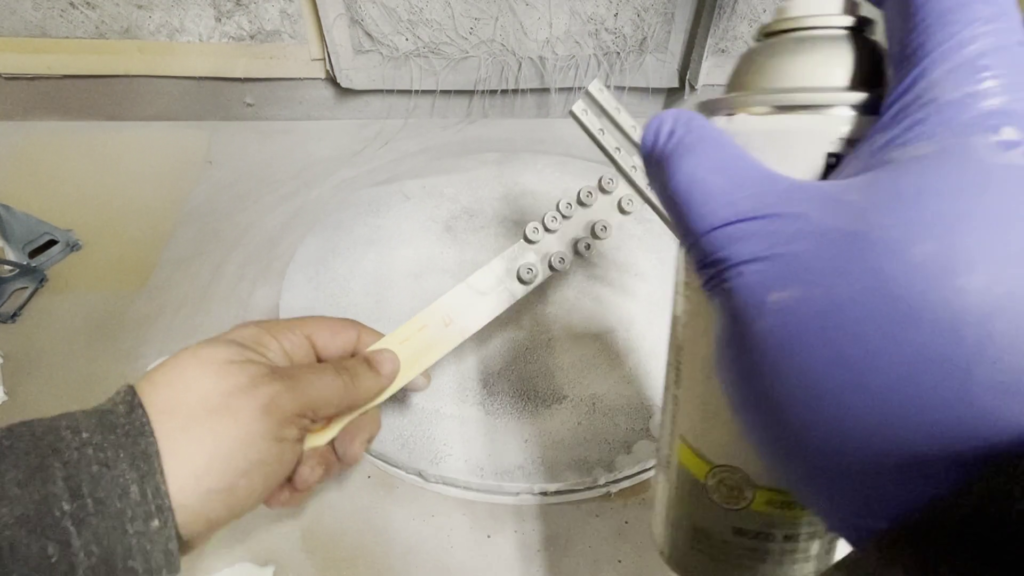
- Predrill holes. Use a 1/16″ bit for all of the holes. If you would like the wheels to spin using M2 screws use a 1/8″ bit on the wheels.
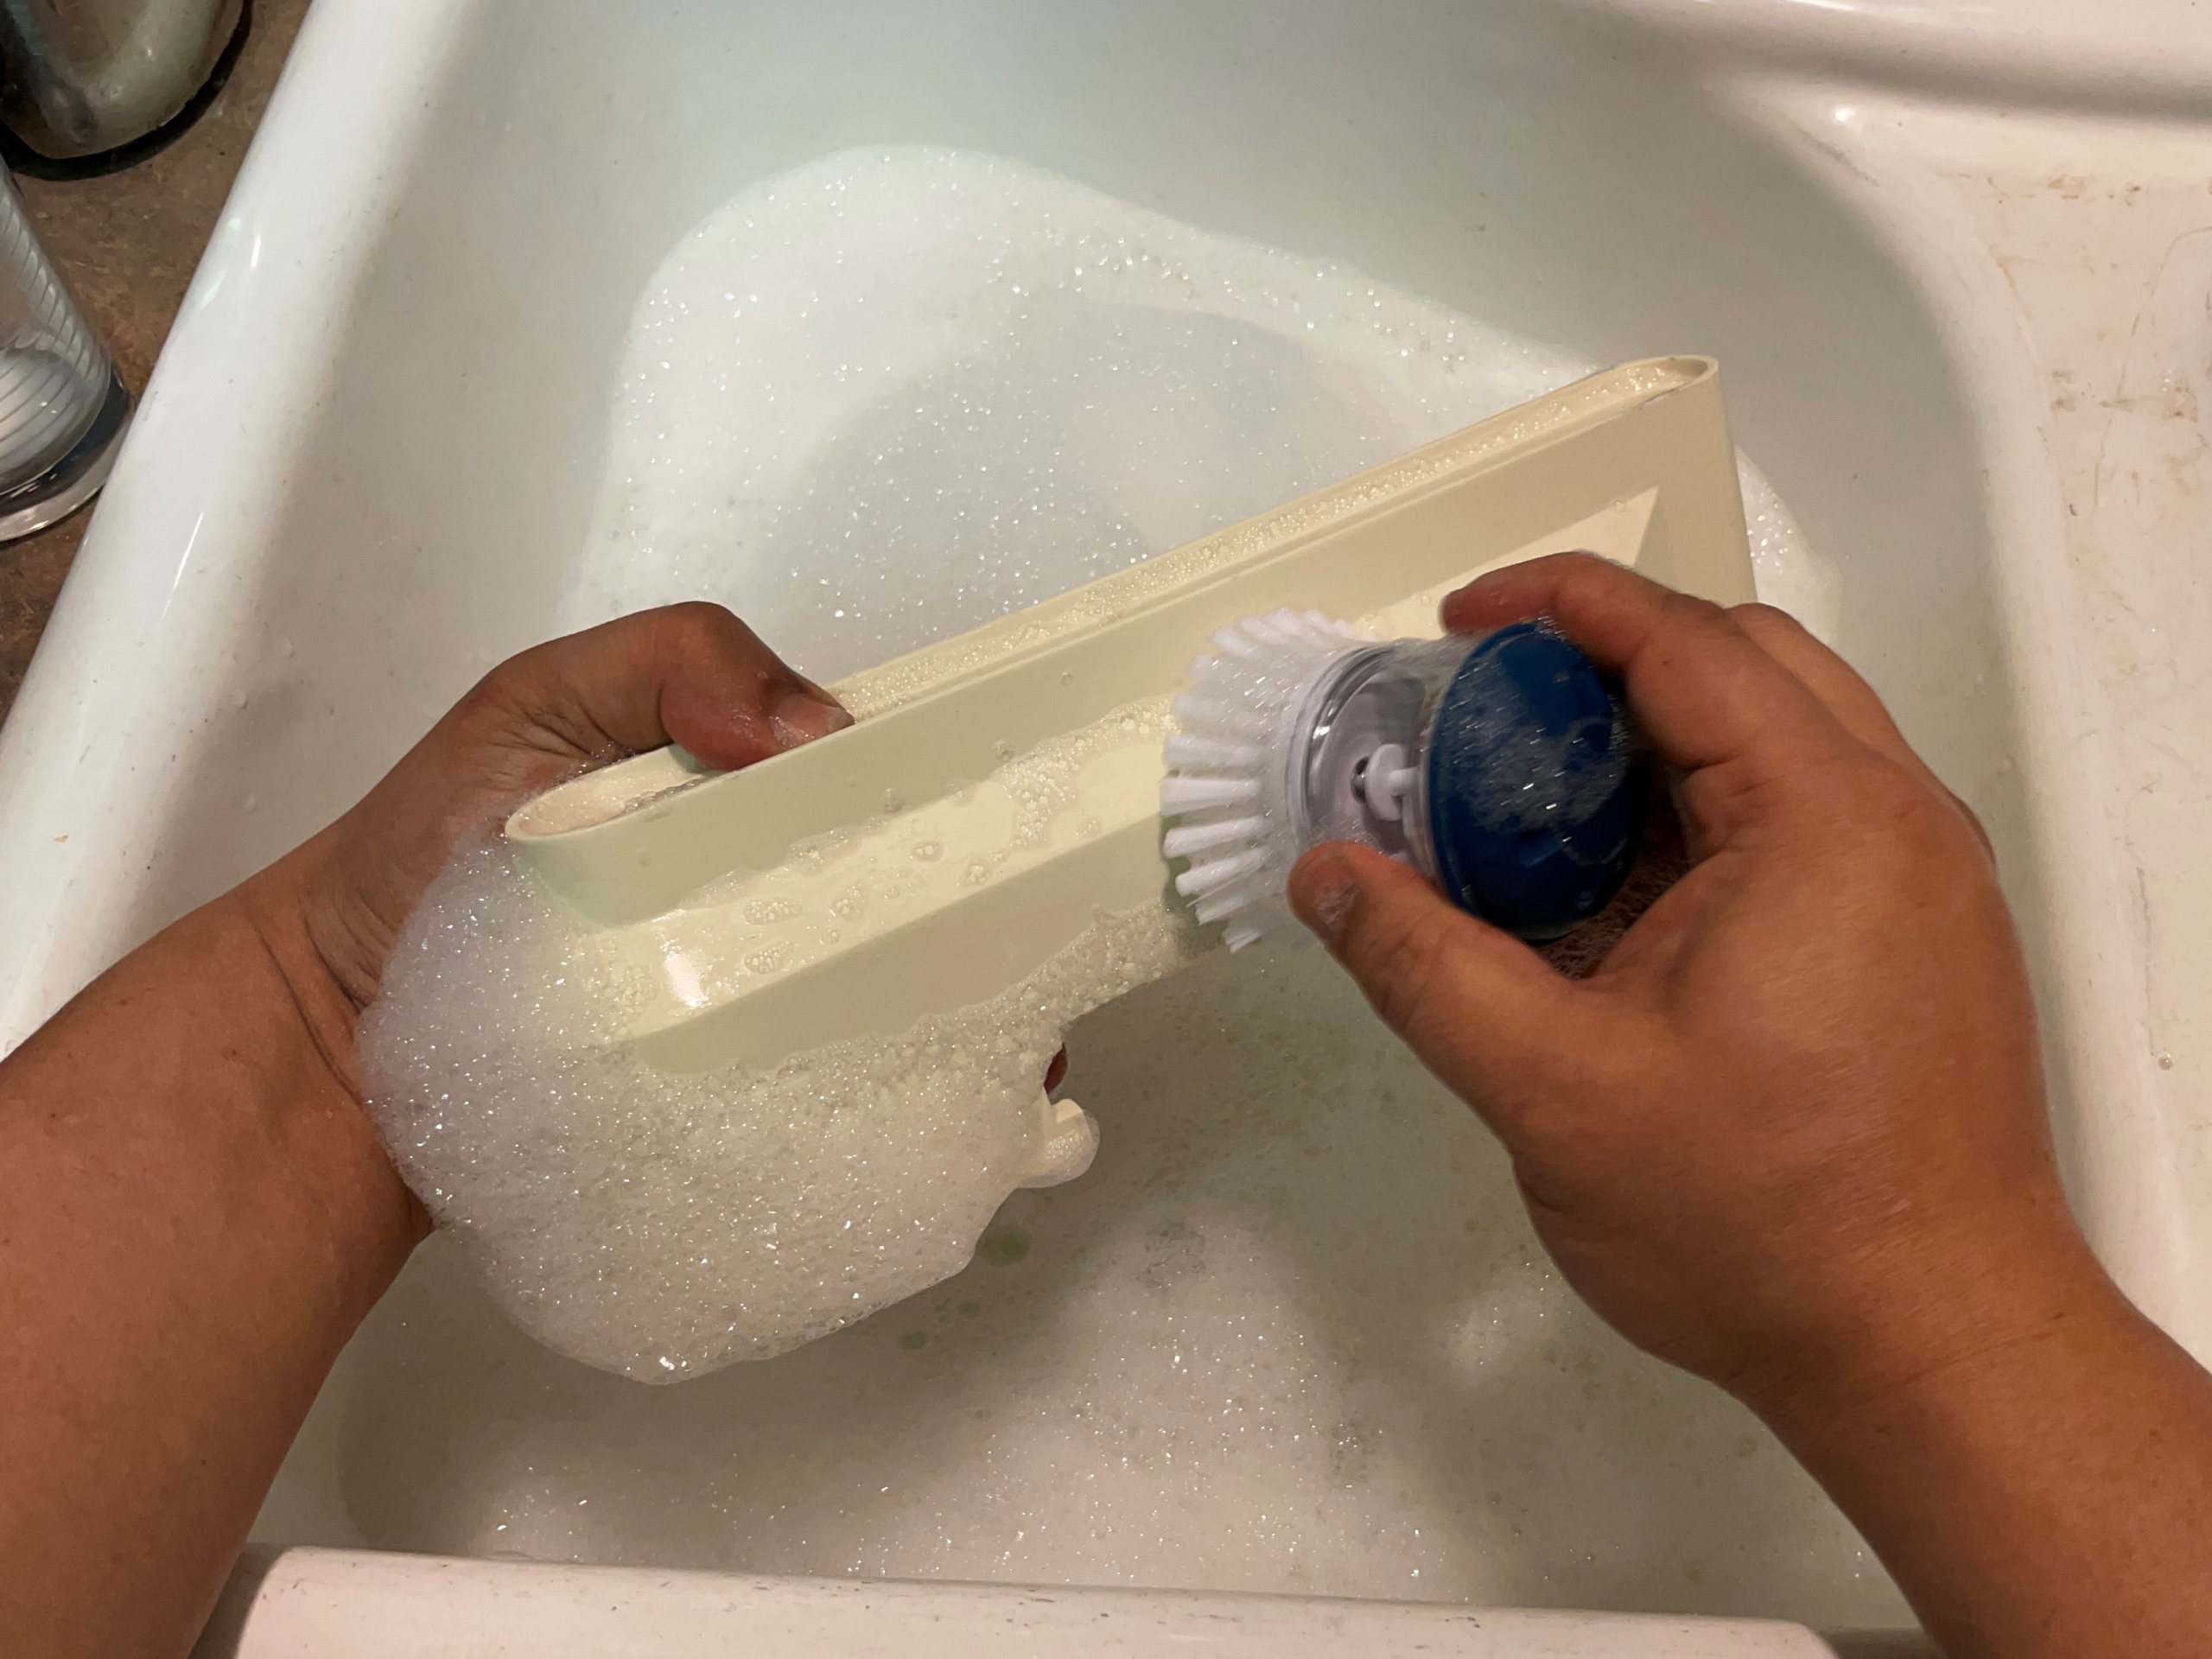
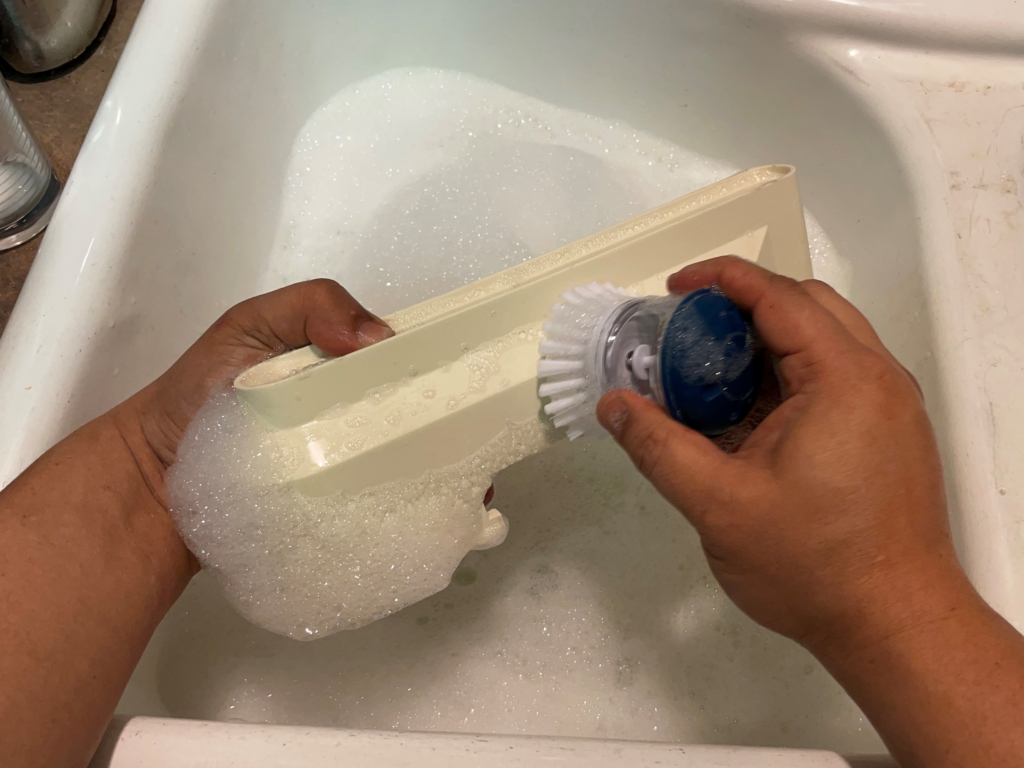
- Once you’ve sanded and predrilled everything, we recommend using plain Dawn dishwashing liquid.
Wash model parts with soap, warm water, and toothbrush.
Rinse thoroughly. Let dry completely.

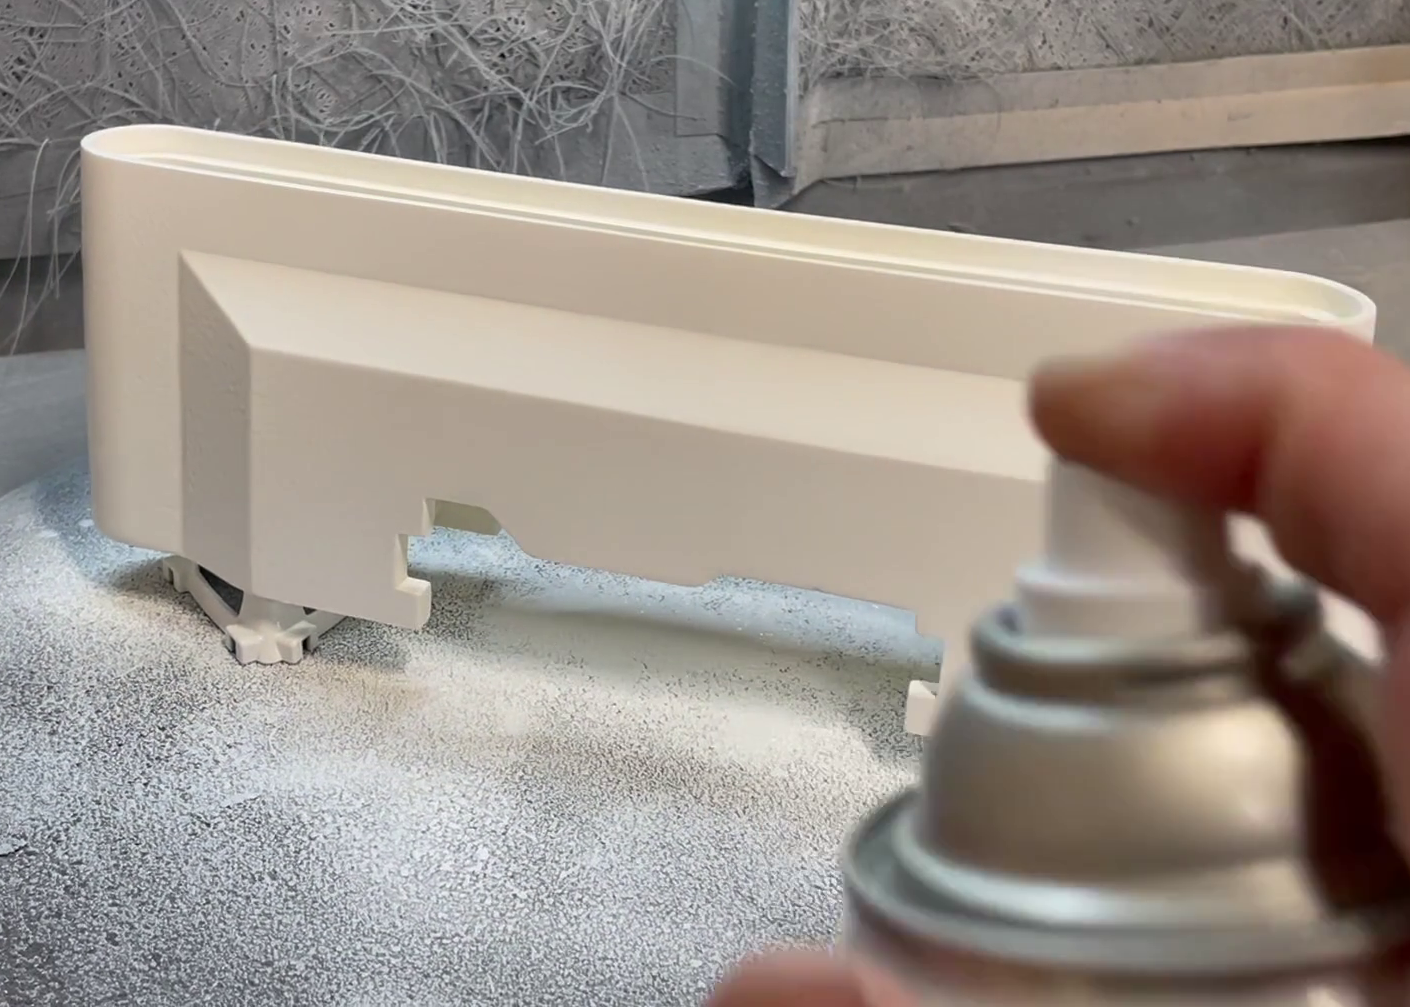
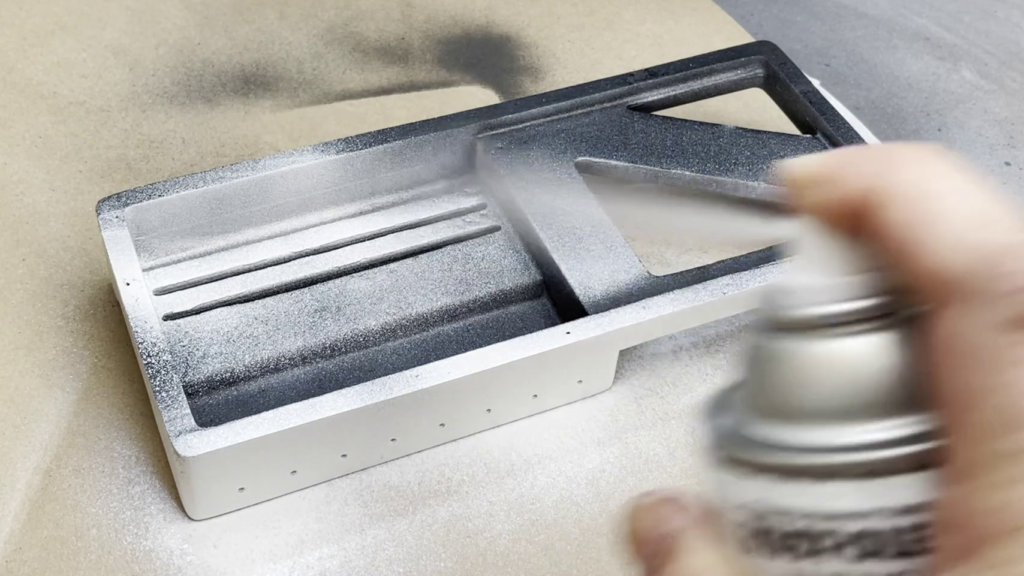
- Prime your model.
Prime these pieces in a dark primer color like flat black.
For the rest of the paintable parts, prime them with White Primer Paint both inside and out.
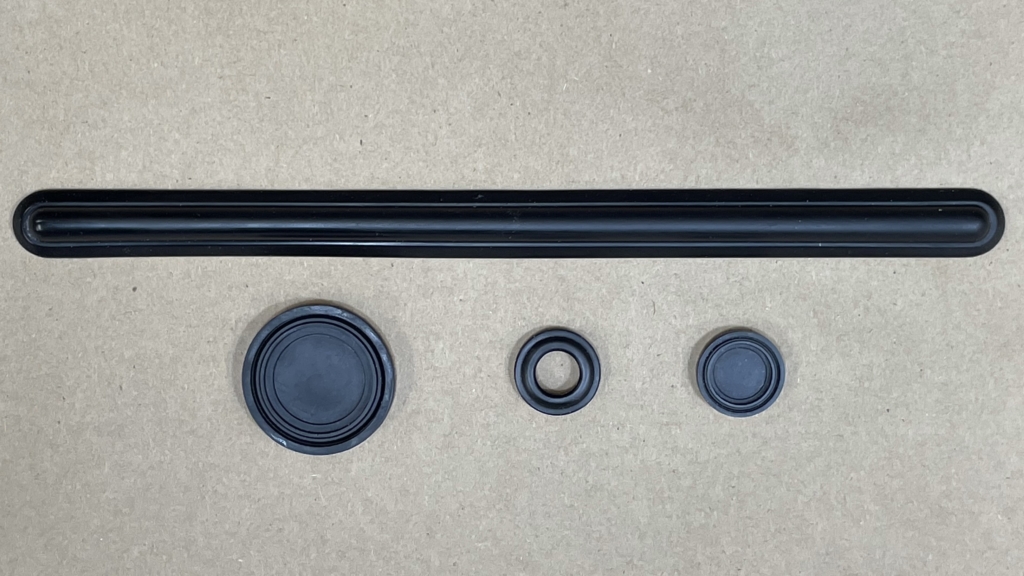
- There are three parts you will have to light block. I usually paint the inside of these parts in alternating black and white paint.
- Finish painting
Paint these parts Silver Spray Paint. 
Do a final pass on the white parts with the Flat or Satin White Spray Paint.
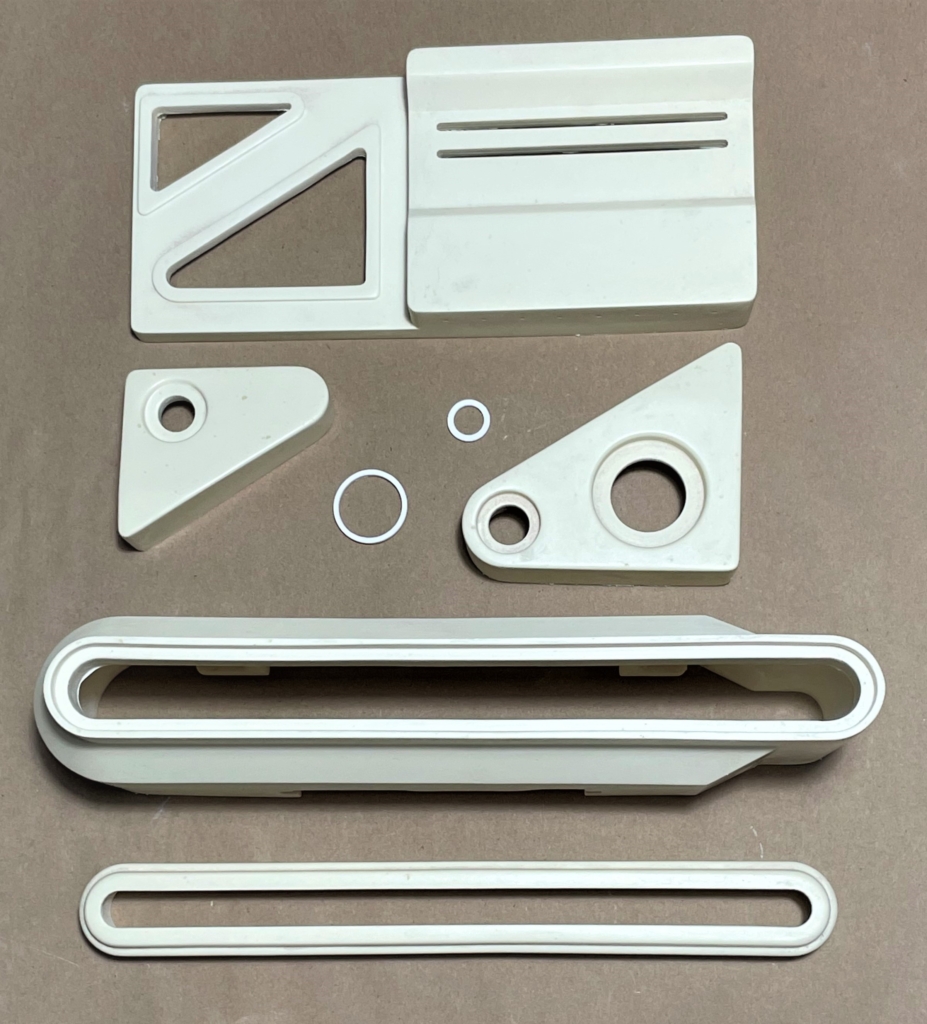

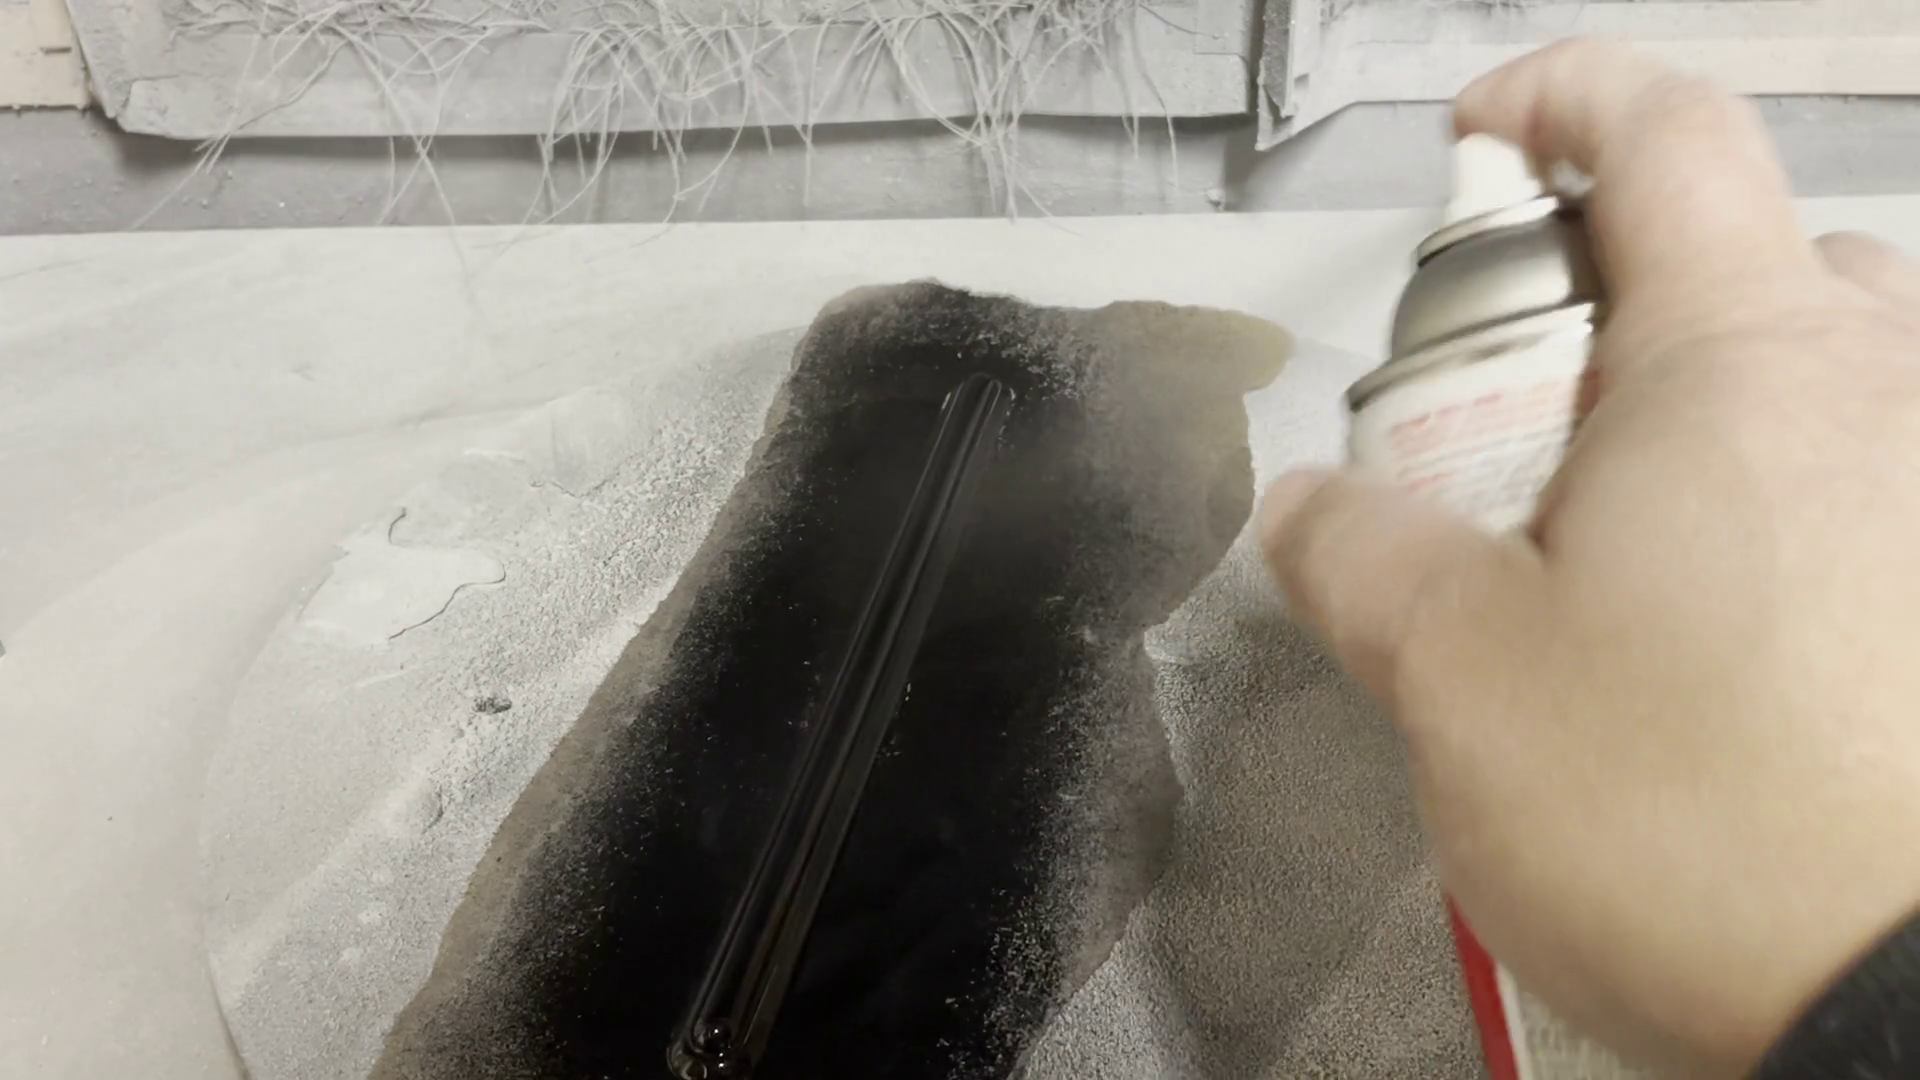
Paint these three pieces Flat Black
Paint this long piece Gloss Black. I’ve had good luck with gloss lacquer spray paints.


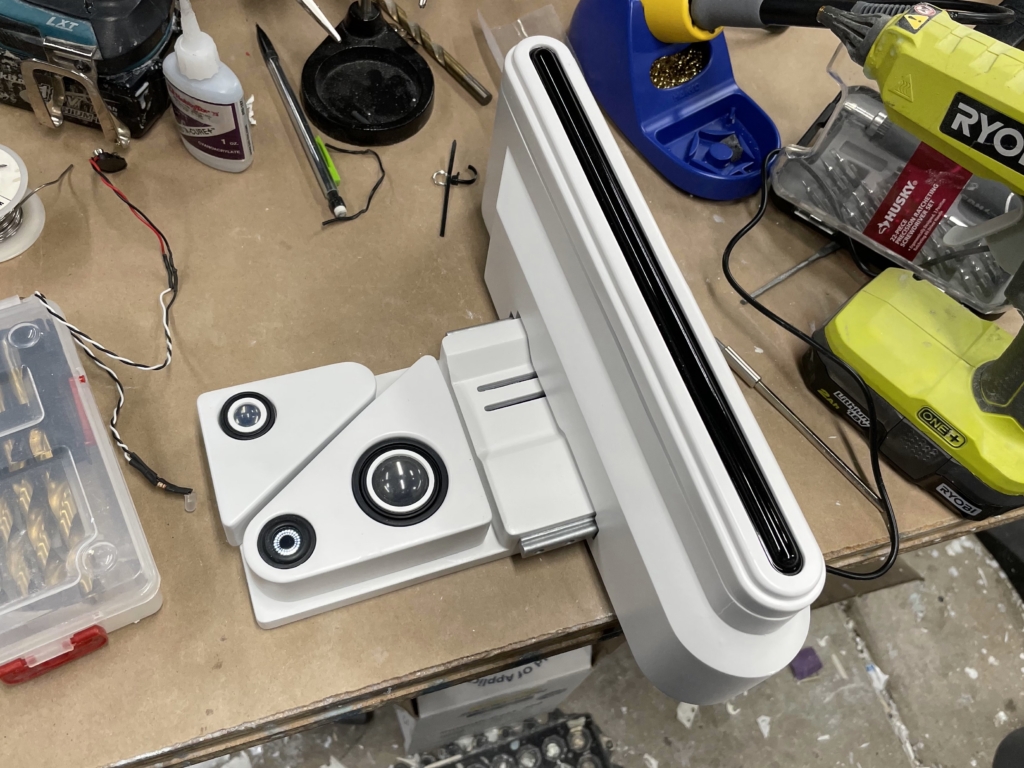
- Once all of your parts have thoroughly dried/cured you can then assemble the model.
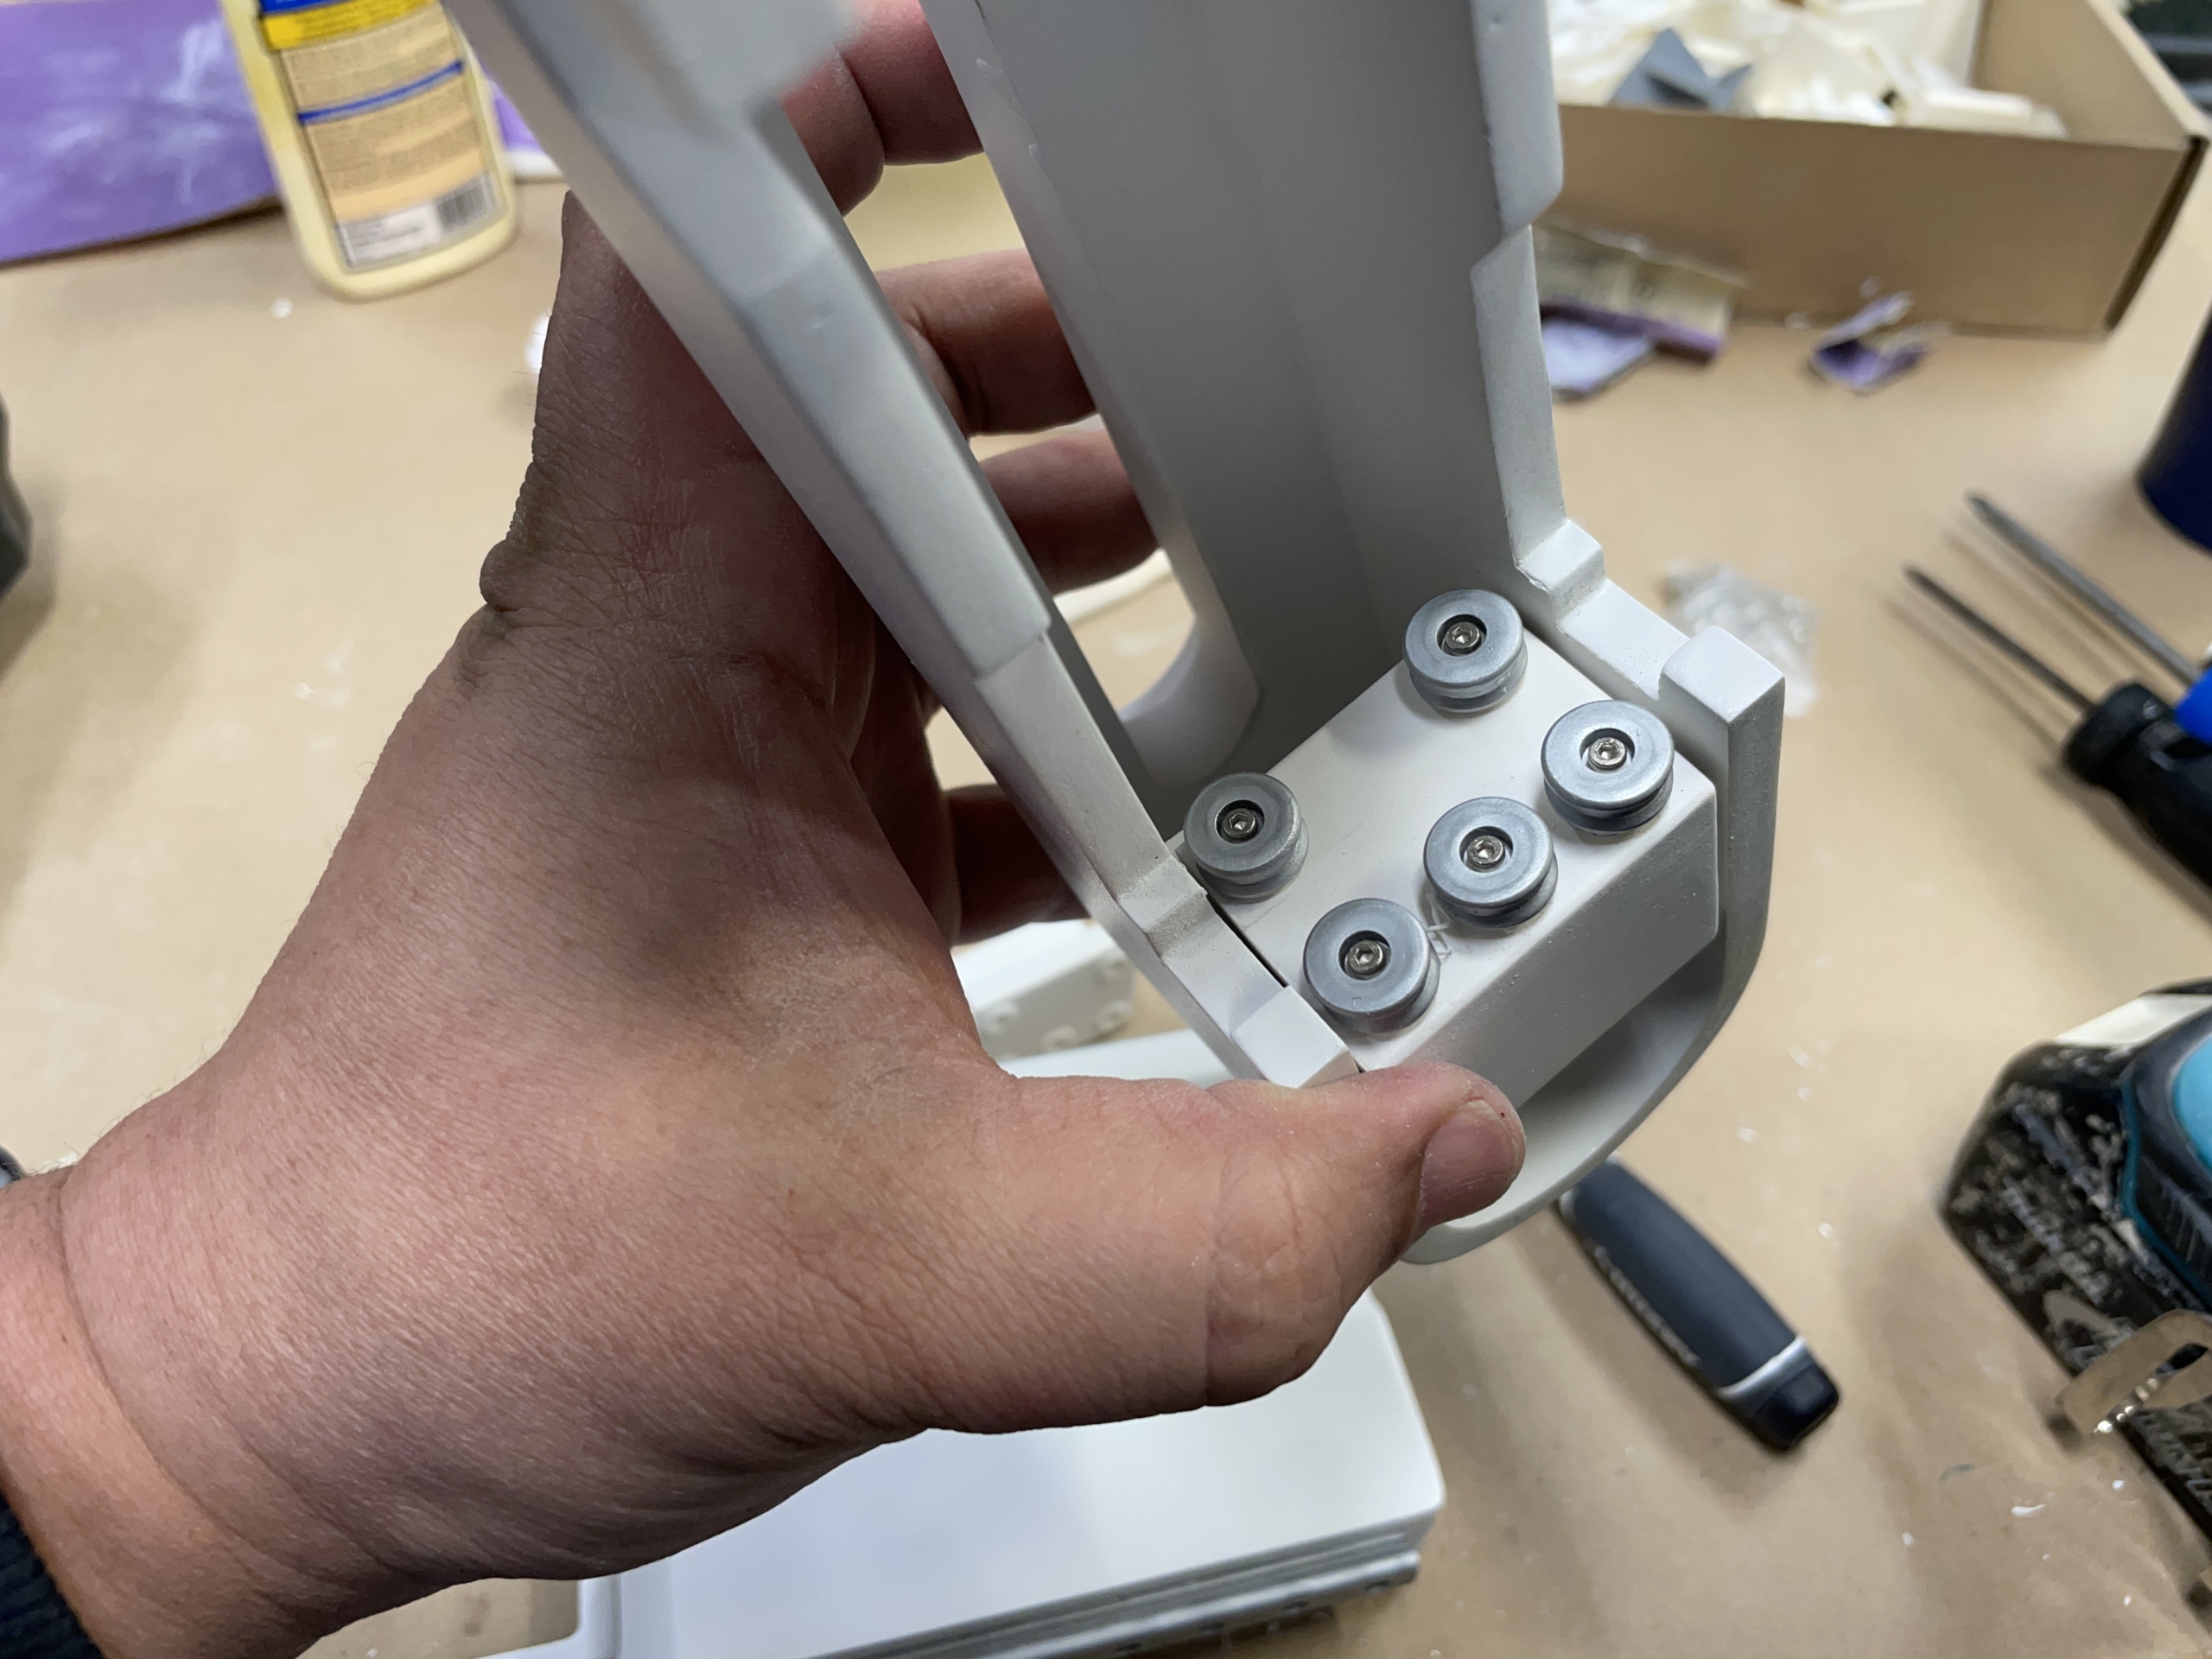
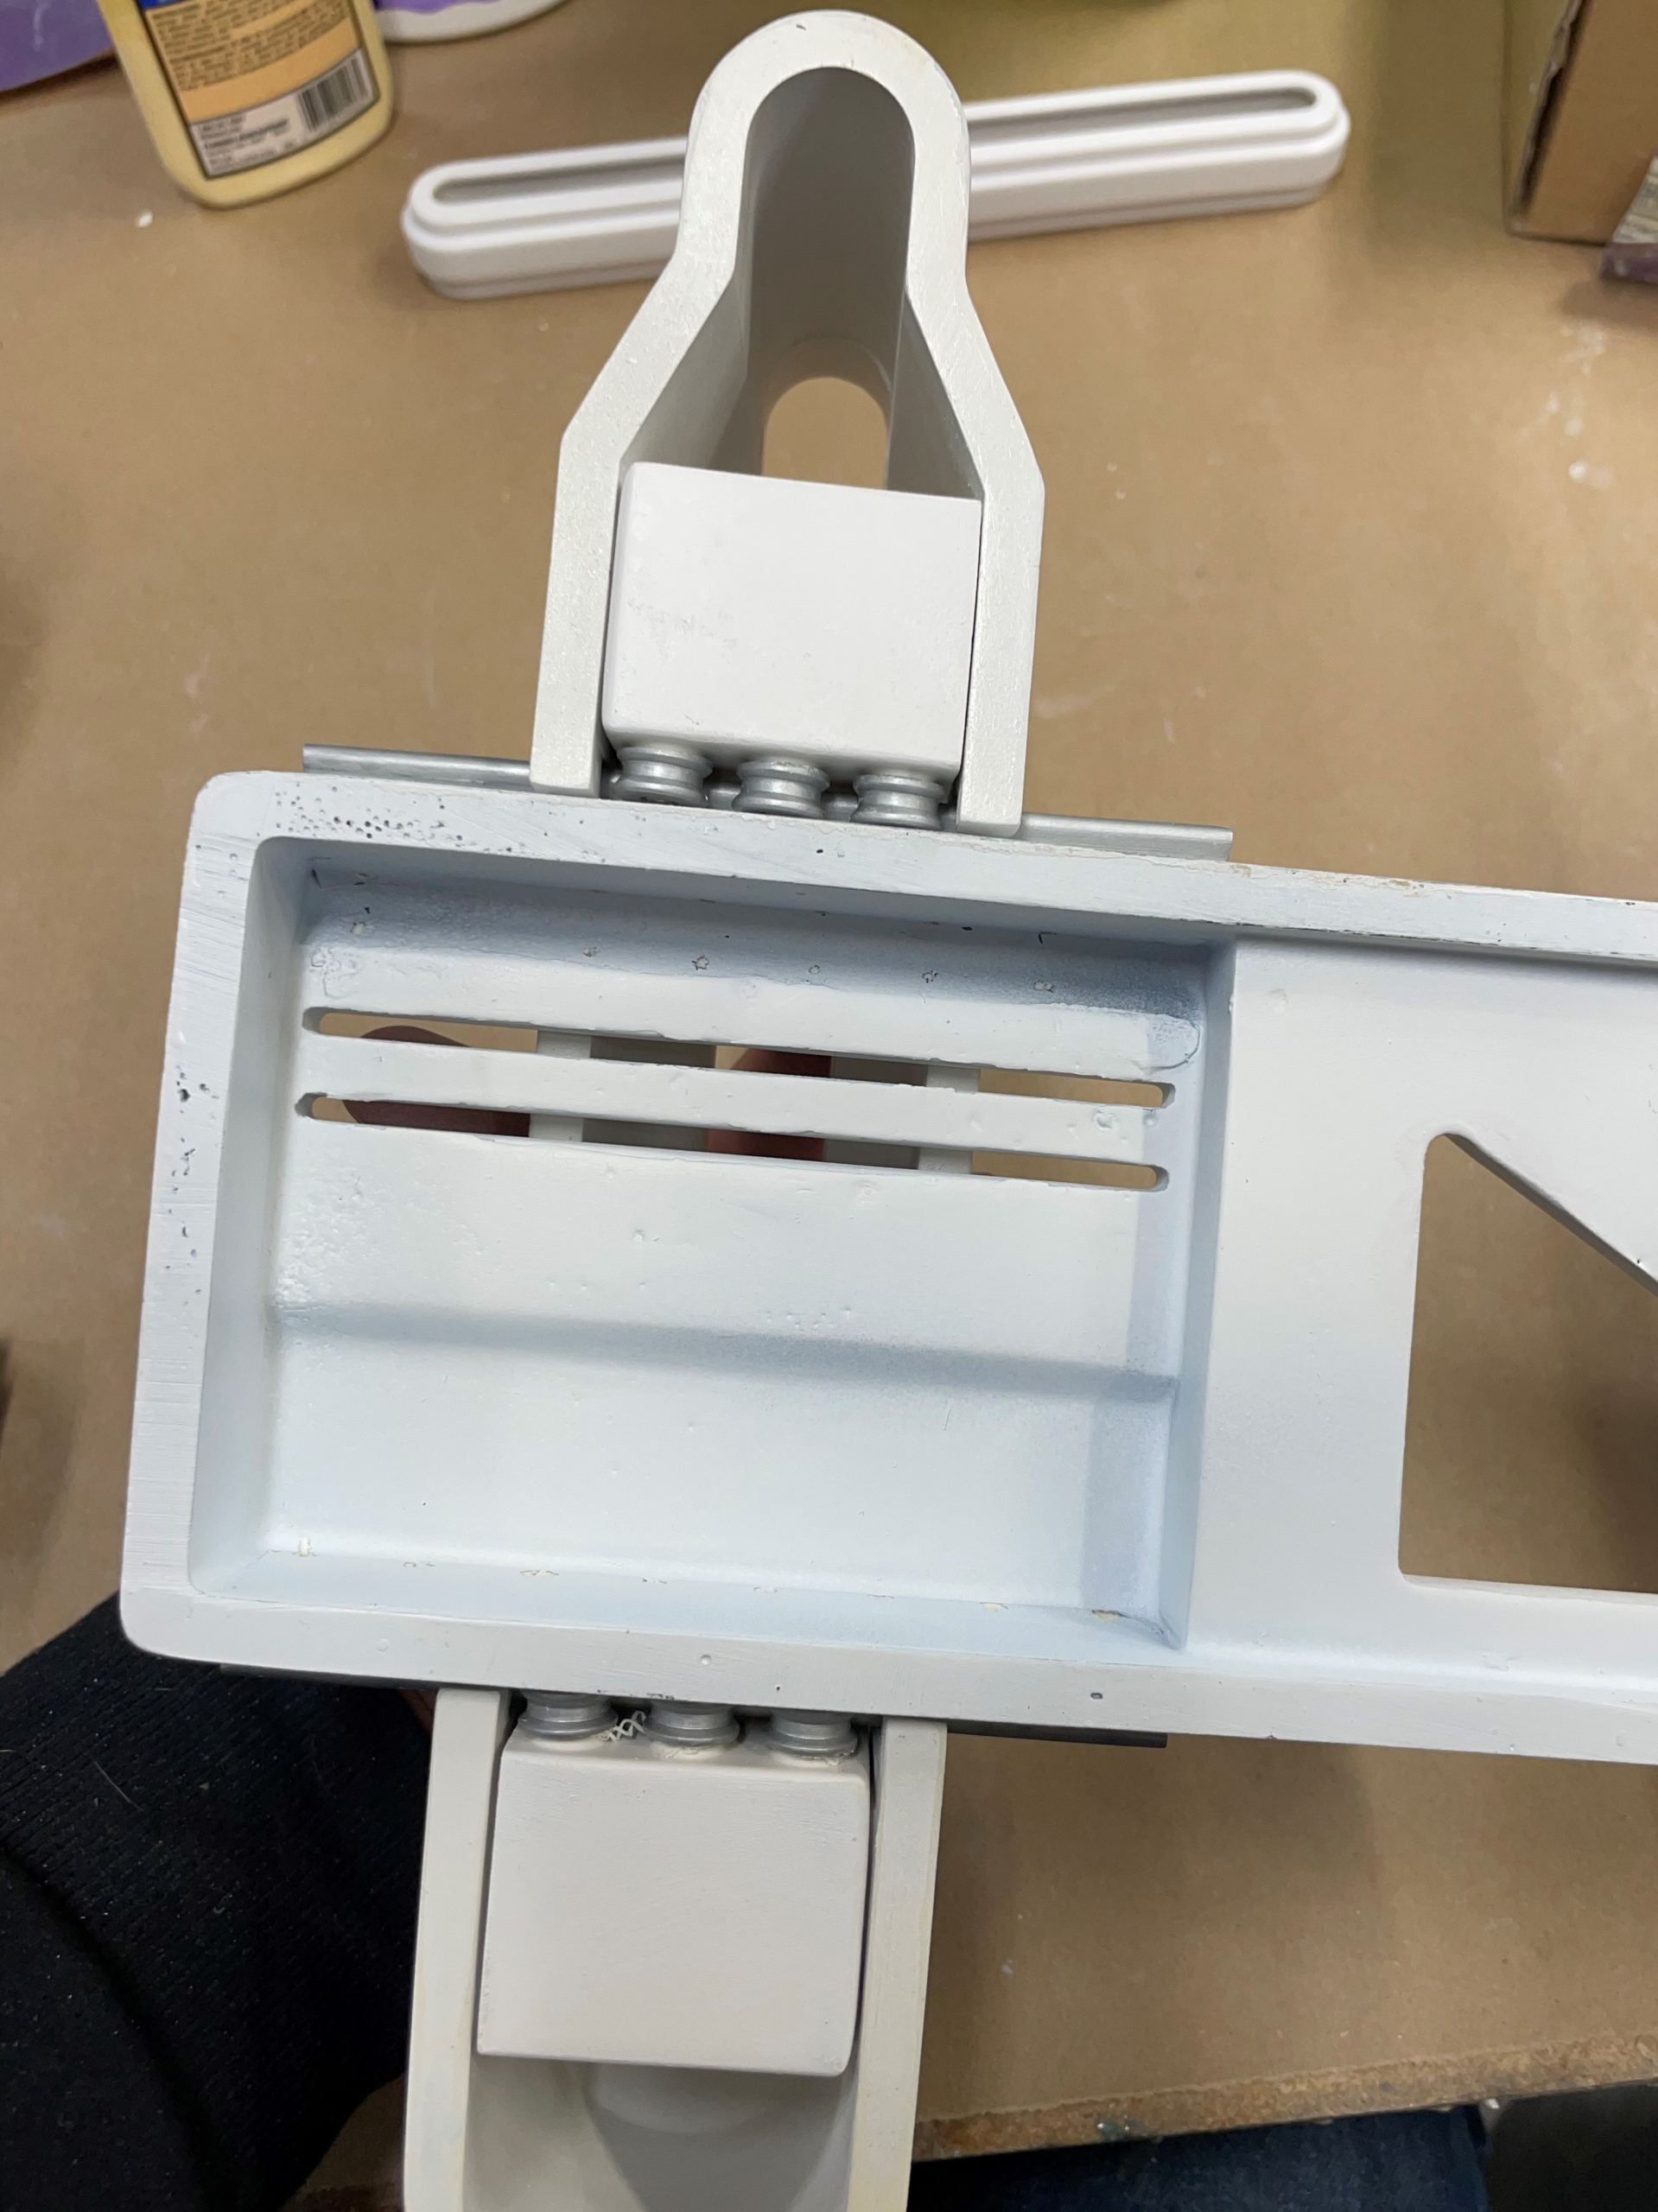
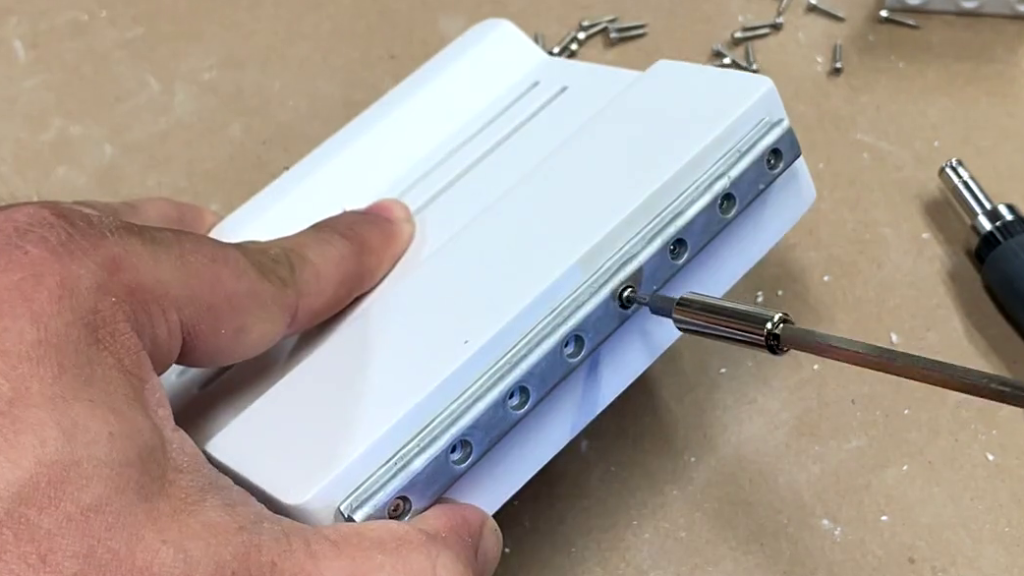
Begin by attaching your silver pieces. The small wheels go on the L-Shaped carriages. Use M2 x 10 mm Silver Socket head screws. Optionally if you can glue these instead. Use your drill bit, or a pin nail for alignment. 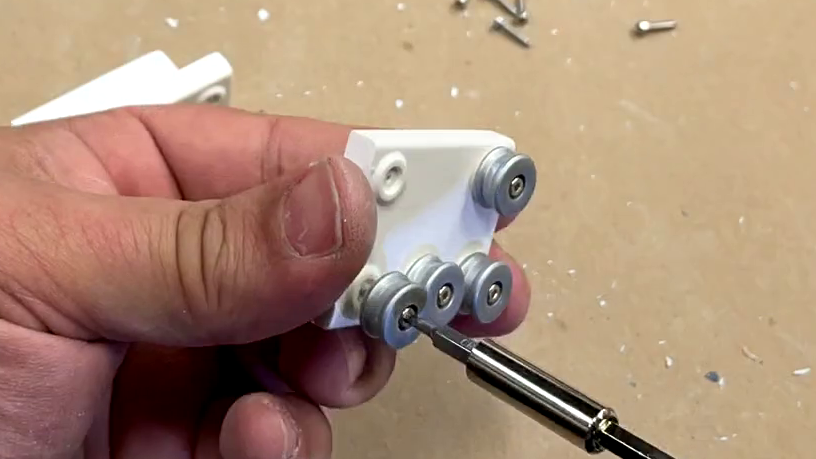
These L-Carriages glue into the main Scanner Base piece.

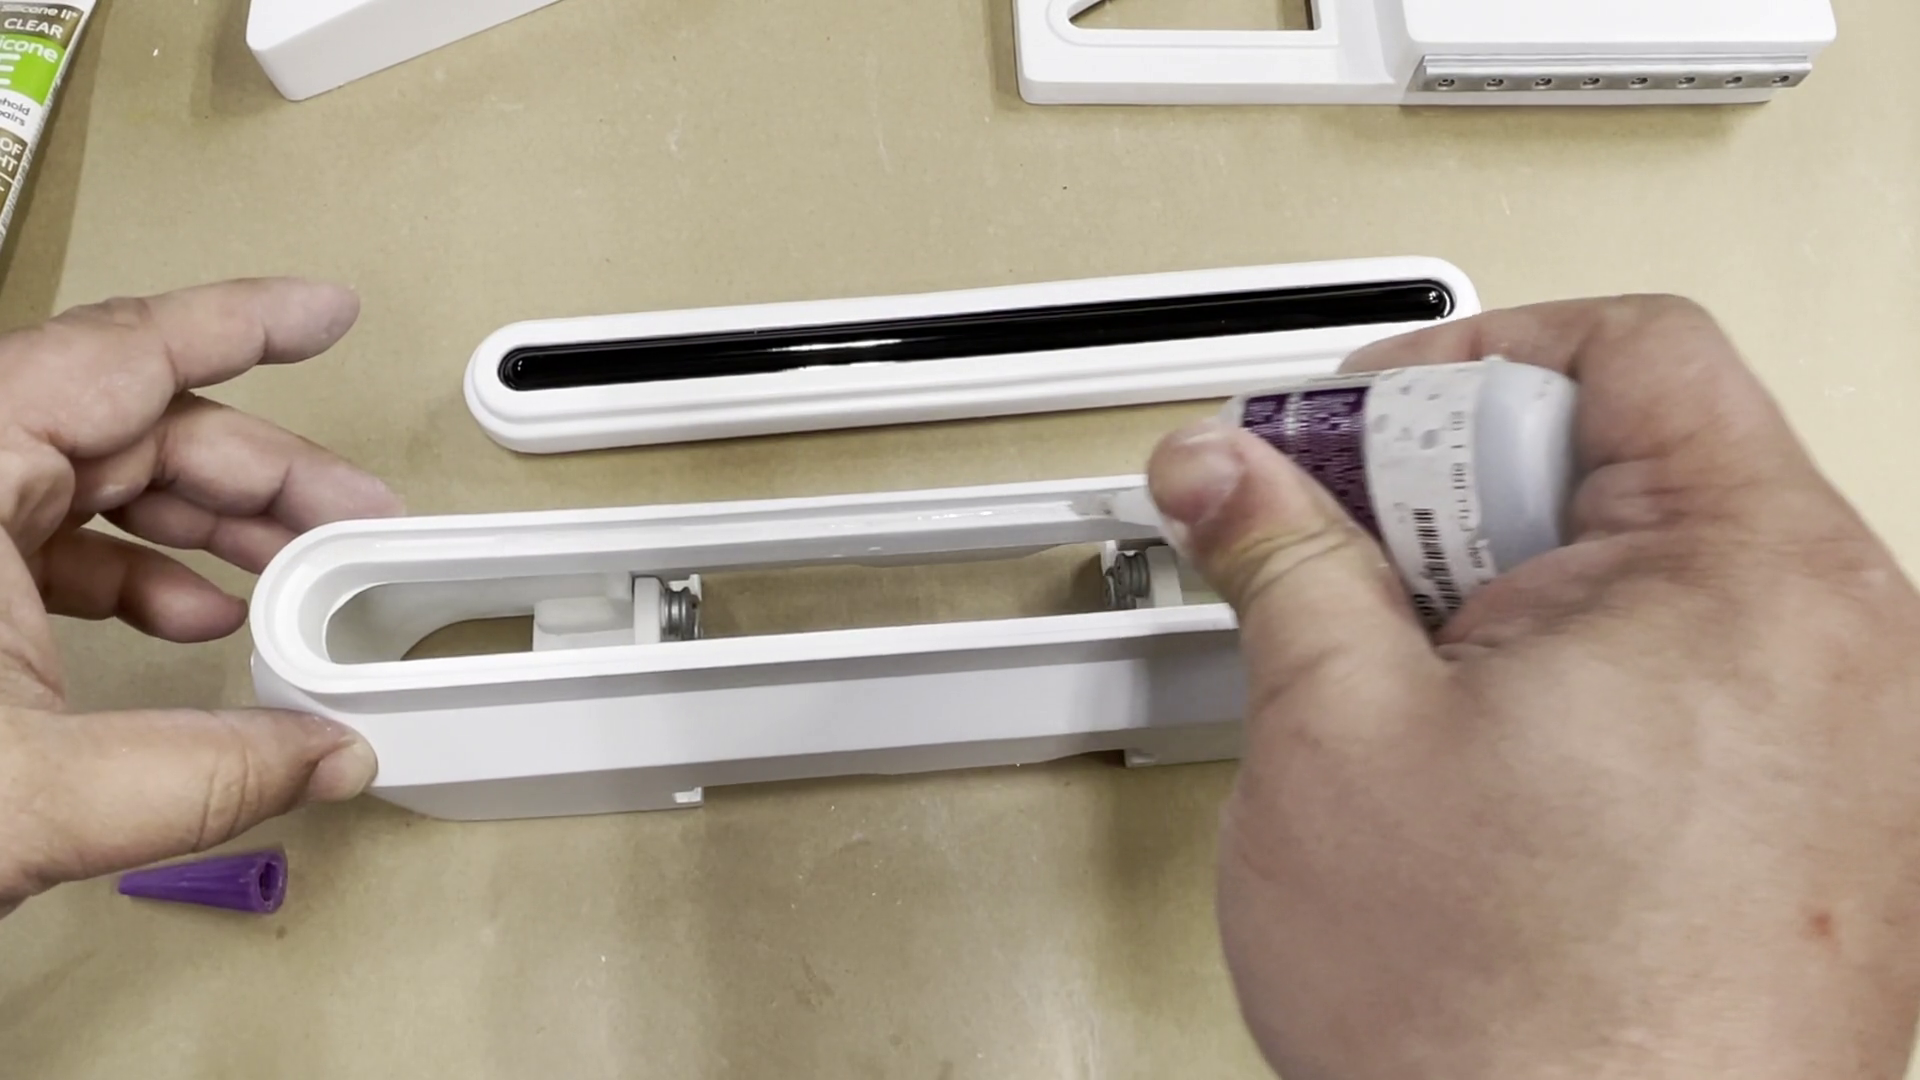
- Use some Elmer’s glue to glue the gloss black scanner piece into it’s holder. Just a little bit on the inside will hold it in place securely. I didn’t know if the superglue would fog the gloss coating like it does on clear parts, so I erred on the side of caution.
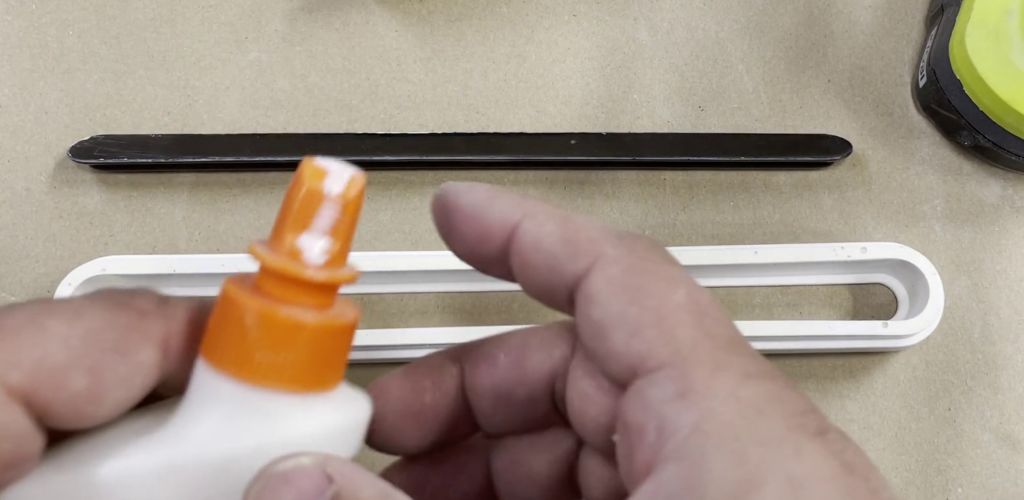
Use a little bit of hot glue to secure it in while it dries.
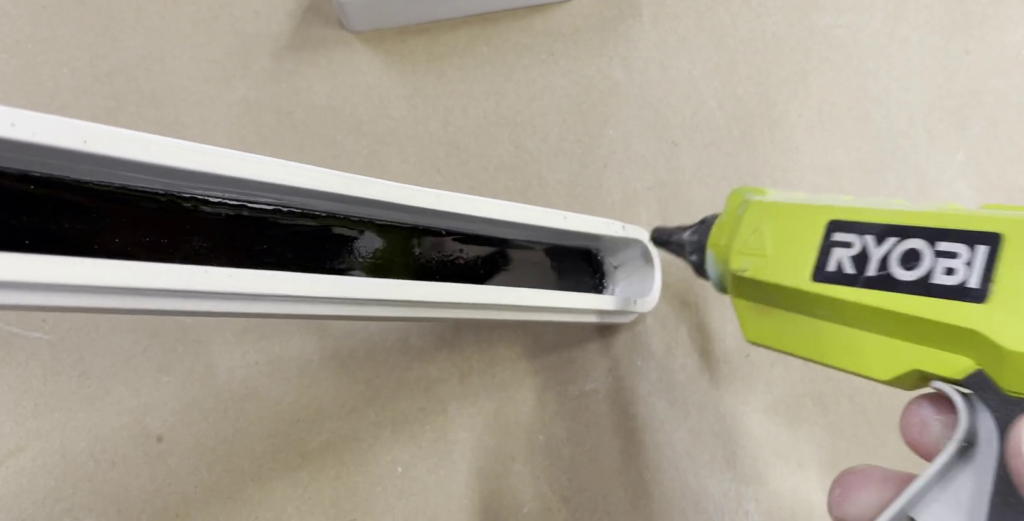
You can then glue that piece onto the tall scanner body using CA Glue (superglue).

This finishes the scanner piece.
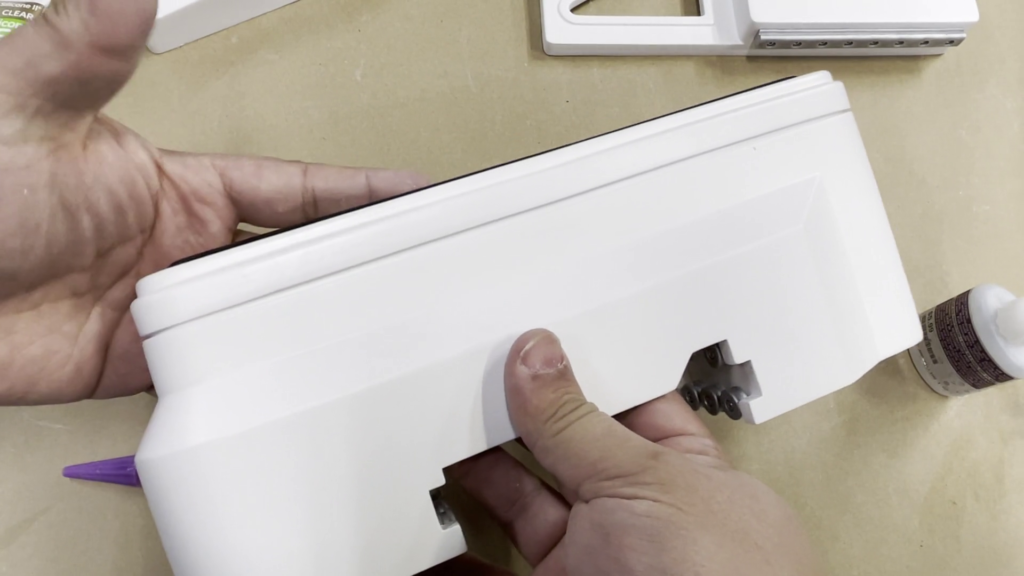
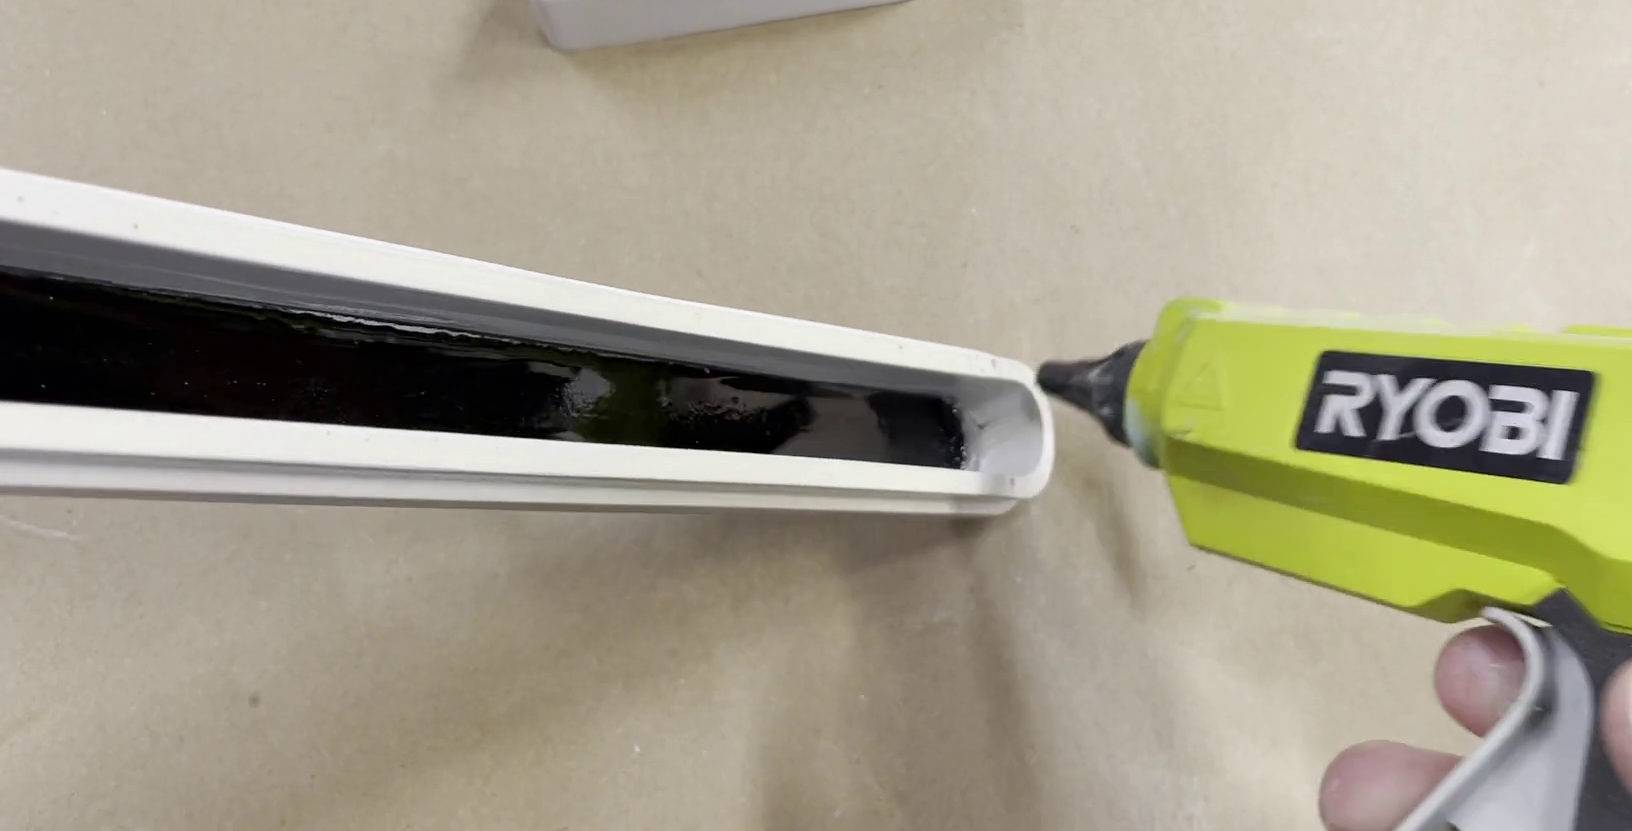
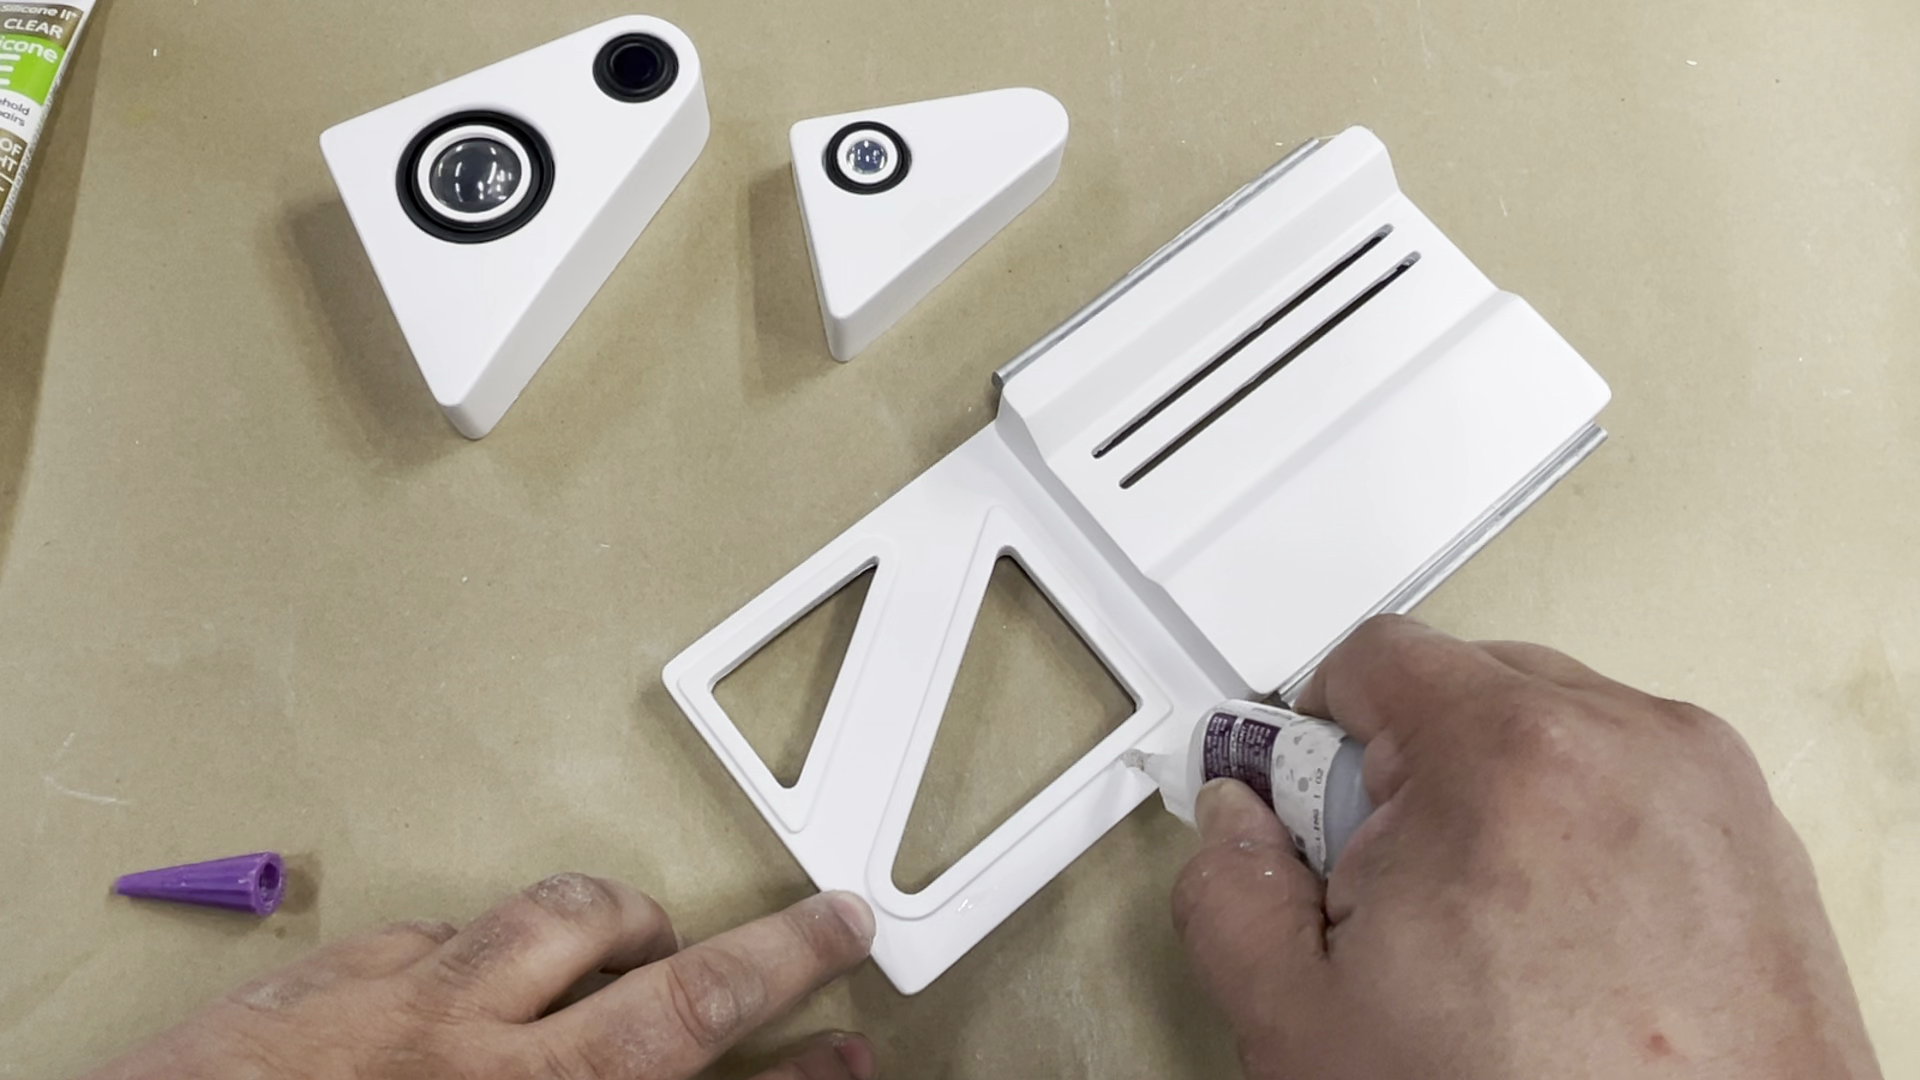
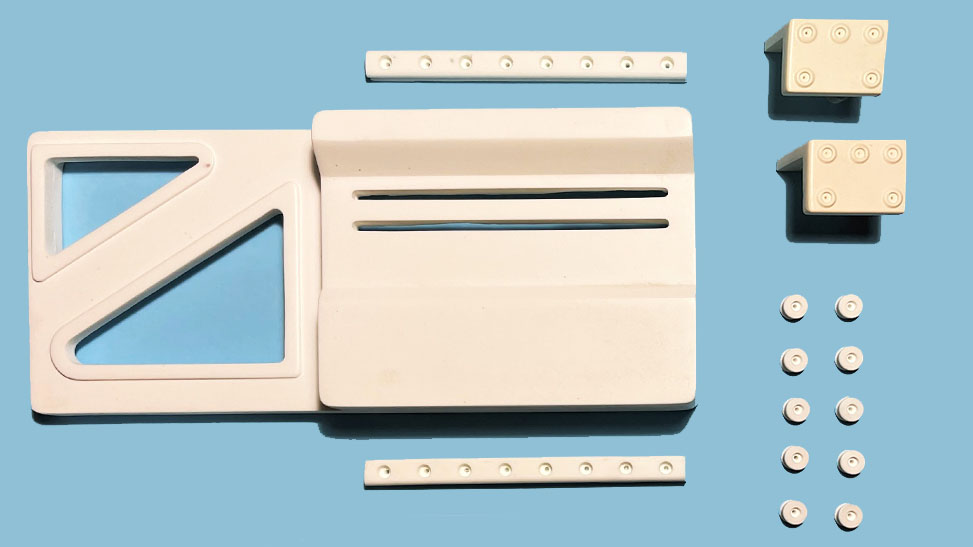
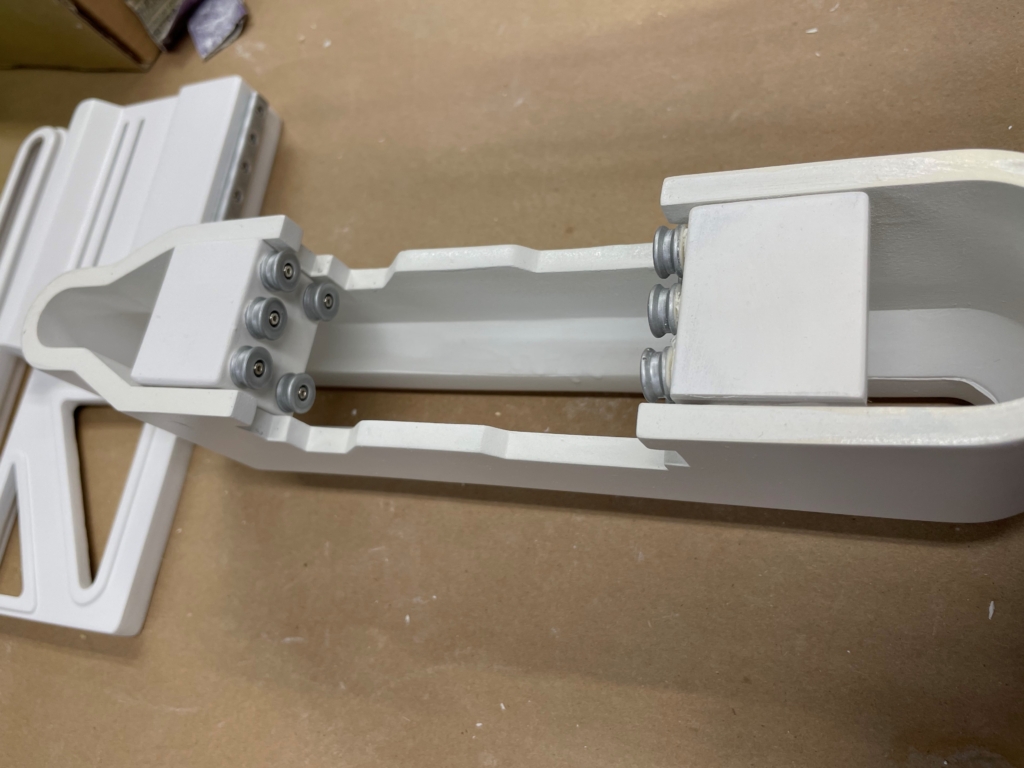
- Attach the rails to the top and bottom of the main body. If you do not want to use screws, you can glue them on using CA Glue. Use a drill bit or pin nail for alignment.
Check your fit before proceeding.

- Add a hole for the switch that turns the light on and off. Use a 13/64″ bit to hide the hole on the bottom.

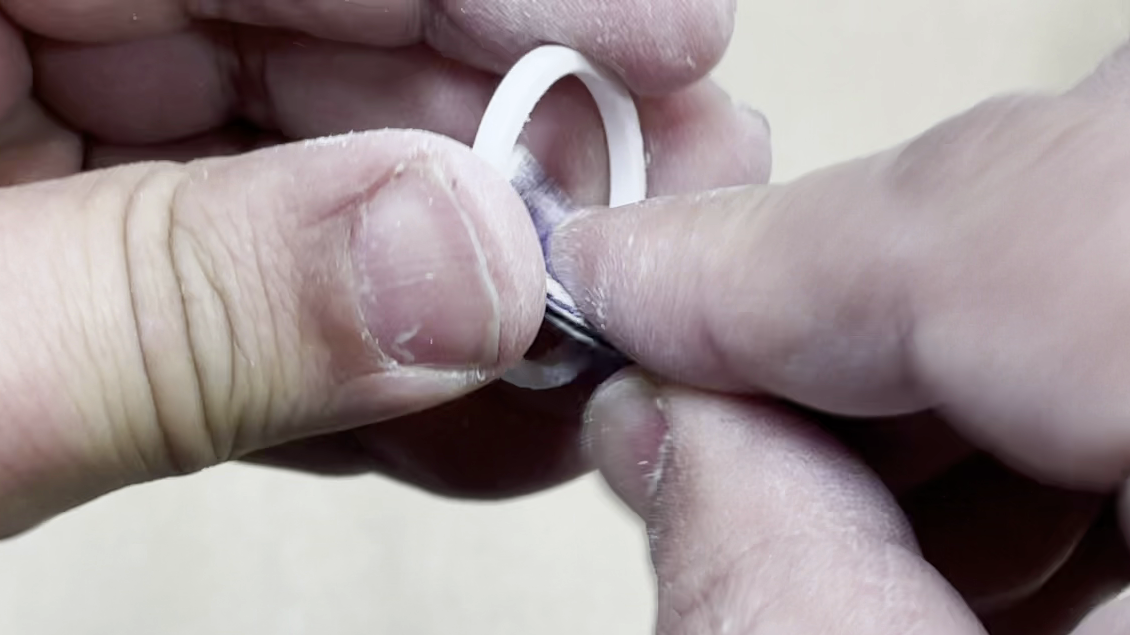
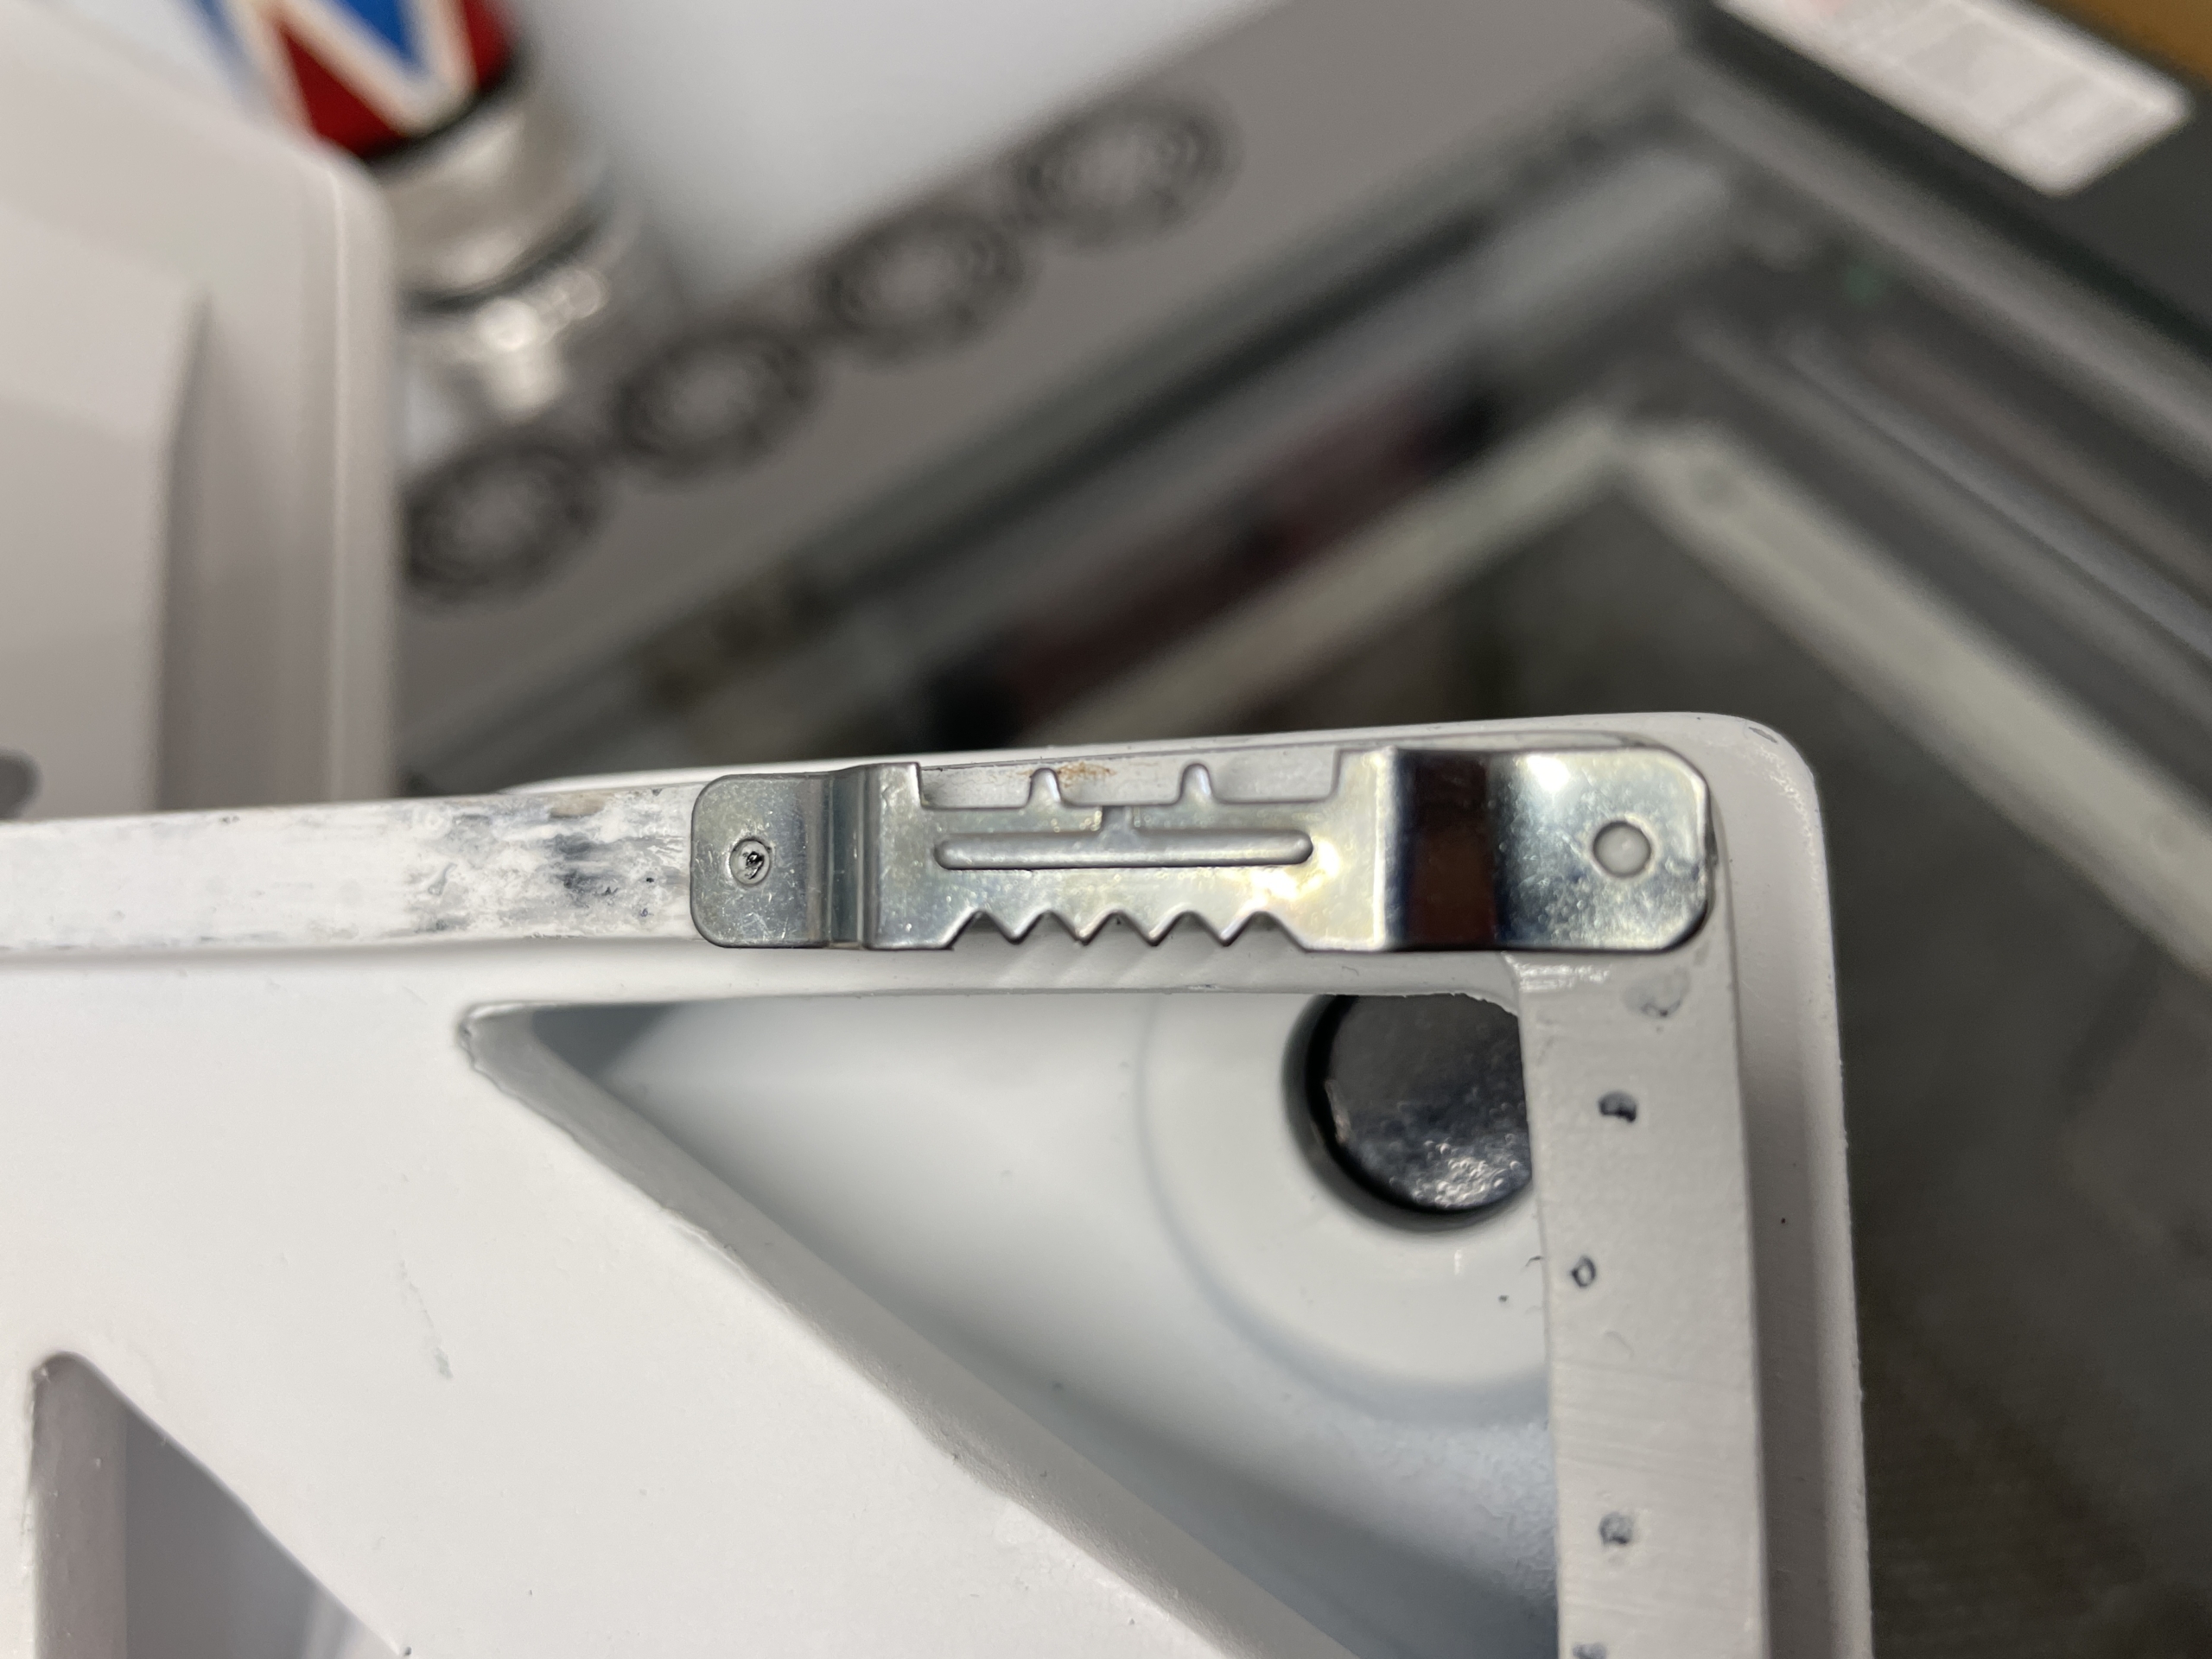
Add the wall hangers to the back. Place one on each side using CA Glue. You can get the nails in if you predrill with a pin vice, but you would want to glue those in anyway and CA is sufficient to hold the weight.

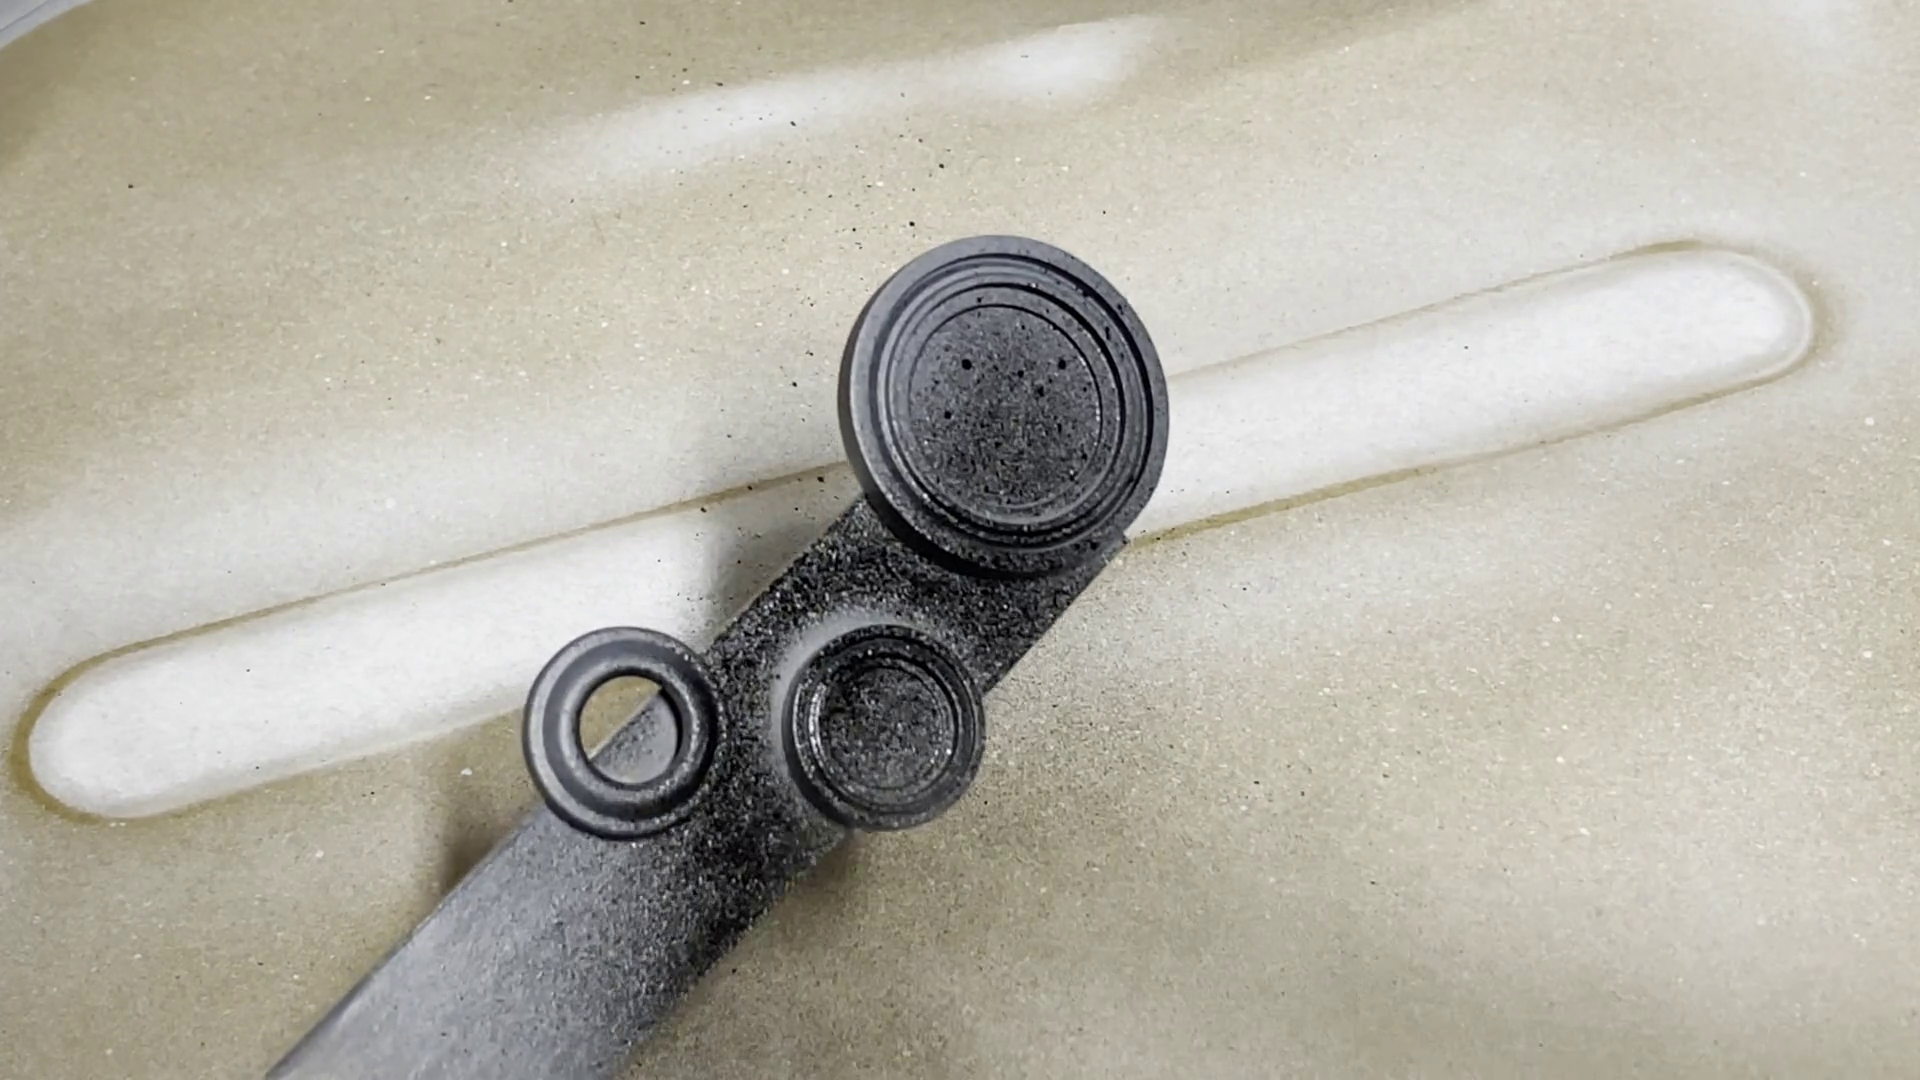
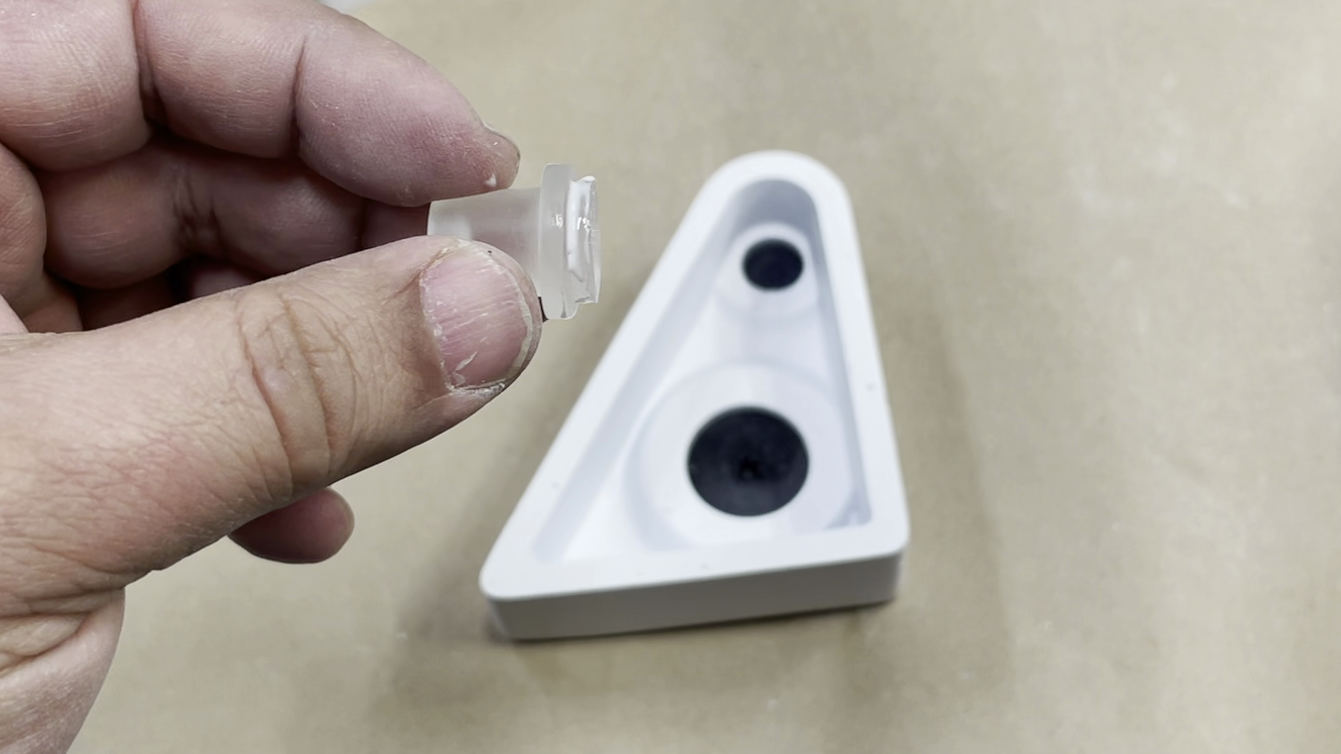
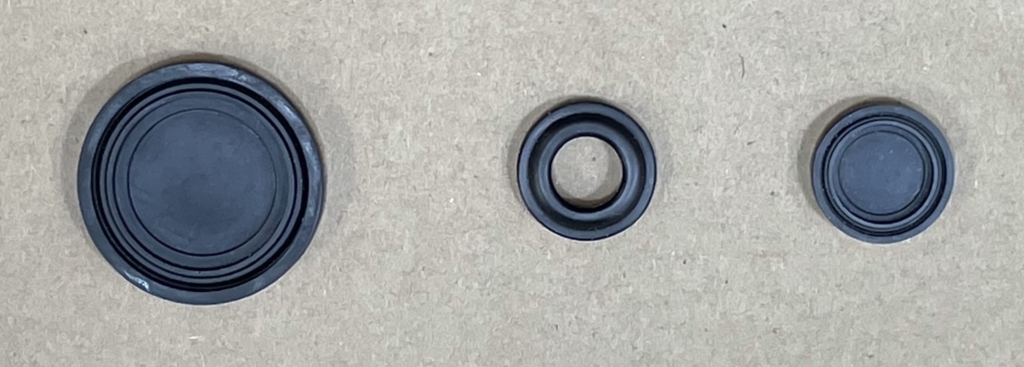
- Building the Camera Pods.
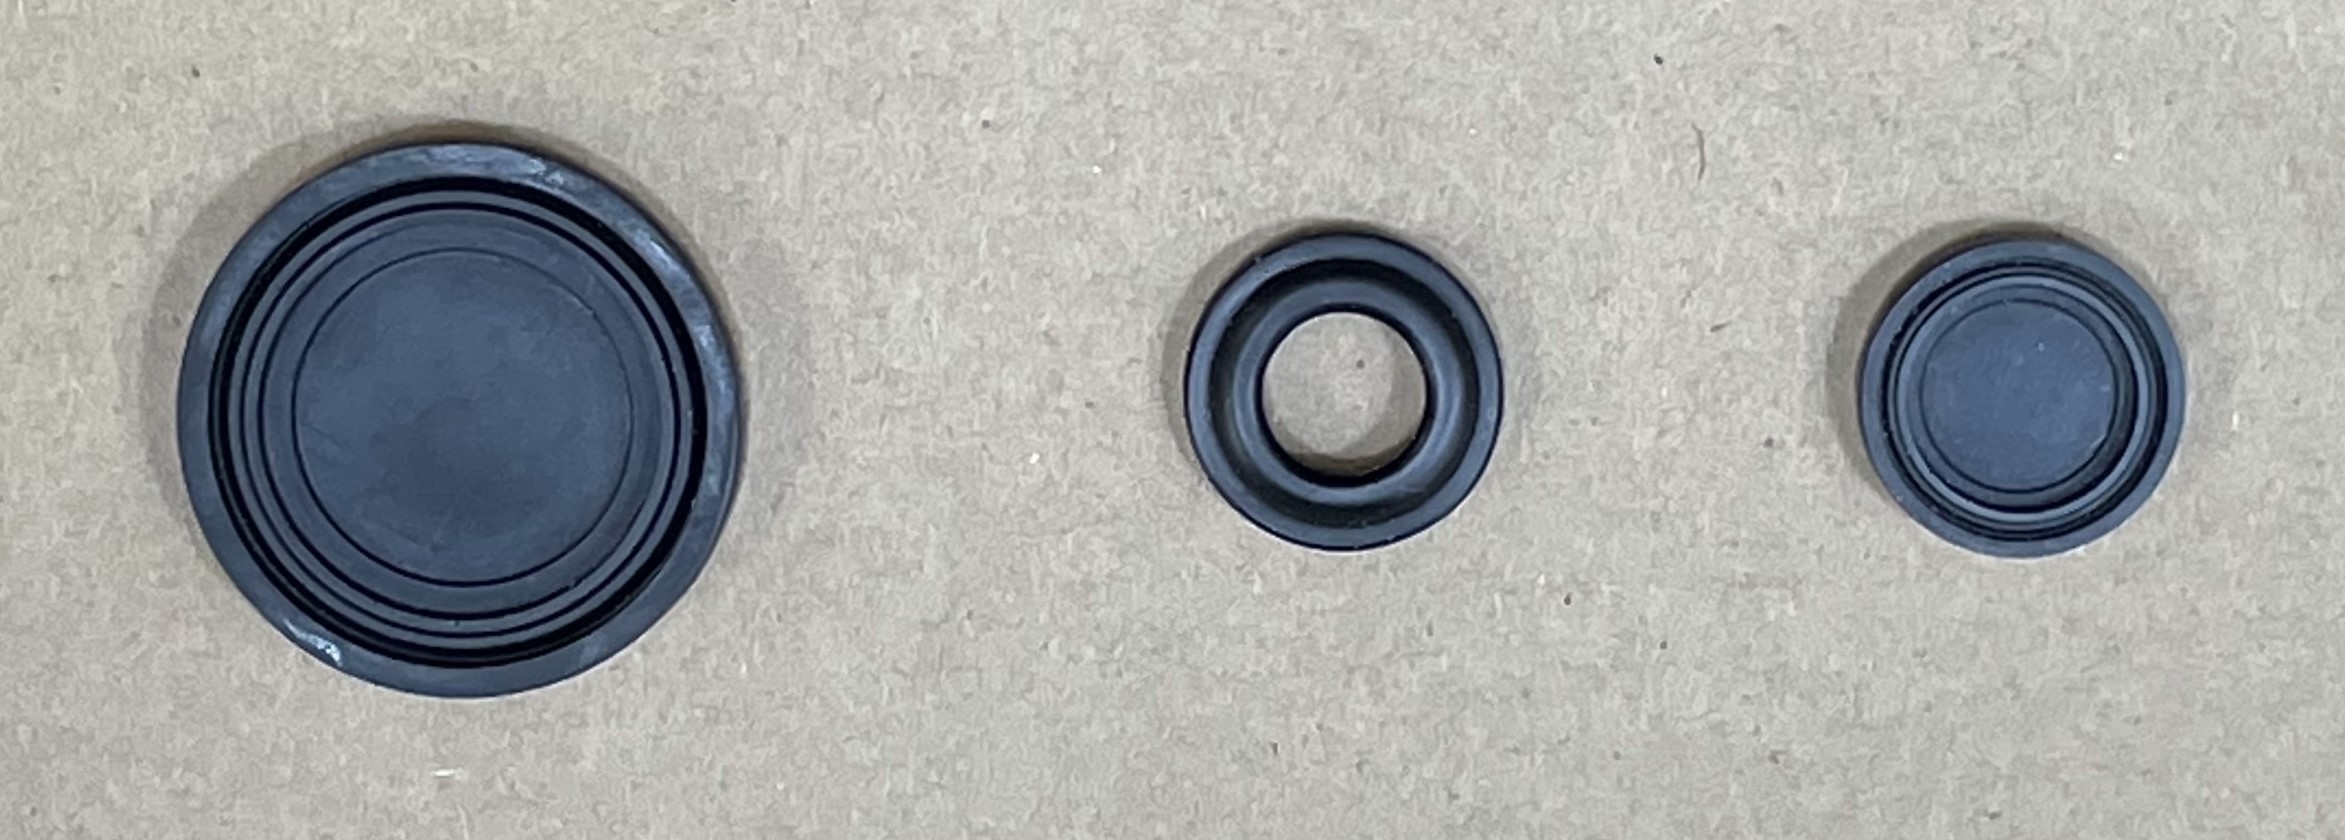
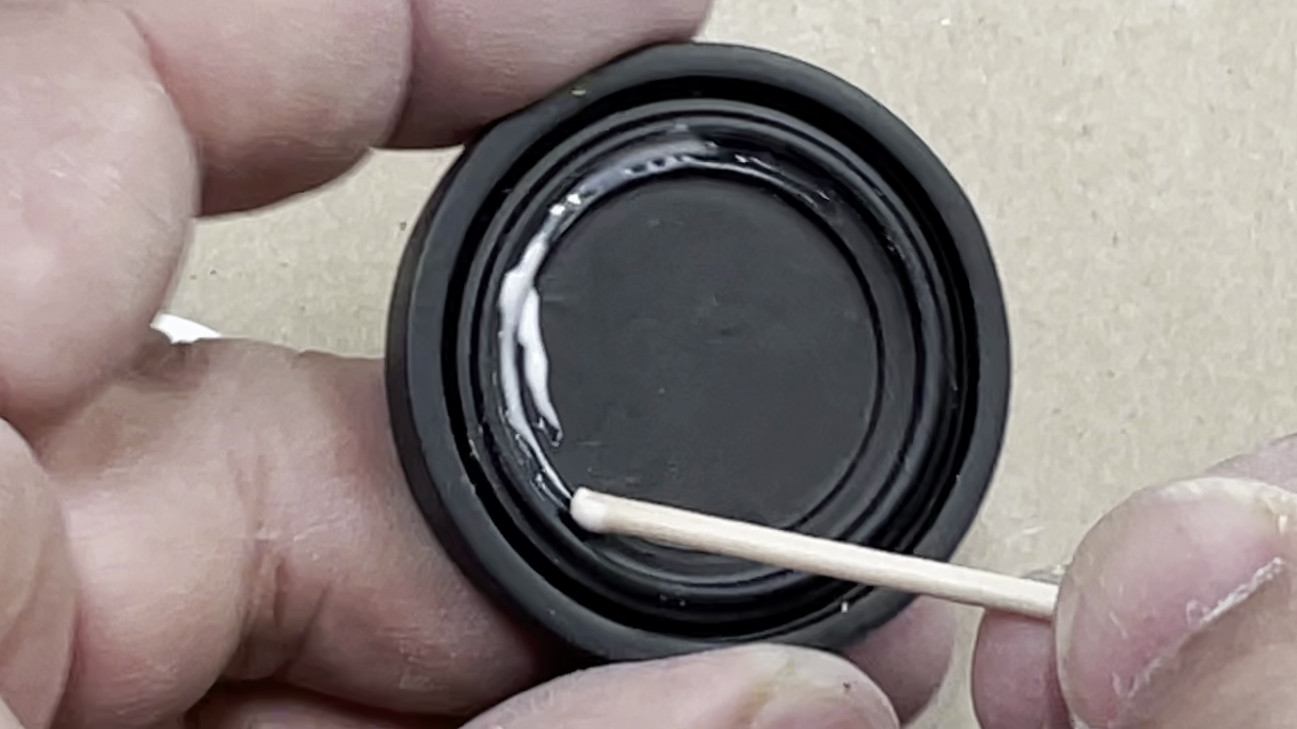
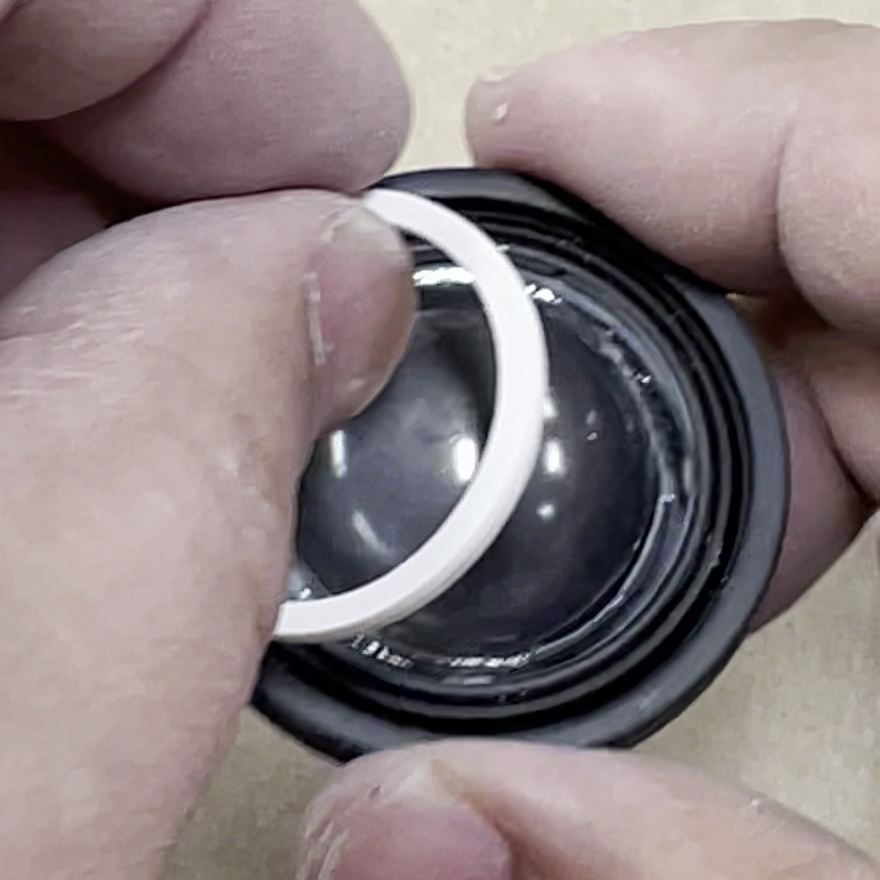
CA Glue (superglue) is famous for clouding clear parts. Use the clear glue solution you’ve chosen, either Elmer’s White Glue, Canopy Glue, or Clear Silicone Glue to the Flat Black Lens Backings.

Press the clear lens into place.

Finally the fit the White Ring on top to secure the piece.
For the lighted lens, lightly add glue from the back of the black piece on the inside of the ring. Then lens will pressure fit in there nicely, so this is just for a bit of insurance.
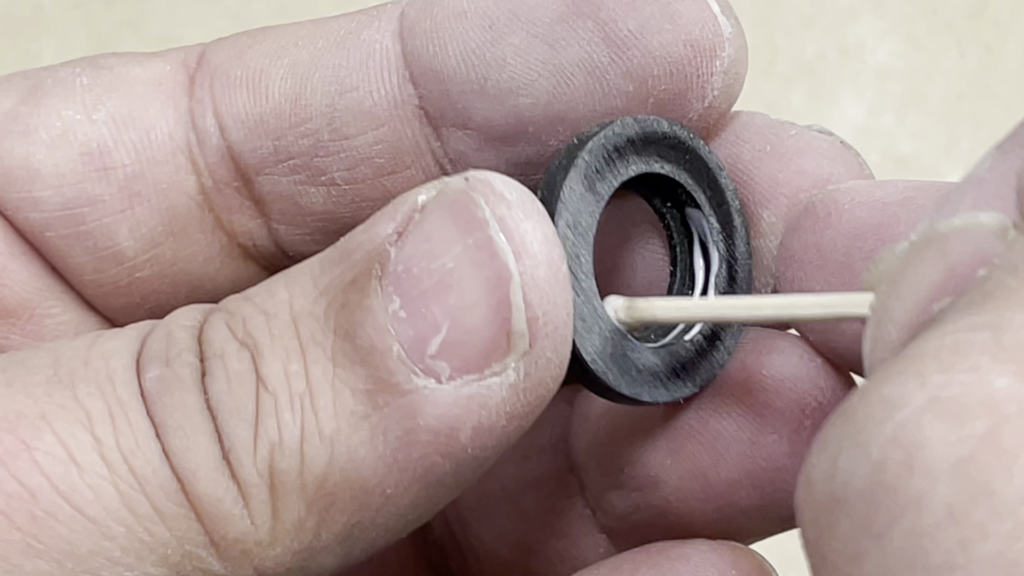
Shiny side facing out. The flat dull side goes towards the inside.

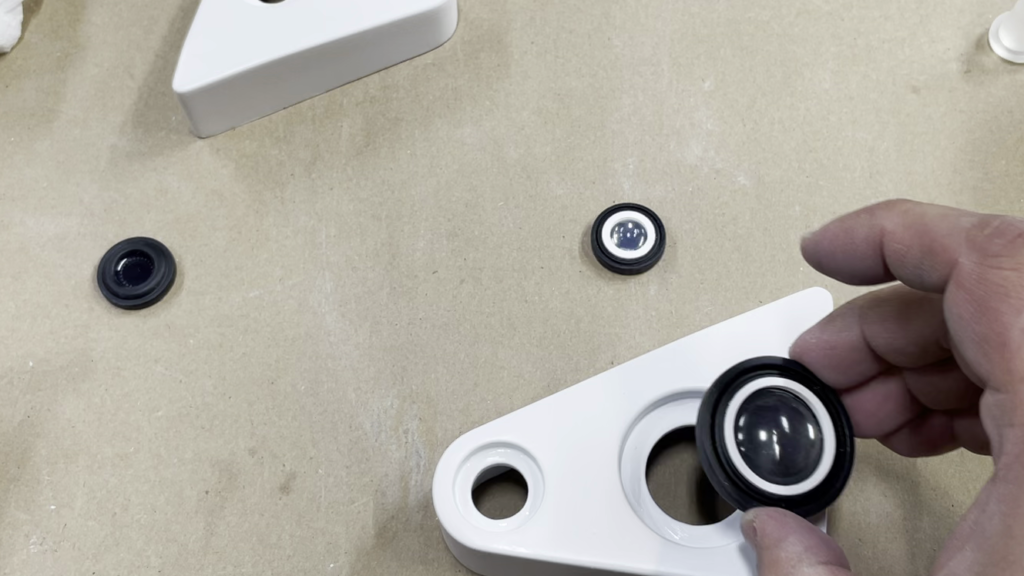
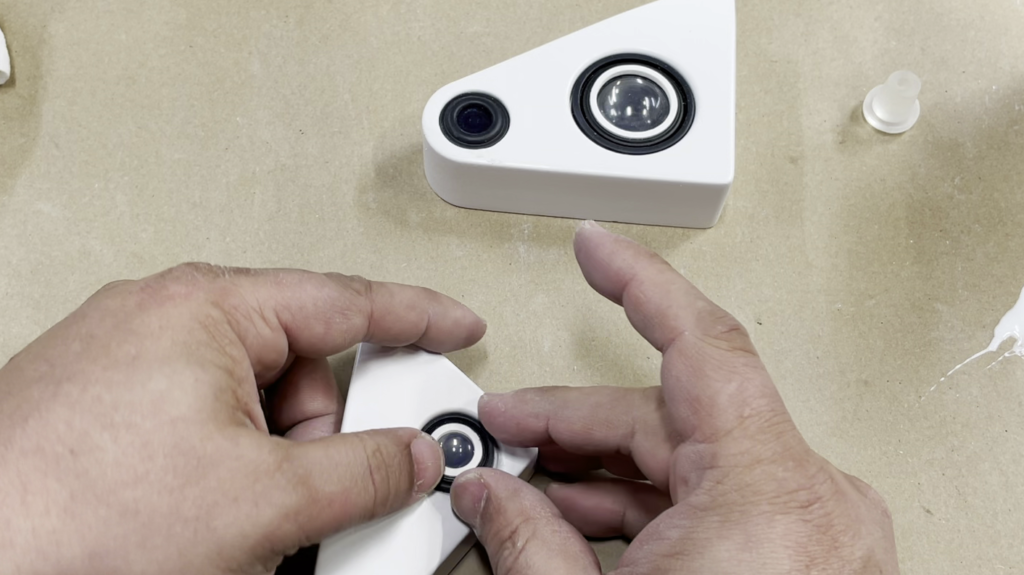
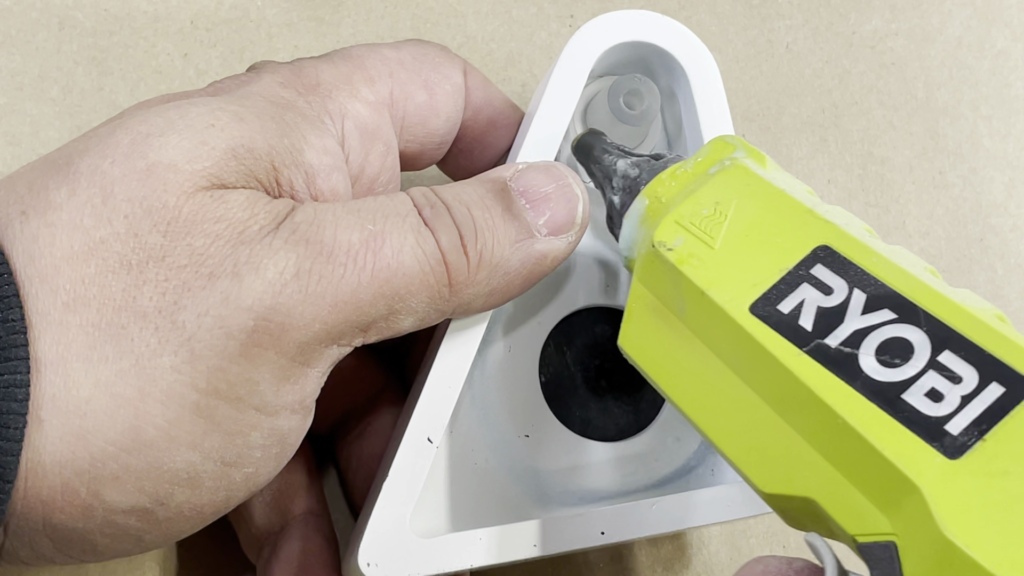
- Glue the lens assemblies into the Pods. Use clear glue to glue in the lighted lens, and use CA glue (superglue) for the remaining two.
 When this is dry turn over the Large Pod, and glue in the LED holder. Use clear glue as pictured and then add hot glue to give it some physical strength.
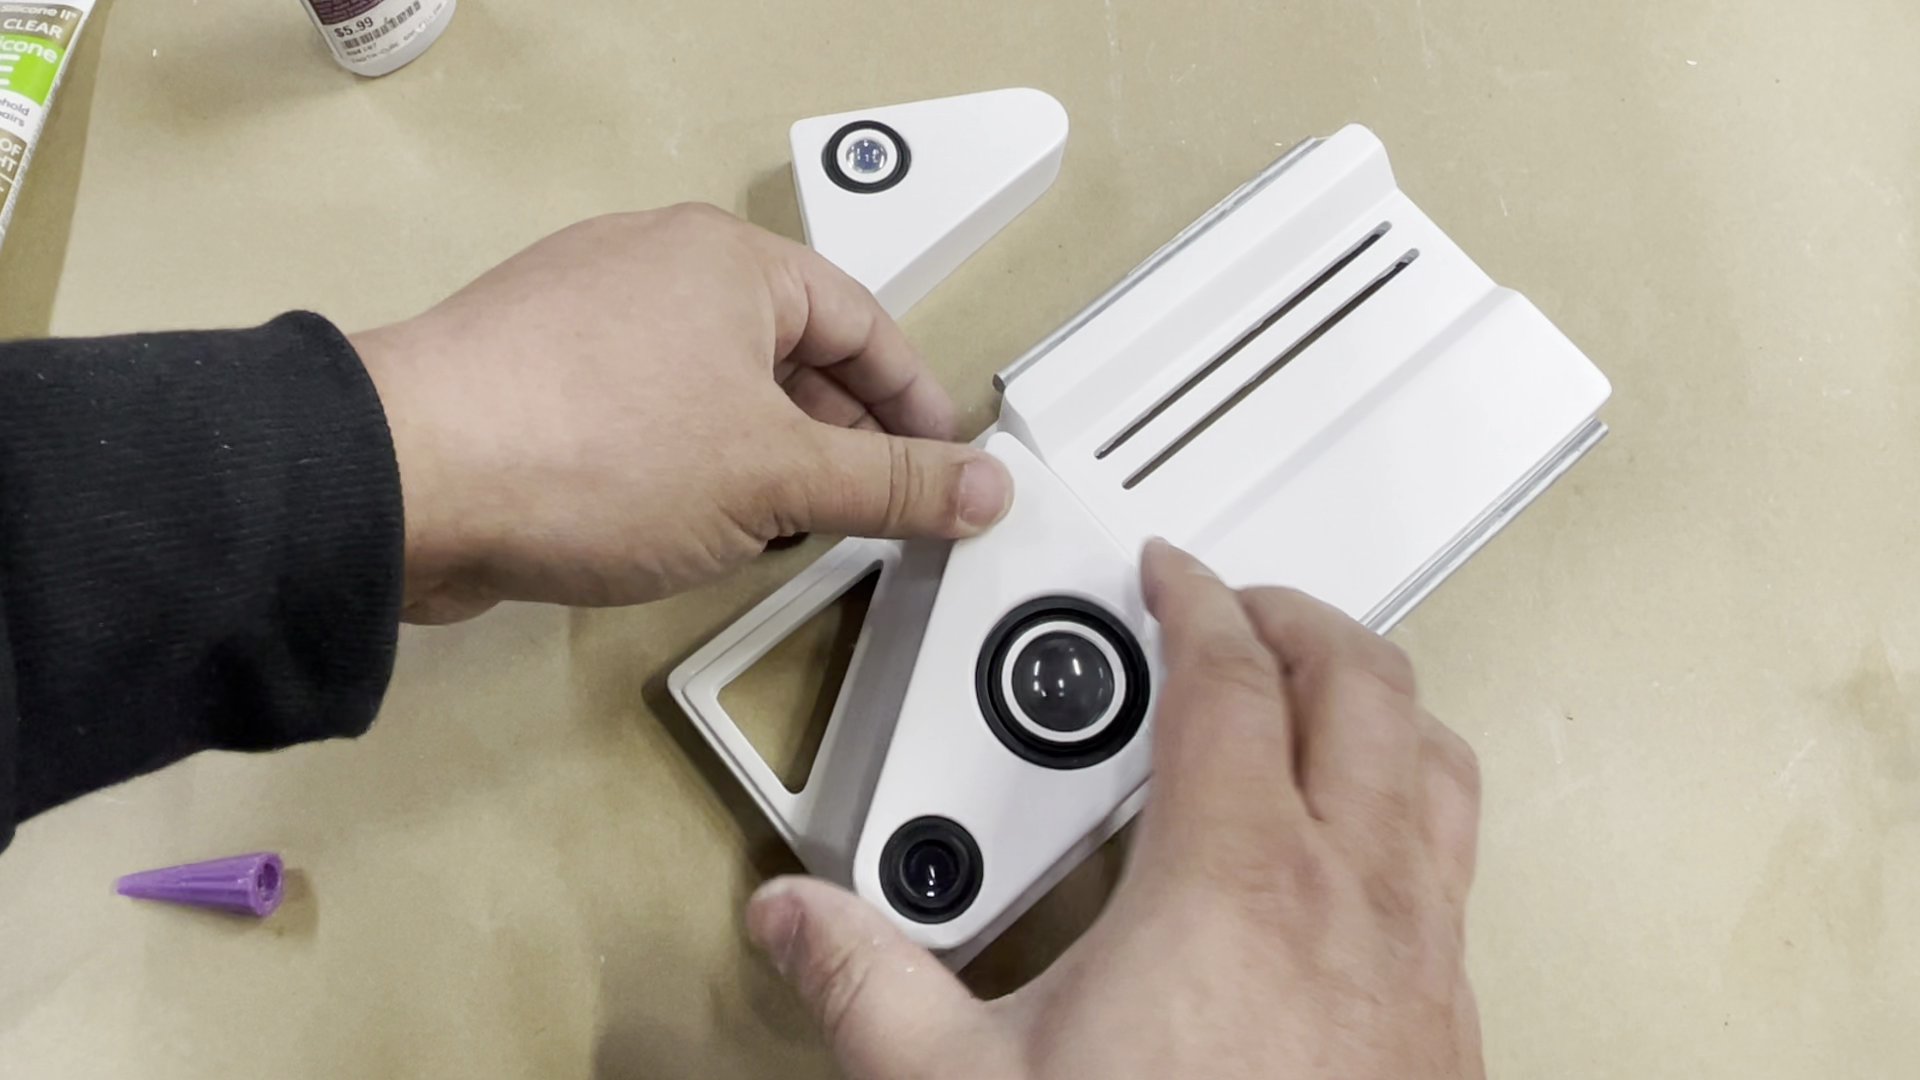
- Use CA glue (superglue) to glue the pods onto the main body.
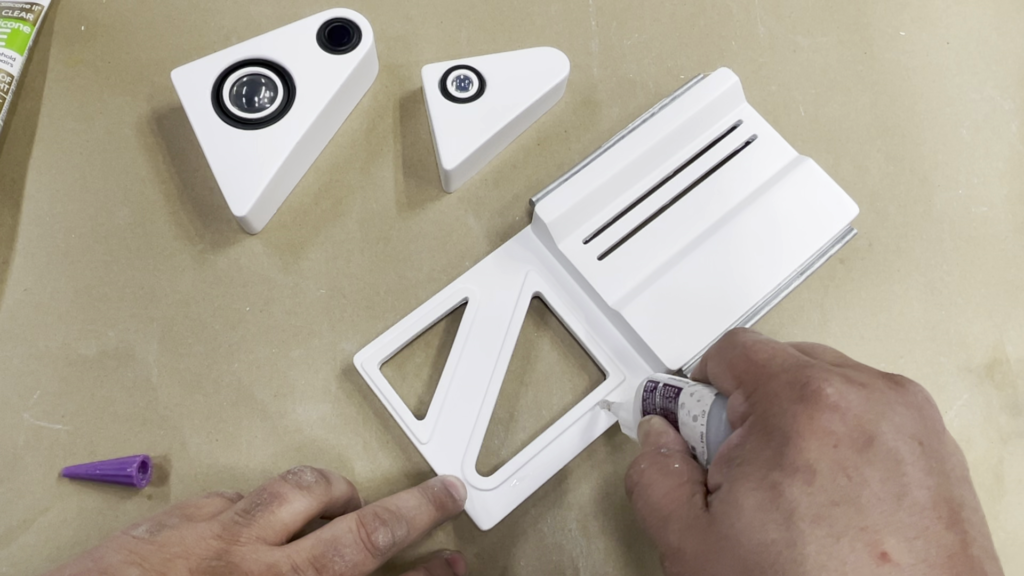

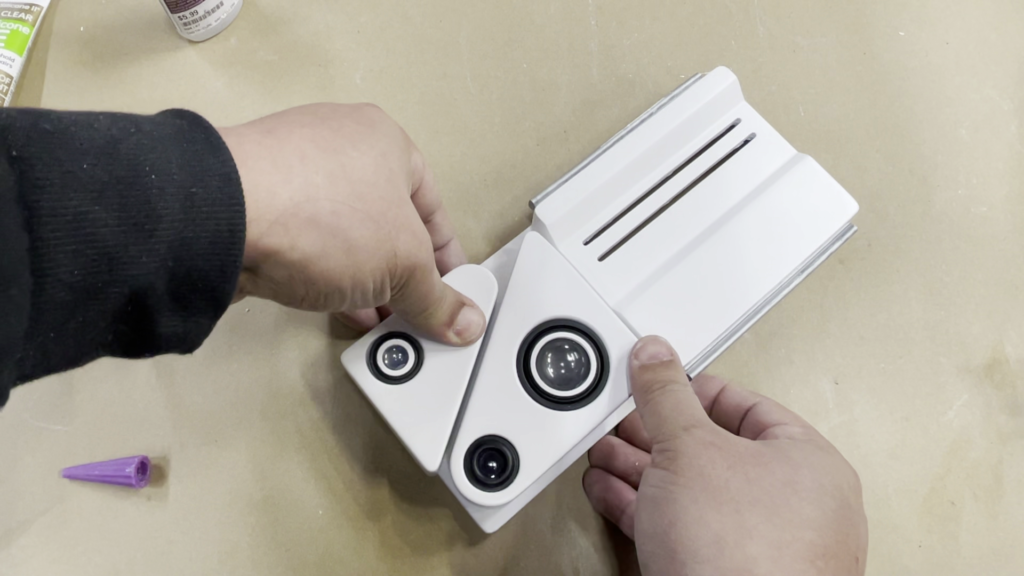
The overhang is intentional and by design. It’s a feature of the original prop.
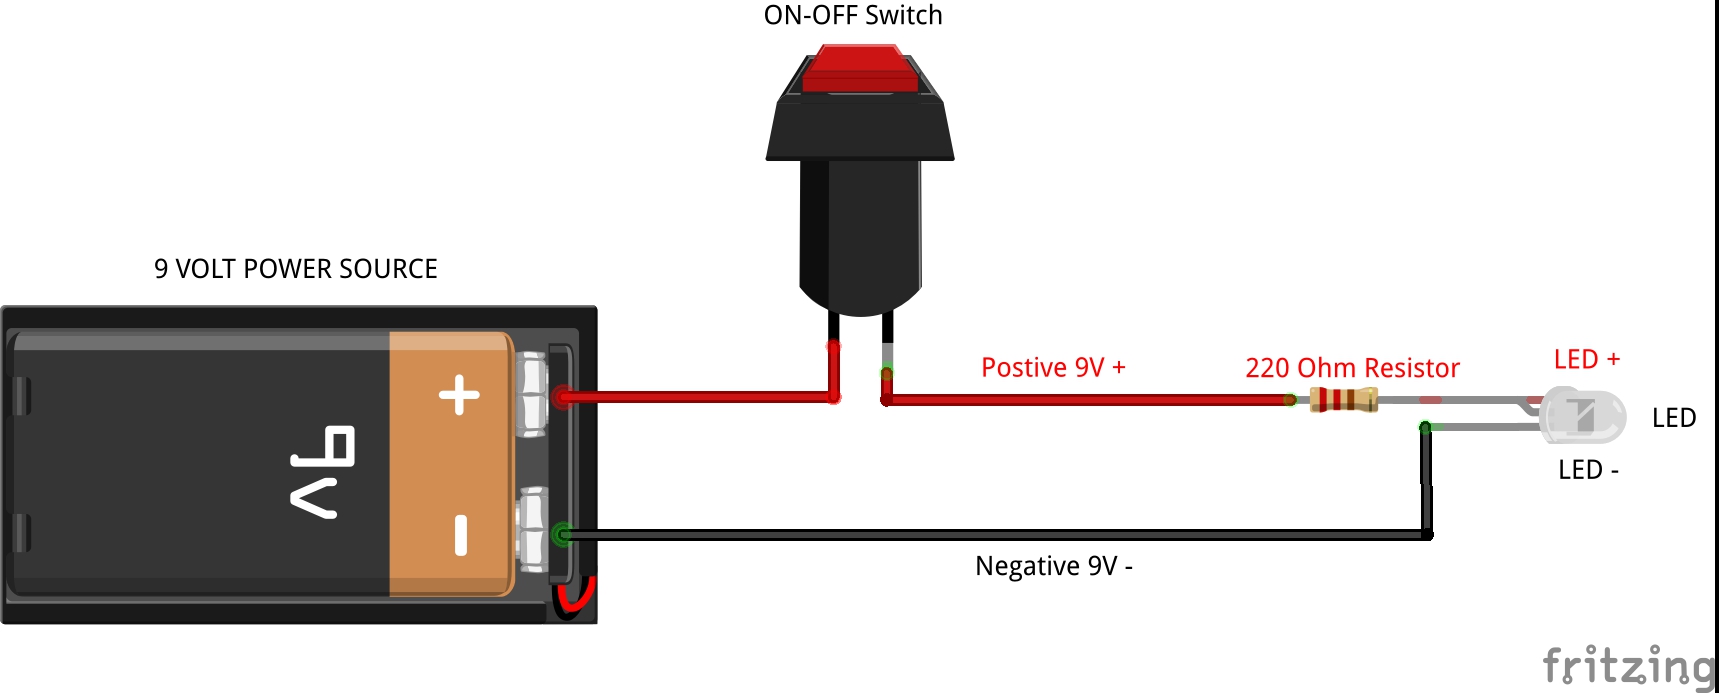
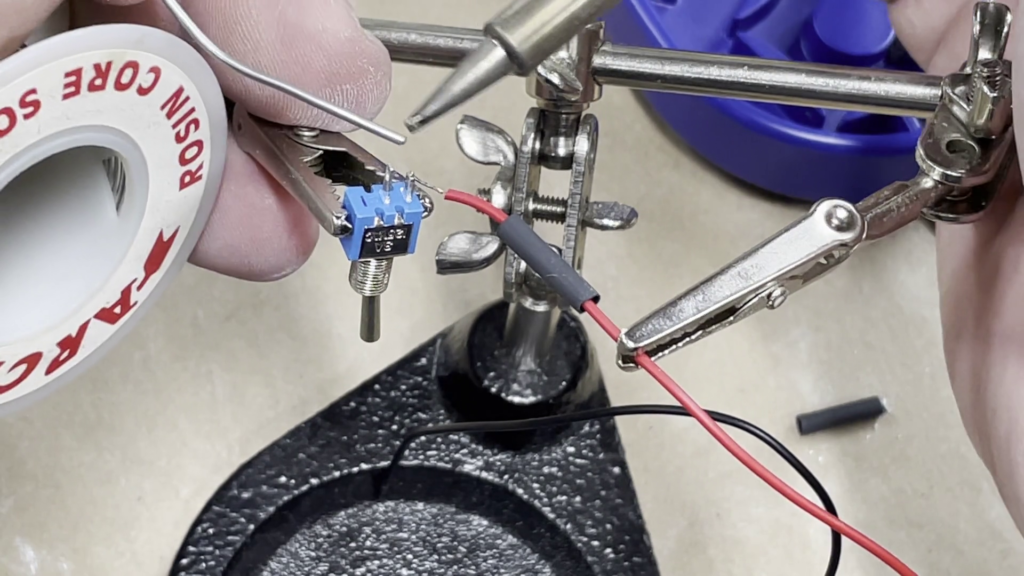
- Soldering the Electronics
There is a little bit of soldering. The LEDs are pre-assembled with a resistor, so really all that is necessary is to solder a switch, and connect the wires to the 9 volt battery connector.
Here is a diagram to follow:

All you have to do is solder the black wires of the LED to the battery connector black wire, and then solder the red wires to each side of the switch.
If you have never done this, here are a couple of videos to guide you. These are VoodooFX electronics so they come with full phone and online support.
Most of this first video is done already, the part we need to pay attention to is how to solder the two wires together:
How to wire and solder a LED with a resistor
This second video is how to wire up a switch, which is our main task.
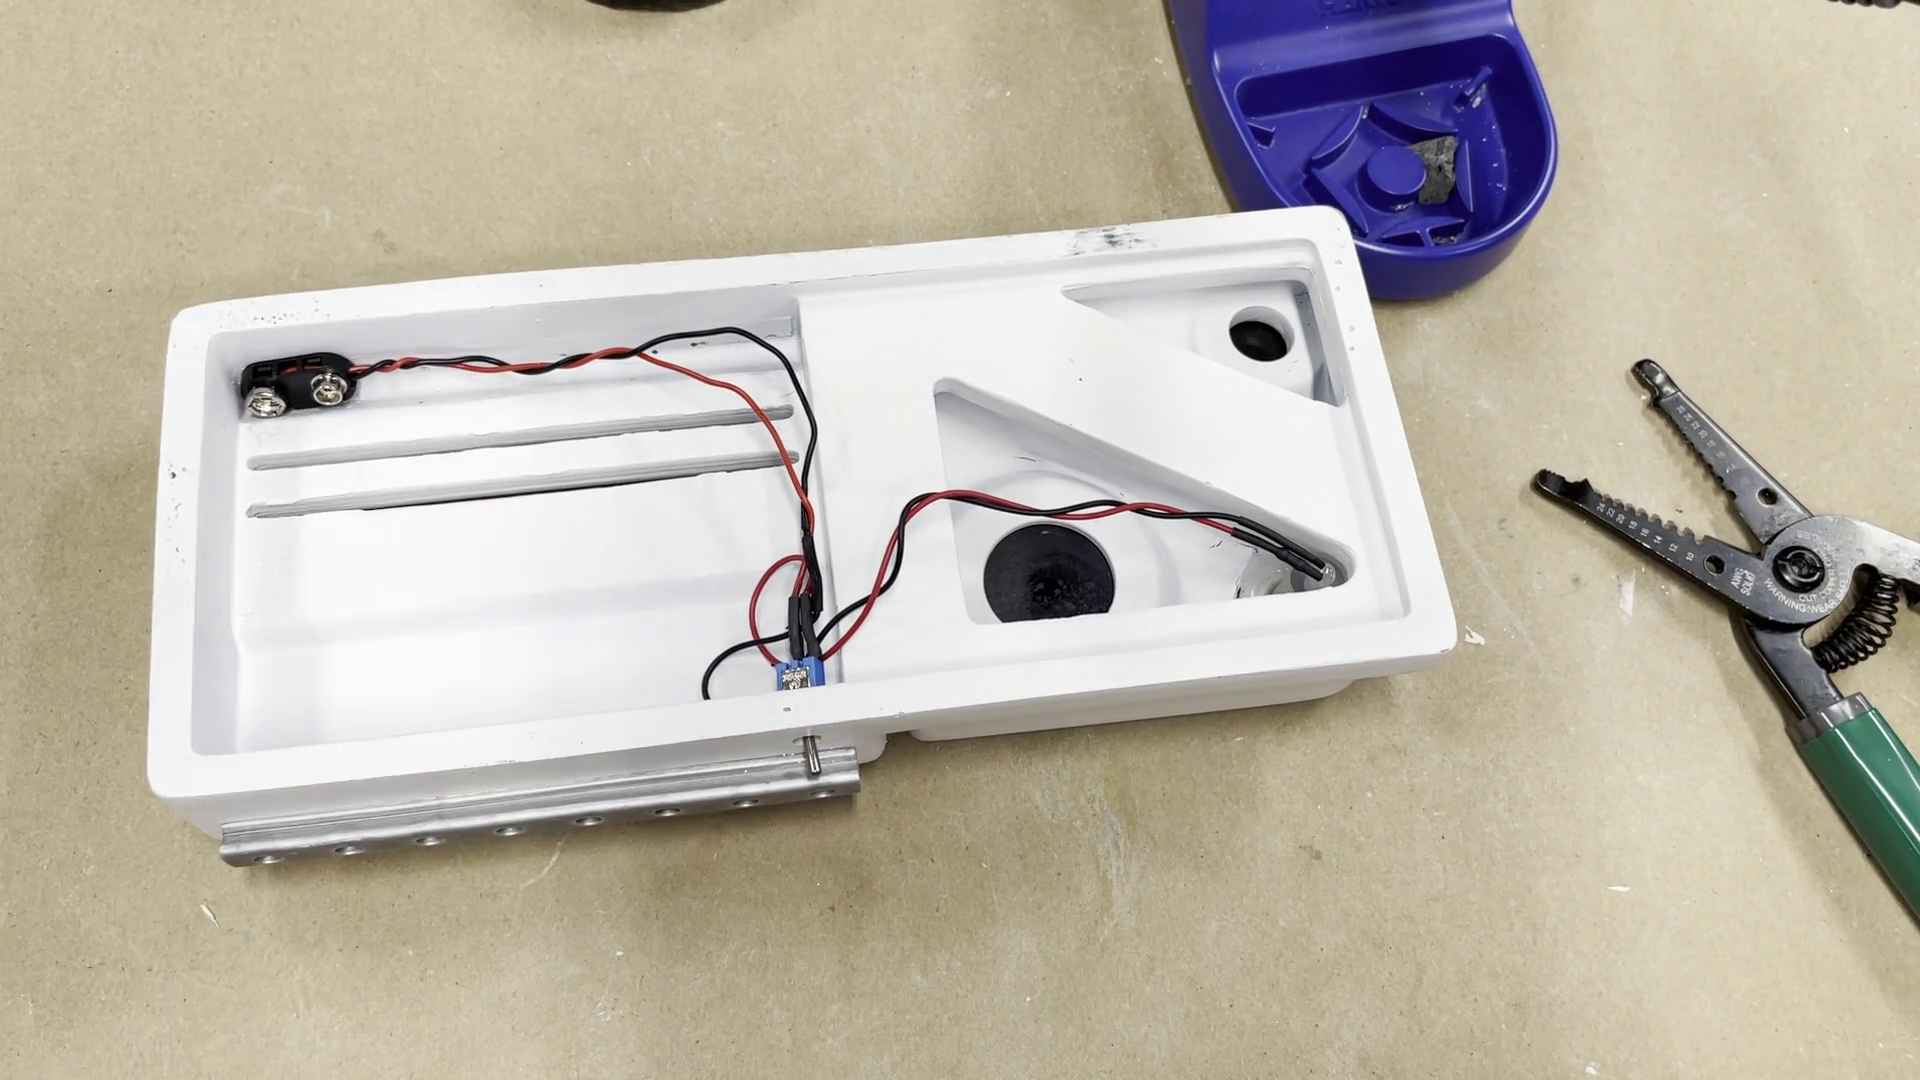
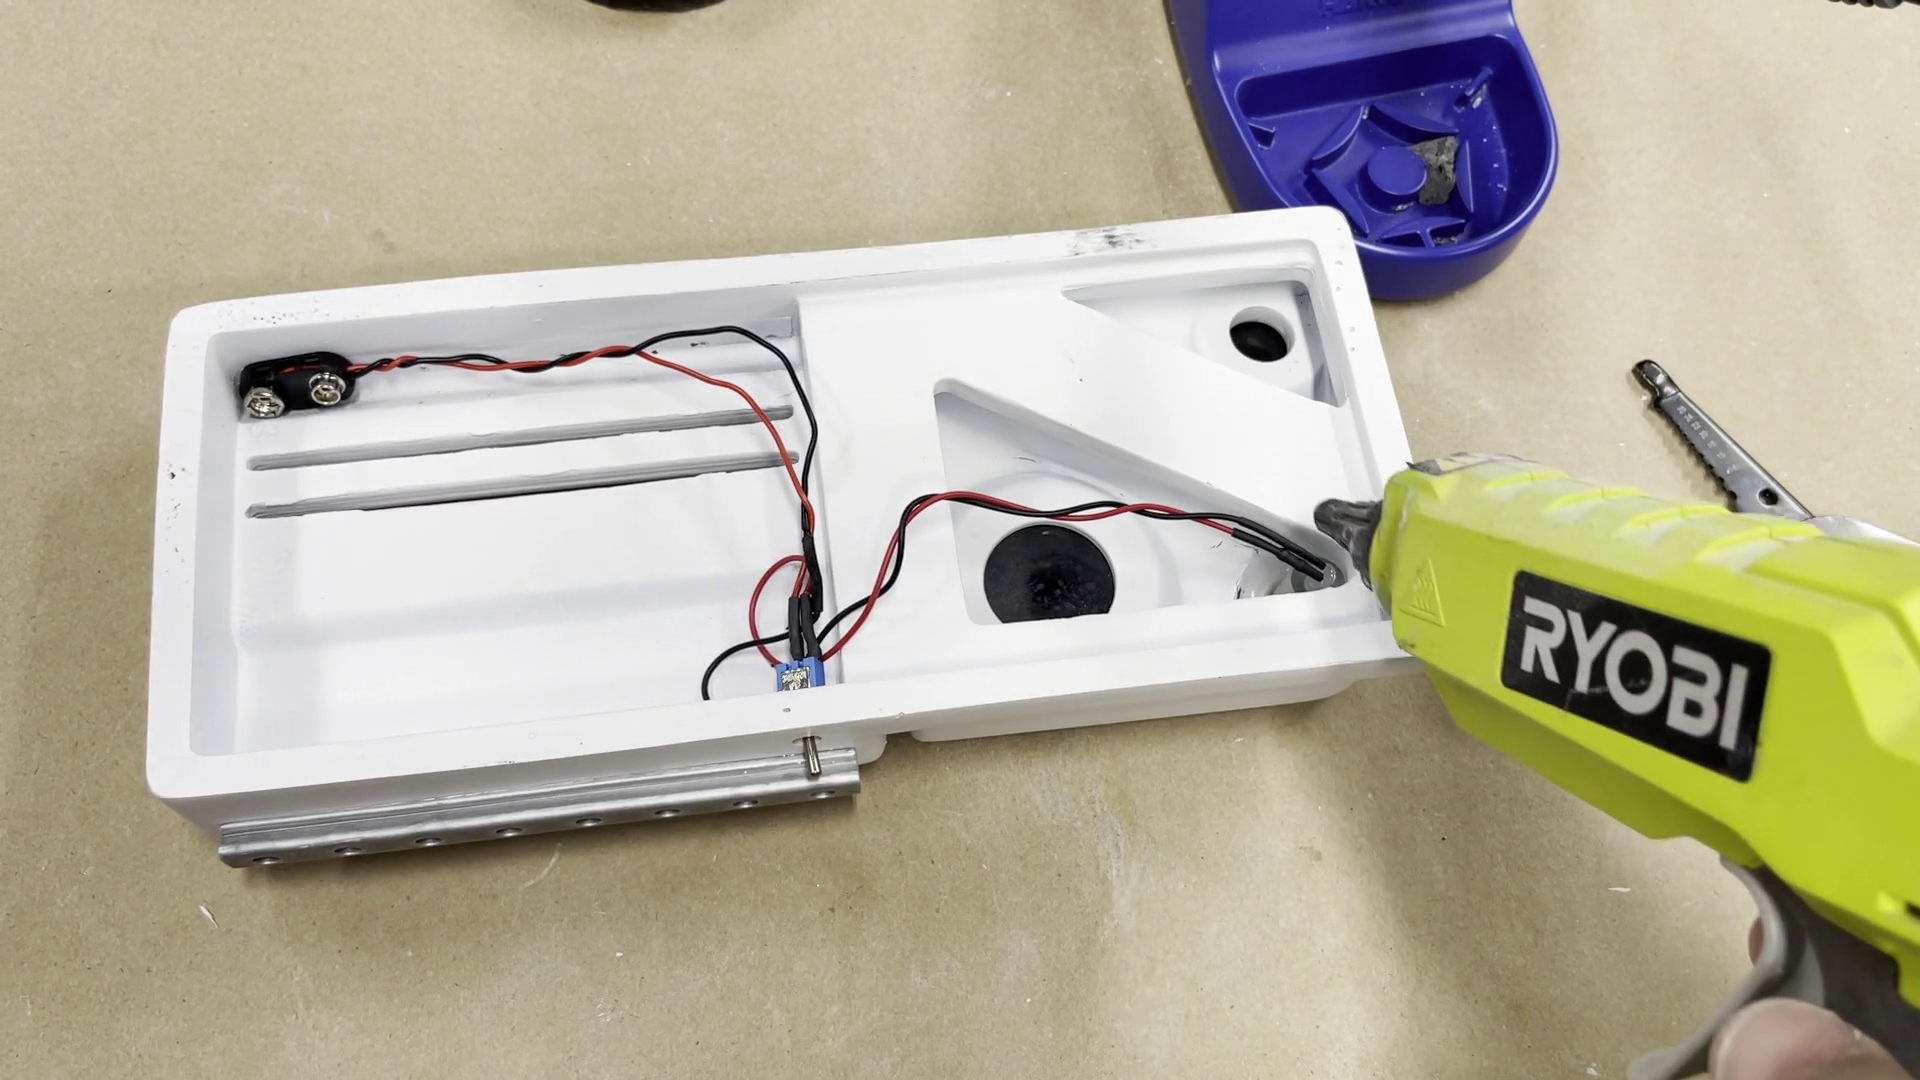
Power On and Off Switching - Once you have your electronics soldered, fit them in the inside of the Baseline as pictured:

Test your soldering by adding a 9 volt battery and turning the switch on.
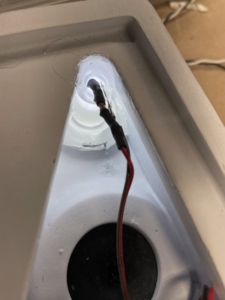
When satisfied, us CA Glue to attach the LED into the LED holder, the switch in the switch hole, and the battery connector some place easy to get to, to change out the battery.
Use some hot glue as a bit of physical insurance.

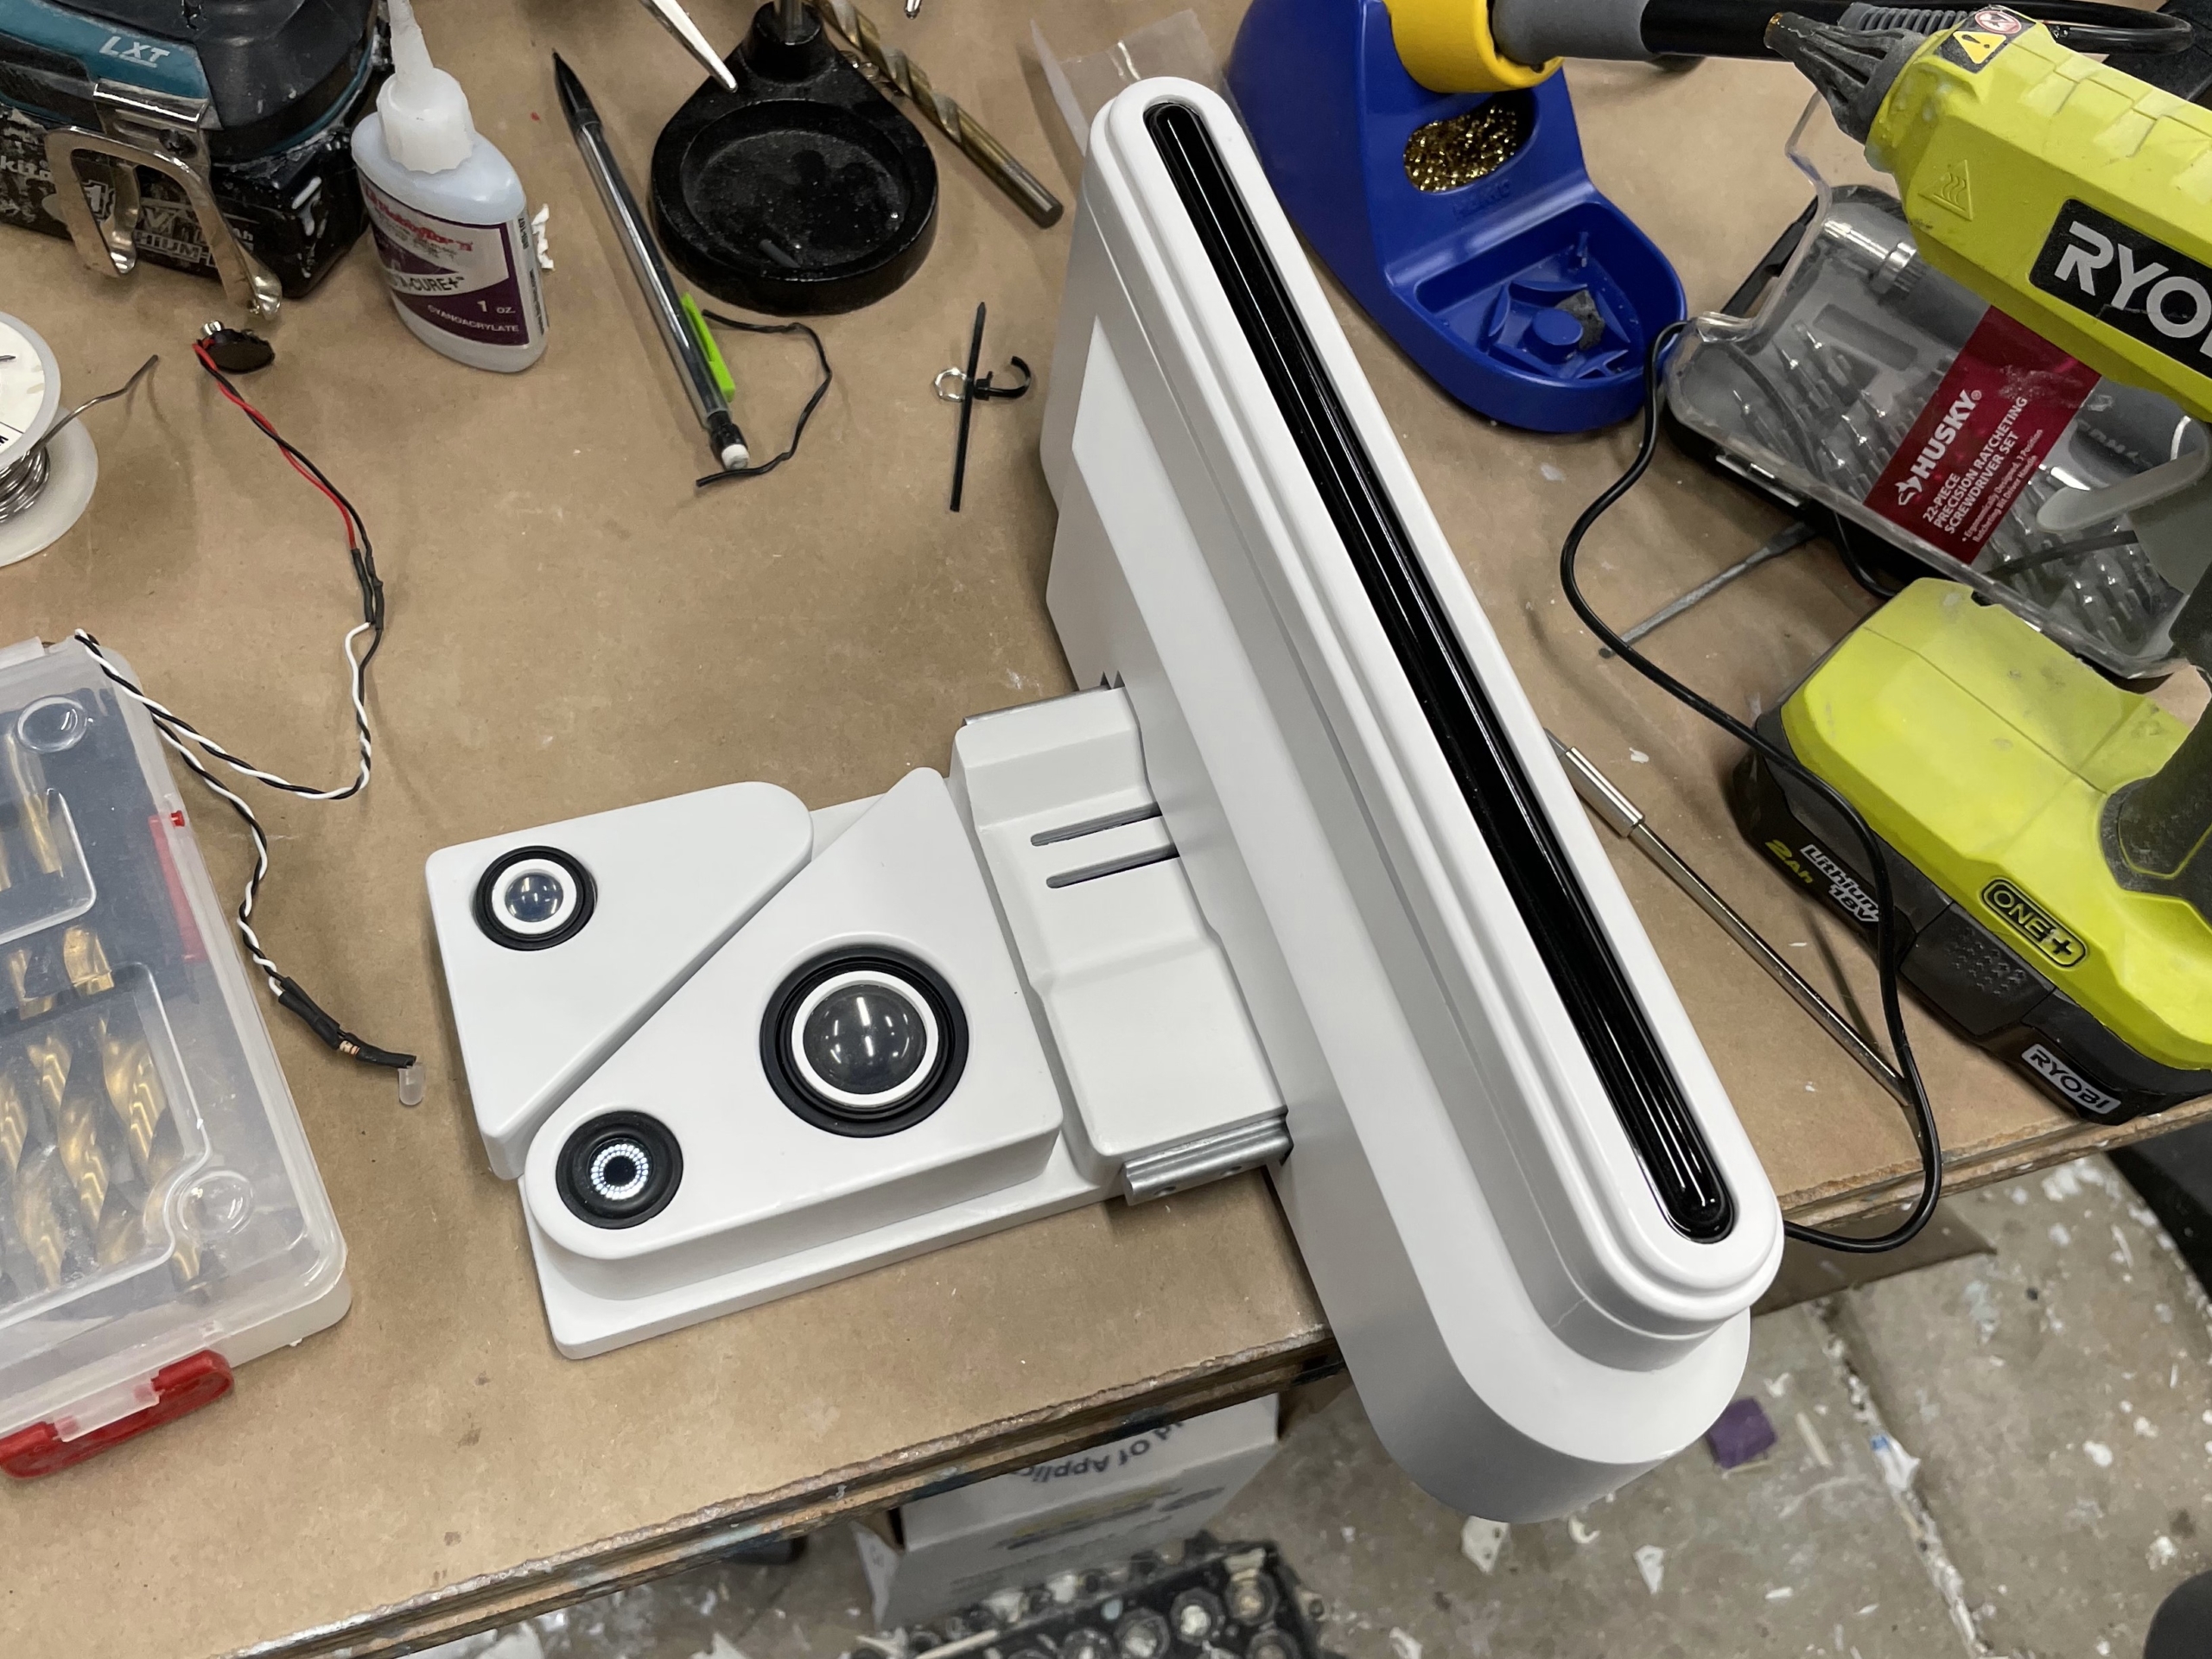
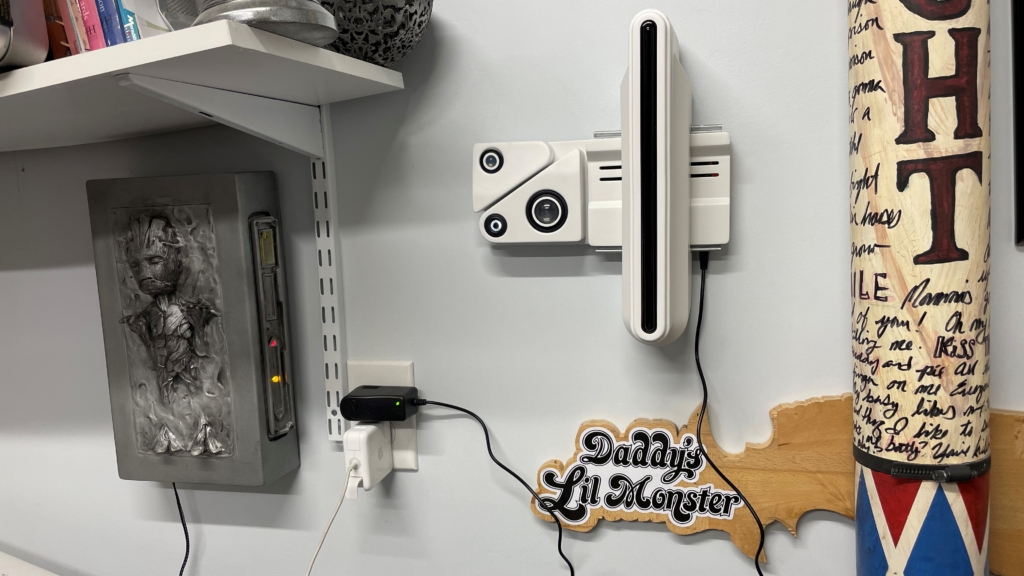
- Finally! Turn your Baseline Scanner over and slide the Scanner onto the rails.
- Put two nails/screws in your wall (use a level). Hang it up and enjoy!
 Thank you