Blade Runner 2049 Baseline Scanner Kit Instructions
Here are the instruction for how to assemble and finish your Blade Runner 2049 Replica Baseline Scanner Kit from Yay Monsters

Here are the instruction for how to assemble and finish your Blade Runner 2049 Replica Baseline Scanner Kit from Yay Monsters
Notes on styrene, watching Twitch while casting.
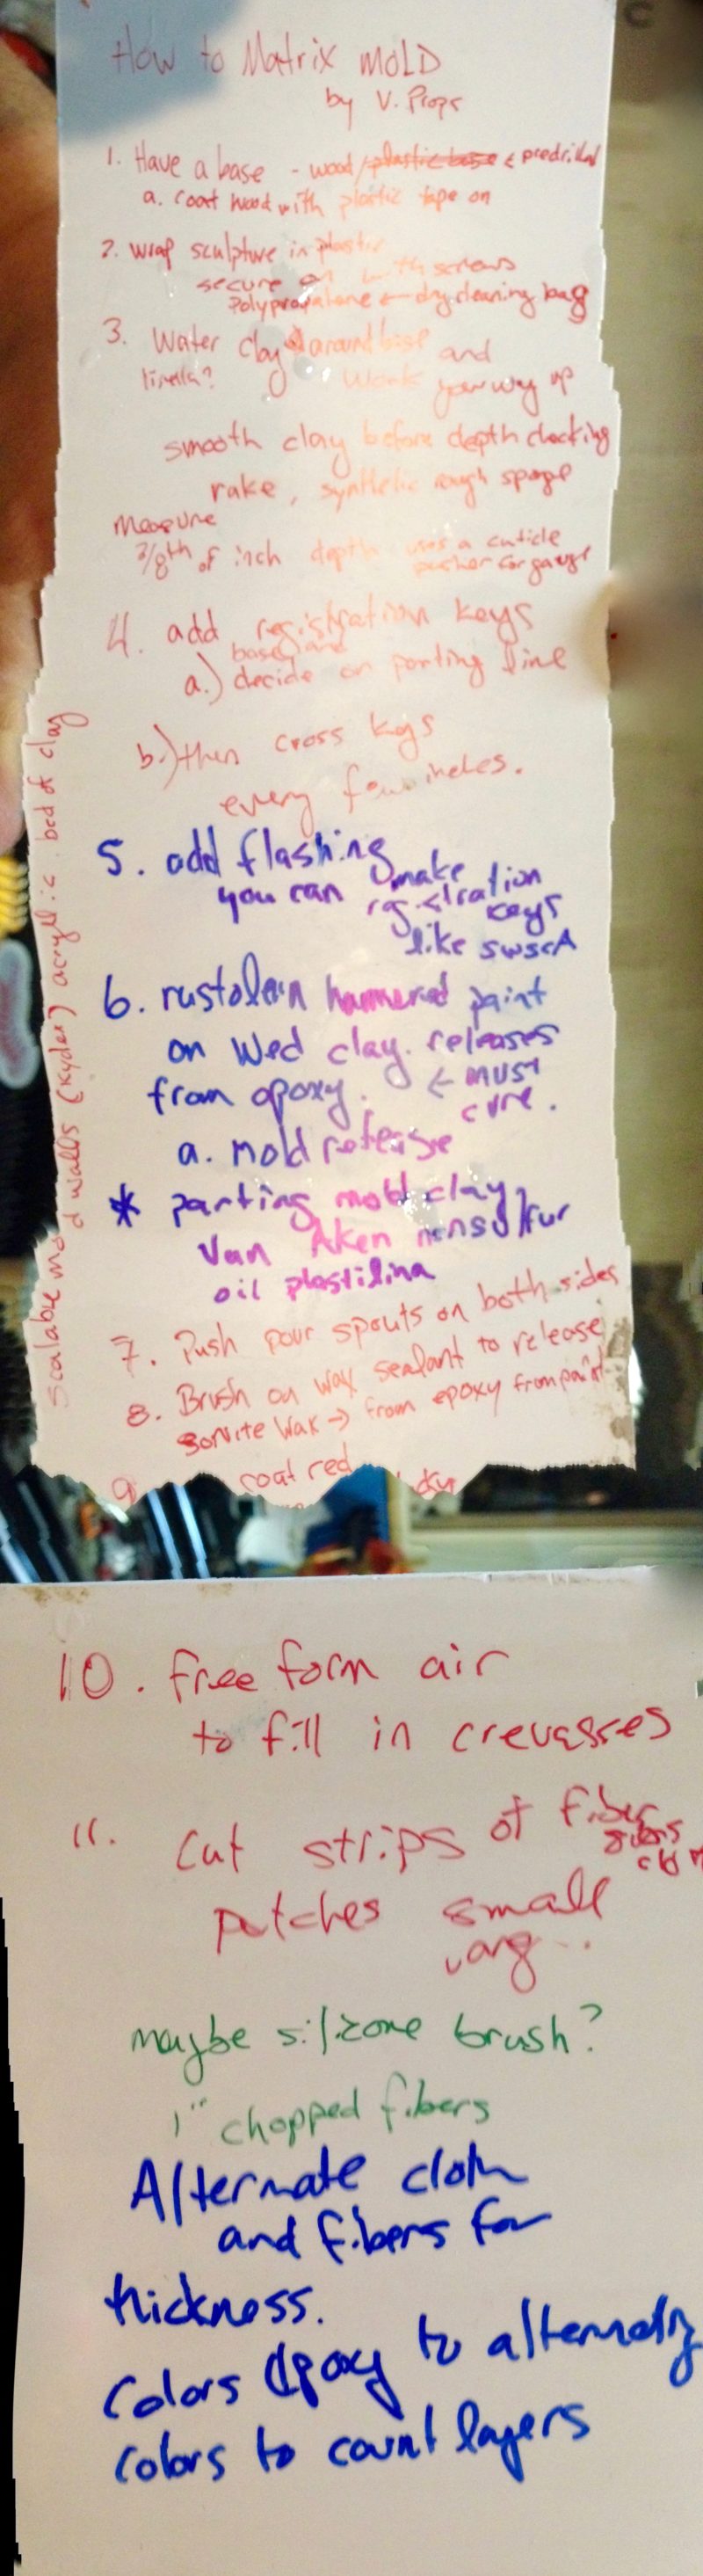
Harrison Krix has always been generous with his knowledge. When he did the Twitch Con Trophy he streamed his process on how to matrix mold.
I’ve watched it three times, but I finally took notes.
You can watch the master at work here: https://www.twitch.tv/volpinprops/v/88101253
Pepakura is a papercraft process that allows you to take a digital 3D object, convert it to a set of flat shapes that you can fold and connect into a 3D object in the real world. It is often then reinforced and built up using automotive body filler, or paper mache and finished into a final product.
In this tutorial, we will learn how to process our pepakura files. These instructions are written for paper fold pdo files, but they can easily be modified for foam builds.
For this project you’ll need:
Pepakura is done in metric measurements. So be prepared to convert to millimeters for everything.
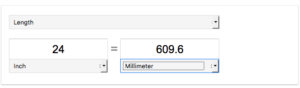
Type: 24 in in mm in your search field and Google will present you with it’s unit converter widget.
Open your file in Pepakura Designer
First thing I do is set the paper size to the size of the laser bed (or material). I use dollar store poster board and I cut it down to my 24″ x 18″ bed.
File > Print and Paper Settings...
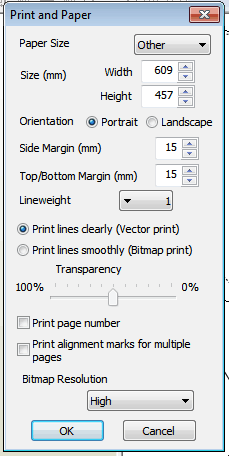
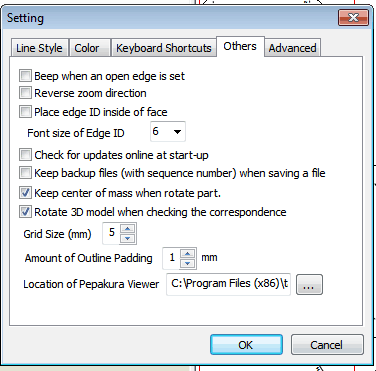
Modify the Other settings as follows:
Settings > Other Settings > Others Tab
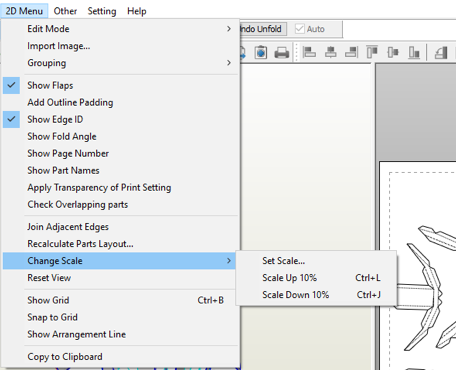
Next set your scaling. It’s good to keep notes because more often then not you’ll get it wrong the first time, or clicking an option will automatically rescale it against your will.
2D Menu > Change Scale > Set Scale...
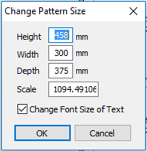
If you don’t know how to size your pep, check here.
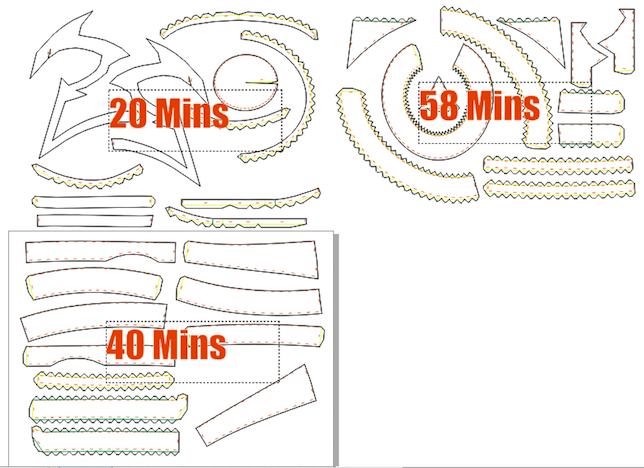
So then you arrange the pieces so they will cut optimally per sheet. Someone probably did it originally for the different sized paper. Now you’ll get to have some fun playing Tetris. Optimize your placement in designer because the app is designed for this.
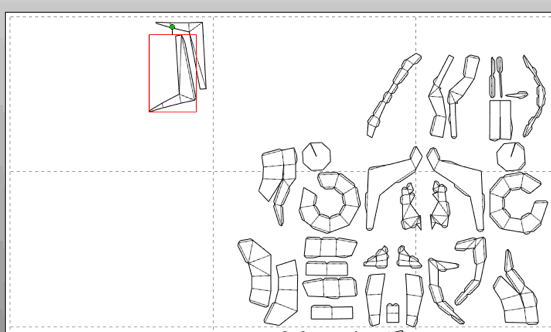
Another factor besides simply fitting the pieces on each sheet of poster board is how many of the numbers there are to raster on the entire board. The more you have to raster, the longer it will take.
I like to save the pdo, in case I need to revisit or make changes, i.e. resize things.
File > Save As...
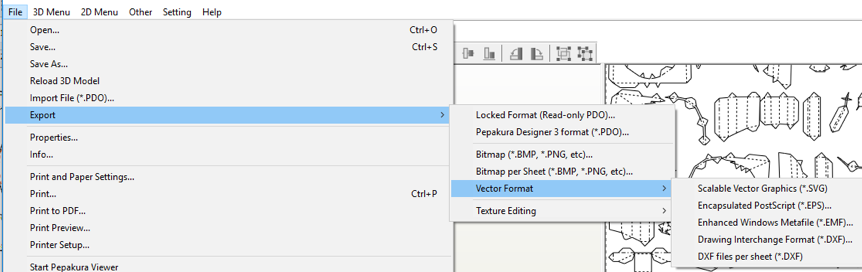
Then Export it as an .eps (Encapsulated PostScript) file.
File > Export > Vector Format > Encapsulated PostScript (*.EPS)...

Open your file in Illustrator and make sure your Document Setup is set for the metric system.
File > Document Setup > Change Bleed and View Options Units: Millimeters
There will be 3 kinds of vector lines you’ll have to change.
Find a cut line and double click on it with the Selection Tool (V) then
Select > Same > Appearance
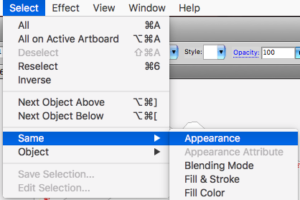
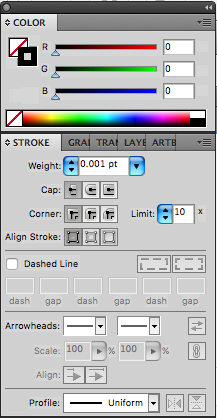
Make sure your outline color is RGB Black, and your stroke is set to .001 pts.
Find a mountain line and double click on it with the Selection Tool (V) and
Select > Same > Appearance
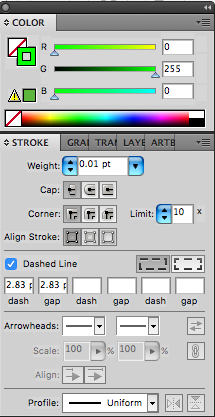
Set your outline color to RGB Green, your stroke .001 pts and the dash line spacing to 2.83 pts, 2.83 pts.
Finally, find a valley line and double click on it with the Selection Tool (V).
Select > Same > Appearance
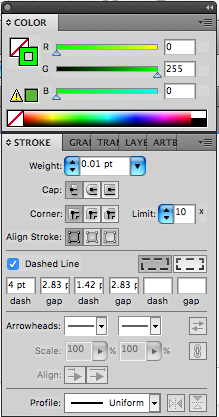
Set your outline color to RGB Green, your stroke .001 pts and the dash line spacing to 4 pts, 2.83 pts, 1.42 pts, 2.83 pts.
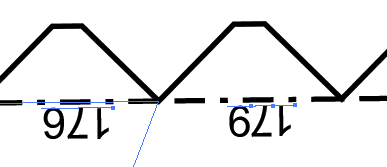
The last thing we have to do is set up the numbers so single click on one of the numbers.
Select > Same > Appearance
It should look like this-
Set the outline color to null and the fill to RGB Red.
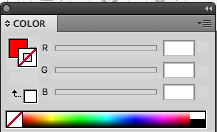
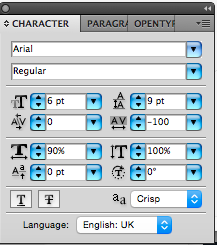
Font: Arial Regular, Size: 6, Leading: 6, Kerning: 0, Tracking: -100, Horizontal Scale: 90% Vertical Scale: 100%,and Baseline Shift: 0
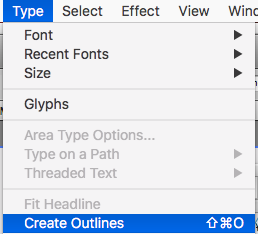
Once this is set we want to make these shapes instead of text vectors since they are going to be rastered anyway.
Type > Create Outlines ⇧⌘O
Save your file, then export to the format for your particular laser cutter.
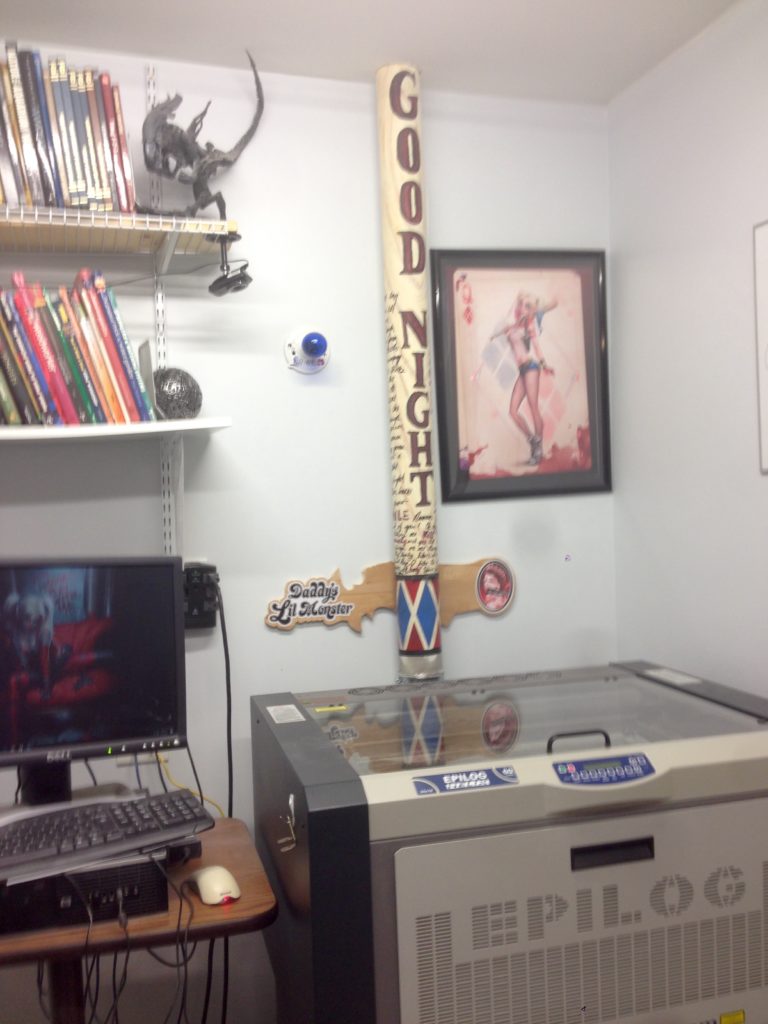
My laser cutter is an Epilog and they are the Cadillac of laser cutters. Mine is named Harley Quinn.
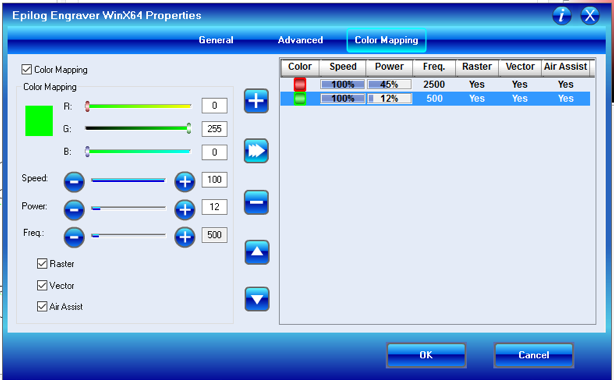
Since this is just poster board, you want it to cut quickly where it needs to cut on the black lines. On the green vector lines (mountain and valley folds) you want it to simply shave off the color layer without cutting through. This leaves the poster board bendable but not easily torn. We use the cut function because it is very quick, and rastering (engraving) all of those lines would take hours. With the numbers, it’s unavoidable you have to raster (engrave) them.
I’ve gone as low as 400 dpi on the rastering, do your test cuts and samples before you run the whole job.
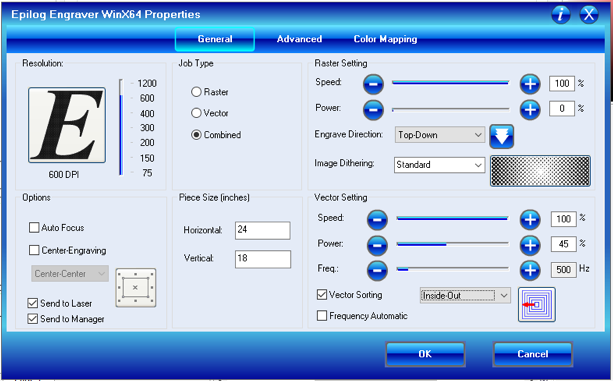
As you can interpret from the settings here, this gives you the cut and raster as compared to the cut line settings above.
In the end, you can use a laser cutter to save an incredible amount of time when prototyping. I’ve often not sized correctly and it didn’t matter because I could just re-run it. So whether it’s the old style paper and bondo or eva foam, you can use these techniques and instructions to quickly process your pep files and get them into the real world.
Happy making!
Learn how to size a helmet for pepakura and you can use this method to size the rest of your armor. Watching a lot of cosplayers, the really great ones are quickly building without patterns and models. Before you can freehand some original foam armor in time for a movie premier opening, you’re gonna have learn the basics.
I learned most of what I know about pep from the 405th Infantry Division. It is a fantastic community and I highly recommend you go to the source. This mostly a post so in case I forget, I don’t have to dig around again.
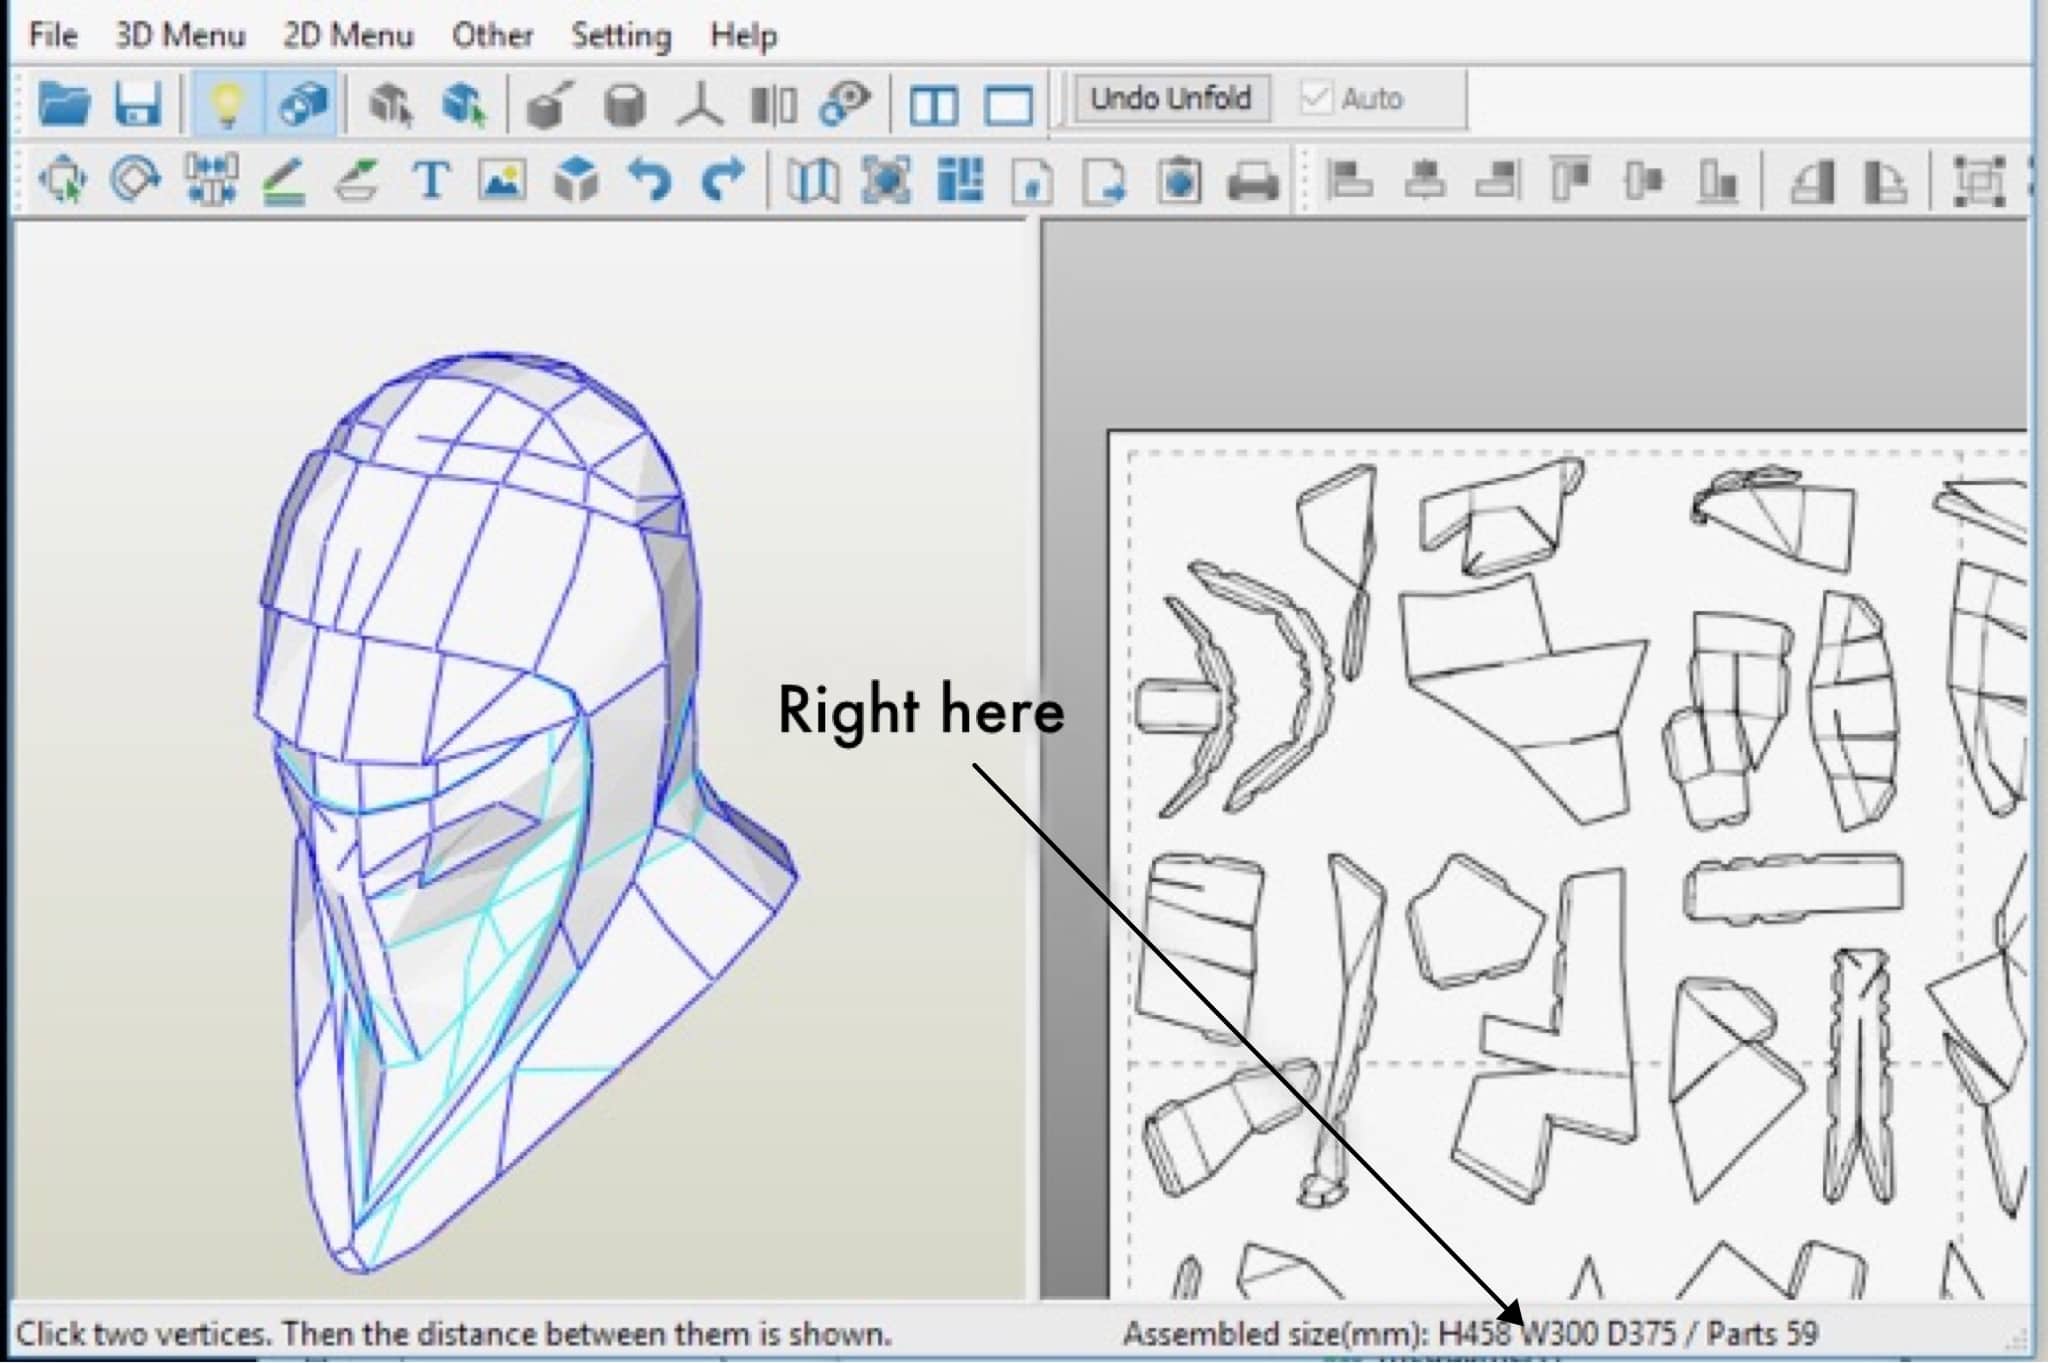
Open your file in Pepakura Designer.
At the bottom of the 2D Panel you’ll see the total measurement in centimeters.
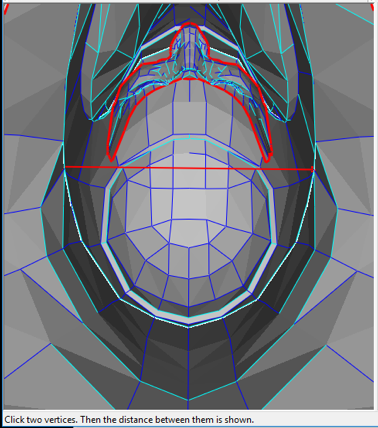
In the 2D panel, Right click and a menu will appear > Choose Measure Distance between Two Points
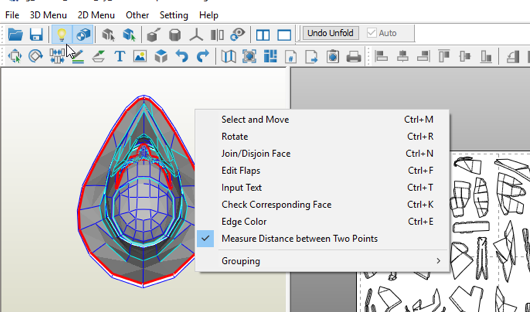
Click both ends of the opening you’re trying to measure.
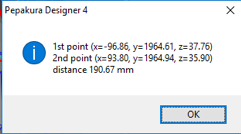
With both of these measurements you can start determining if this is going to fit your head.