

How to Matrix Mold Like Harrison Part 1
Notes on styrene, watching Twitch while casting.
Harrison Krix has always been generous with his knowledge. When he did the Twitch Con Trophy he streamed his process on how to matrix mold.
I’ve watched it three times, but I finally took notes.
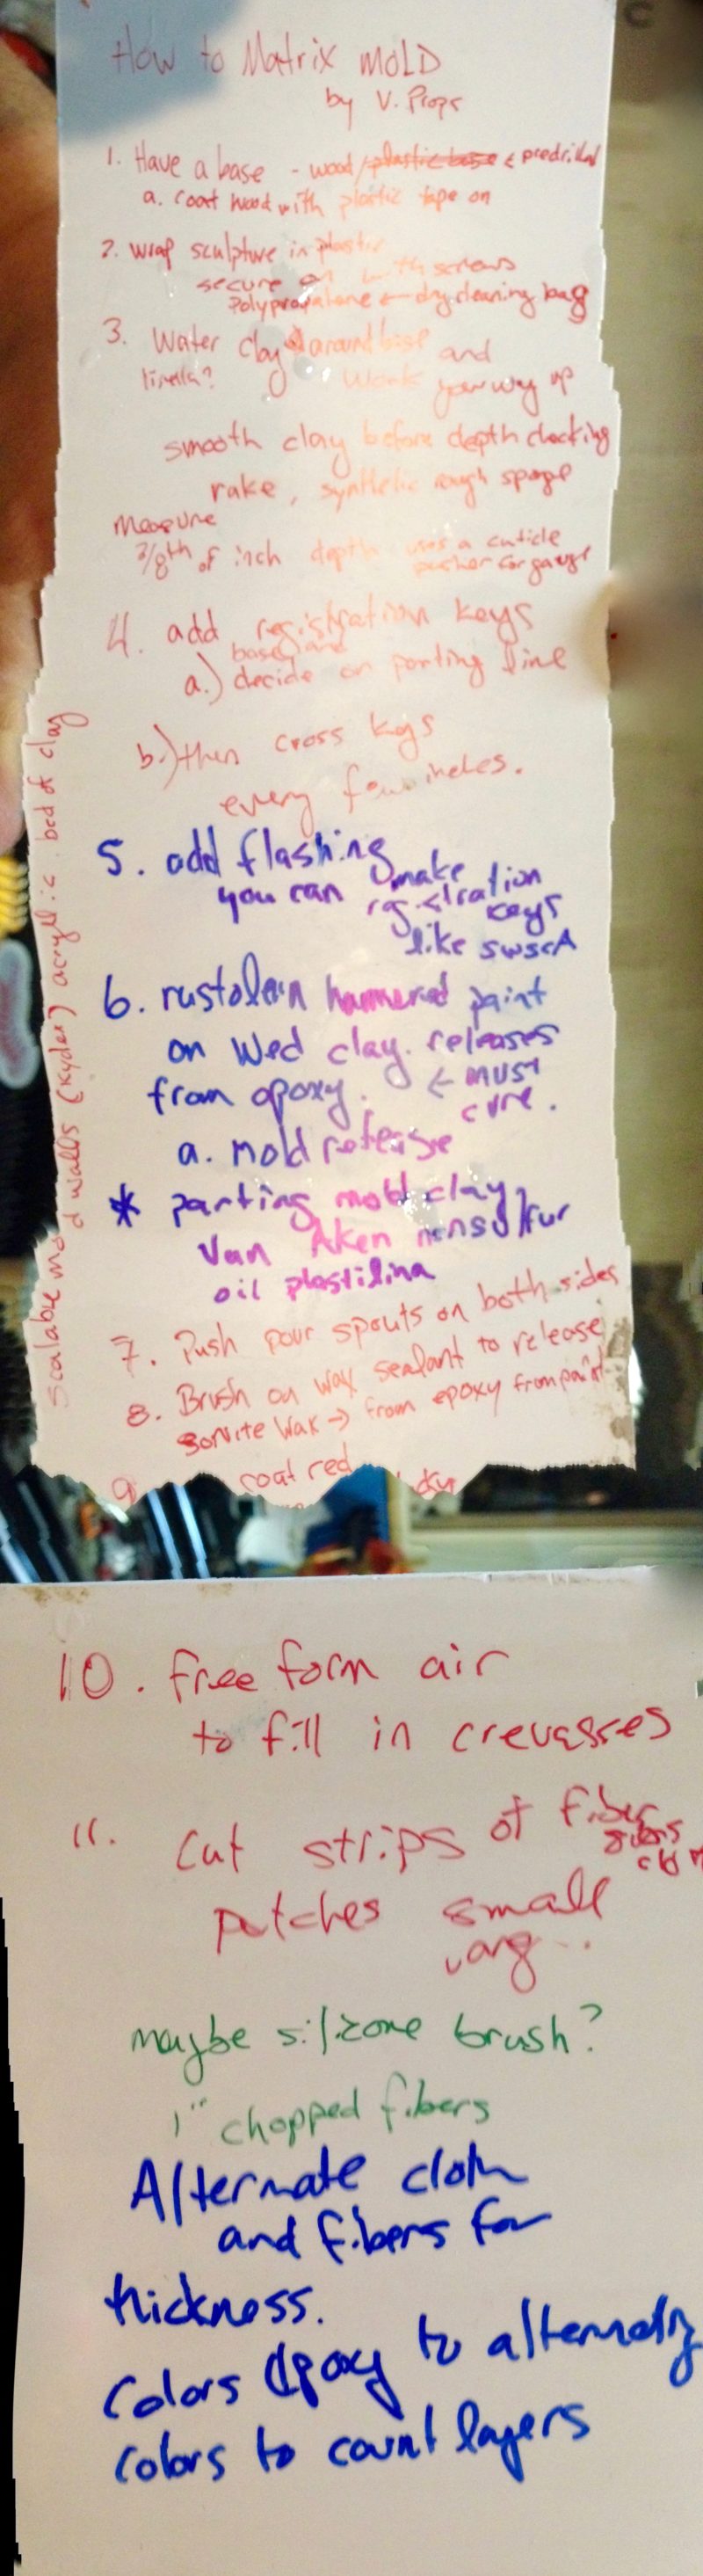
- Have a nice plywood base, or maybe a melamine board with pre-drilled holes. Cover it with polypropylene plastic (dry cleaning bags) and tape it down to protect it from the clay and epoxy resin.
- Attach your sculpture to the board and then wrap in plastic.
- Start building your water clay (Lizella because it’s cheaper than WED) blanket at the base and work your way up.
- Smooth the clay before depth checking. Use a kidney rake, then a rough sponge, then another make up sponge.
- Make sure you have a bed of at least 3/8″ if you are pressure casting. More if you have appropriate features. H uses a cuticle pusher to measure.
- Decide on a parting line. Start building registration keys. Add cross keys every few inches.
- Clean up your keys so they don’t create undercuts. Smooth and actually apply some craft to them. The work you put in here, will pay dividends when demolding later.
- Add flashing. The 6″ aluminum flashing from home depot. You can key it like they do on SWSCA, but H doesn’t and hasn’t had a problem.
- Spray seal the clay with Rustoleum Hammered Paint. It creates a plastic like surface which makes clay removal much easier (think scrubbing). Let this cure before proceeding.
- Push in pour spouts (shipping tubes) into the clay and then brush on Sonite Wax. This is another mold release between the epoxy and (paint) clay.
- EpoxAcoat Red is the skinning layer. Let it cure until tacky, but not all the way. It will not bond with the other layers if it fully cures.
- Use Free Form Air to fill in crevices. This will make the fiberglassing easier without having to jam it into corners.
- Cut strips, small patches and large patches before you start glassing.
- Use Apoximite 102 to blend the Free Form Air and the EpoxACoat together. It will melt it together nicely. He uses a chip brush. Someone suggested using a silicone brush so he could reuse it.
- He alternates between 1″ chopped glass and the fiberglass cloth. Bushes resin into the glass/cloth for 4 layers.
- When he gets to the top (5th) coat, he adds dye so he can see how thick he is getting it visually.
- Cures in 16 hours.
You can watch the master at work here: https://www.twitch.tv/volpinprops/v/88101253